
|
|
 |
|
|
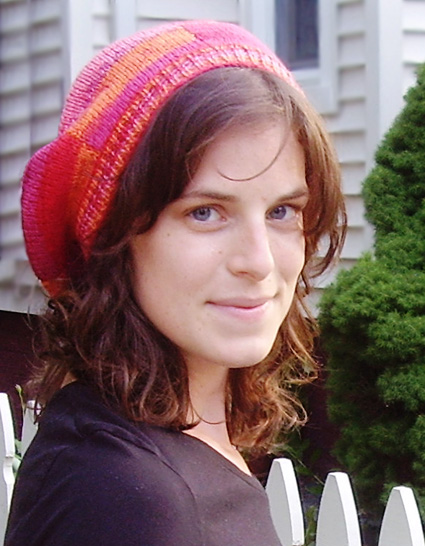 |
I’m a sucker for patterns that let you knit for stretches of time without looking at the directions… but still look really awesome and complicated. With effortless amazing-ness as my guide, I came up with this pattern where self-striping yarn and really simple intarsia do all the work! The hat is divided into an even number of sections, each of which stripes at its own pace. So, while it it looks like color changes are happening out the wazoo… you really just knit in stockinette with a handful of predictable yarn swaps on each row. This hat is designed to be an introduction to intarsia: a (non-stressful) simple pattern of color changes so you can get your feet wet. And it’s worked flat, so it’s a great project for those of you who don’t love working in the round. |
My
favorite version of this hat is the fingering
weight version: there are lots of great
self-striping sock yarns available! And,
if you’re like me, you’re itching for an excuse
to use them that doesn’t result in a pair of socks. For
a faster knit, I've included a worsted weight
version. The finished size is the same, but it works up much
faster and has fewer color changes. |
|
|
|
 |
|
SIZE |
|
FINISHED MEASUREMENTS |
|
MATERIALS Fingering
weight version Worsted weight version Notions Worsted weight version |
|
PATTERN NOTES |
|
Instructions for working Mattress Stitch can be found here. This hat is worked in intarsia, which means at some point, you need to divide your yarn into a number of equal-length balls. The pattern instructs you to do this after you have completed your ribbing (which is done in a single yarn). If it greatly bothers you to play with your yarn after you’ve begun knitting, then you can do the division before you begin… just keep in mind that one ball will need to be bigger than the rest in order to do the ribbing. The easiest way to divide your yarn into equal parts is to use a postage scale… determining how much each mini-ball should weigh, and winding a ball of that weight. When you wind your mini-balls, wind them into center-pull balls, and wrap a rubber band around the outside. Work with the yarn pulled from the center, and your yarn will stay fairly orderly. 
The pattern will tell you when to switch balls of yarn for doing intarsia (which we’re going to call ‘switching colors’, since that’s what it’s going to look like). There’s no charts, here… you’ll be switching colors at the same place every row, so you’ll get nicely-shaped ‘wedges’ in your hat, and after you get the hang of the pattern, you’ll know when to switch. To switch colors, grab your new yarn (which, after the second row, should be exactly at the stitch you’re on, but one row down), and twist it around your old yarn. This twist makes sure there is no gap between your color changes. Leave your old yarn hanging there, and start knitting with your new yarn. At the end of a row, you’ll turn, and continue using the same ball of yarn that you were just using. 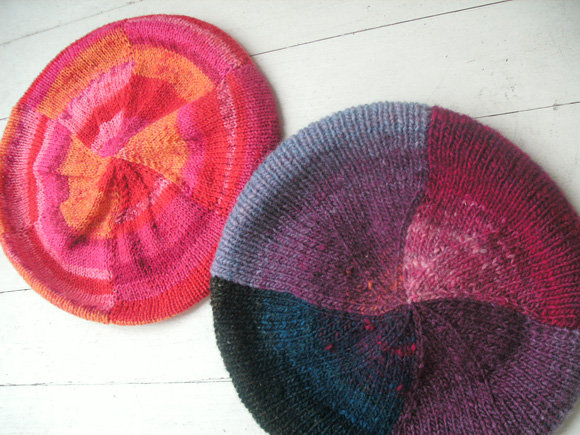
|
|
DIRECTIONS 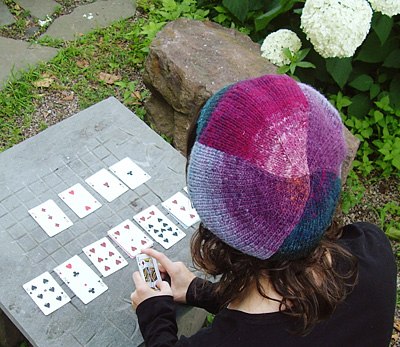
Brim With smaller needles, CO 90[134] sts. Row 1 [WS]: P1, [p1, k1] to last st, p1. Row 2 [RS]: K1, [p1, k1] to last st, k1. Rep Rows 1 & 2 2[4] more times, and then work Row 1 once more. Body of hat Divide remaining yarn into 4[6] even yarn balls. From now on, you will work intarsia, switching to the new color (ball of yarn) when indicated in the pattern. See Pattern Notes for details. Switch to larger needles. Rep Rows 2 & 3 until you have worked 6 inches past the ribbing, ending with a WS row. 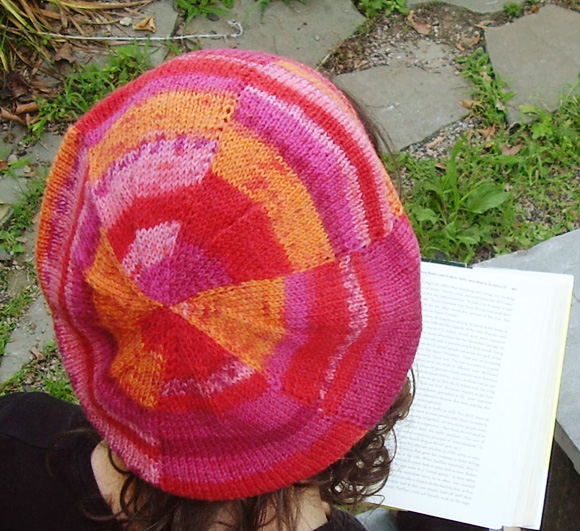
Row 1 [RS]: K1, [k10, k2tog] twice, [switch color, [k10, k2tog] twice] 3[5] times, k1. 90[134] sts. Row 2 [WS]: P1, p22, [switch color, p22] 3[5] times, p1. Row 3 [RS]: K1, [k9, k2tog] twice, [switch color, [k9, k2tog] twice] 3[5] times, k1. 82[122] sts. Row 4 [WS]: P1, p20, [switch color, p20], 3[5] times, p1. Row 5 [RS]: K1, [k8, k2tog] twice, [switch color, [k8, k2tog] twice] 3[5] times, k1. 74[110] sts. Row 6 [WS]: P1, p18, Row 7 [RS]: K1, [k7, k2tog] twice, [switch color, [k7, k2tog] twice] 3[5] times, k1. 66[98] sts. Row 8 [WS]: P1, p16, [switch color, p16] 3[5] times, p1. Row 9 [RS]: K1, [k6, k2tog] twice, [switch color, [k6, k2tog] twice] 3[5] times, k1. 58[86] sts. Row 10 [WS]: P1, p14, [switch color, p14] 3[5] times, p1. Row 11 [RS]: K1, [k5, k2tog] twice, [switch color, [k5, k2tog] twice] 3[5] times, k1. 50[74] sts. Row 12 [WS]: P1, p12, [switch color, p12] 3[5] times, p1. Row 13 [RS]: K1, [k4, k2tog] twice, [switch color, [k4, k2tog] twice] 3[5] times, k1. 42[62] sts. Row 14 [WS]: P1, p10, [switch color, p10] 3[5] times, p1. Row 15 [RS]: K1, [k3, k2tog] twice, [switch color, [k3, k2tog] twice] 3[5] times, k1. 34[50] sts. Row 16 [WS]: P1, p8, [switch color, p8] 3[5] times, p1. Row 17 [RS]: K1, [k2, k2tog] twice, [switch color, [k2, k2tog] twice] 3[5] times, k1. 26[38] sts. Row 18 [WS]: P1, p6, [switch color, p6] 3[5] times, p1. Row 19 [RS]: K1, [k1, k2tog] twice, [switch color, [k1, k2tog] twice] 3[5] times, k1. 18[26] sts. Row 20 [WS]: P1, p4, [switch color, p4] 3[5] times, p1. Row 21 [RS]: K1, k2tog twice, [switch color, k2tog twice] 3[5] times, k1. 10[14] sts. Row 22 [WS]: P1, p2, [switch color, p2] 3[5] times, p1. Row 23 [RS]: K1, k2tog, [switch color, k2tog] 3[5] times, k1. 6[8] sts. Row 24 [WS]: P1, p1, [switch color, p1] 3[5] times, p1. Cut yarn leaving a tail 12-18 inches long. Using tapestry needle, thread yarn through remaining sts, draw tight, and fasten. Leave the tail for seaming. |
|
FINISHING If you want a tighter fit in the brim, you can sew elastic thread into the band. For the most durability, sew 3 separate threads into the band: one at the bottom of the ribbing, one in the middle, and one at the top. |
| ABOUT THE DESIGNER |
|
|
|
Pattern & images © 2010 Stacey Trock. Contact Stacey |
