|
|
|
|
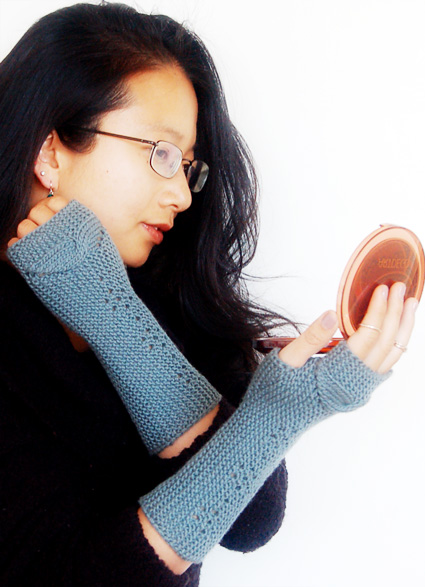
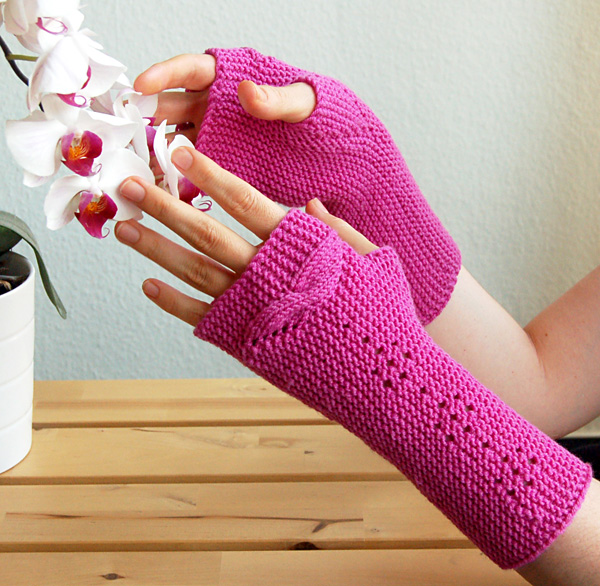
When I put my very first knitting design to paper, a good friend pointed out an interesting shape in the corner of the scarf: a tiny cable that barely had space for one twist before it was swallowed by a series of knit-two-togethers. Like a moth (Nachtfalter in German) that strayed into one's home and refused to leave even after all the windows and doors have been thrown wide open, this little cable rattled around the corners of my brain until I featured it in its own design. In these fingerless mitts, this moth-like cable flutters out of thick garter fabric to perch across the knuckles of the wearer, hovering above classic daisy eyelet motifs. The mitts are knit flat and grafted, using short rows to create the thumb gusset. The project is quick to complete and uses less than 75 grams of yarn. Instructions for two sizes are provided.
|
||
|
|
||
|
SIZE |
|
|
FINISHED MEASUREMENTS |
|
MATERIALS Notions |
|
GAUGE |
| 22 sts/30 rows = 4 inches in stockinette stitch 22 sts/48 rows (24 ridges) = 4 inches in garter stitch |
|
PATTERN NOTES |
|
Any provisional cast on method works for this project. Instructions for one method is provided here. Kitchener Stitch: Selvage edge stitch: To create smooth edges for the mitts, the pattern features a slipped selvage stitch at the beginning of every row and the WS rows of the thumb gusset. To work a wrap and turn (w&t) in garter, k to the point indicated in pattern, bring yarn to front of work between the needles, sl the next stitch from left to right needle purlwise, bring yarn to back of work between the needles (wrapping the stitch) and sl the stitch back to the left needle. Turn work and bring yarn to the back of the work between the needles. You don't need to pick up any wraps in this project. |
|
|
DIRECTIONS 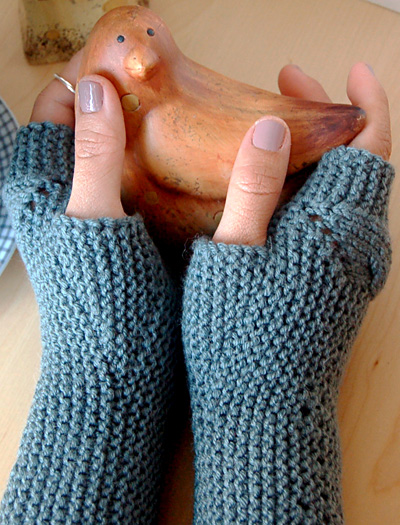
Using the provisional cast on of your choice, CO 51[55] sts. Garter row: Sl1p wyif, k to end. Thumb Gusset: Work 5[7] more rows in garter st. Moth and Daisies Motif: Next row [RS]: Sl1p wyif, k3[4], pm, work row 1 of Chart B 3 times, pm, k to next m, slip m, work next row of Chart A, k to end. Work as set until Chart B is complete, and row 22 of Chart A is complete. Next row [RS]: Sl1p wyif, k to the third m, removing the first two as you pass them, work row 27 of Chart A, k to end. Work as set until Chart A is complete. Remove markers when working the final row. Work 28[38] more rows in garter st ending with a WS row. Break yarn, leaving an approximately 20-inch tail. Undo the provisional cast on and place the stitches onto another needle. Thread long yarn tail onto a yarn needle and with RS facing, graft the two edges together. 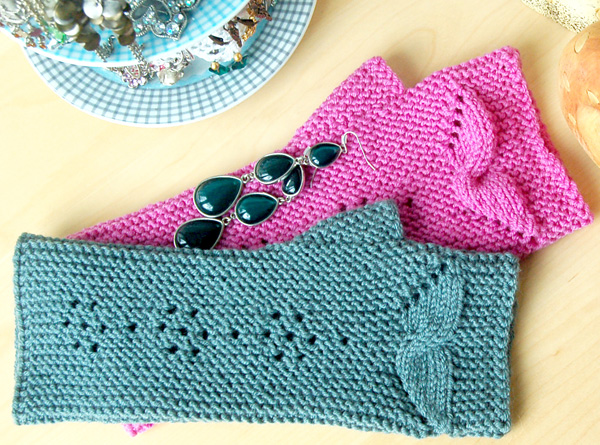
Provisionally CO 51[55] sts. Garter row: Sl1p wyif, k to end. Work 28[38] more rows in garter as set. Next, work the 34 rows of the Moth and Daises motif as for the Right mitt. Work 4[6] rows in garter st. Work the 23 rows of the Thumb Gusset as for the Right mitt. Work 3 more rows in garter st ending with a WS row. Break yarn, leaving an approximately 20 inch tail. Undo the provisional cast on and place the stitches onto another needle. Thread the long yarn tail onto a yarn needle and with RS facing, graft the two edges together. |
|
FINISHING |
| ABOUT THE DESIGNER |
|
You can find her on Ravelry here. |
|
Pattern & images © 2014 You-Shan Feng. Contact You-Shan |
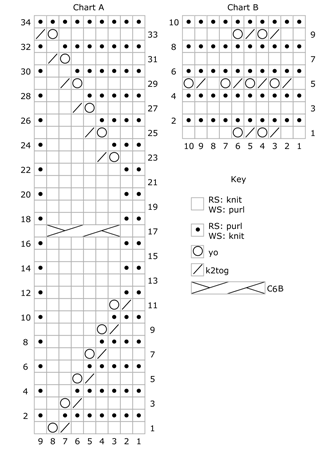 C6B: Sl 3 sts onto cable needle and hold to back of work, k3 from left needle, k3 from cable needle