 Joining in the middle of a row creates a “jog” where
the color changes:
Joining in the middle of a row creates a “jog” where
the color changes:
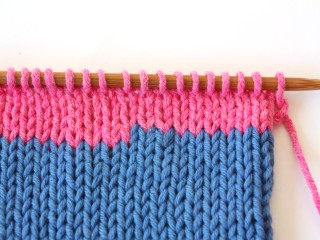
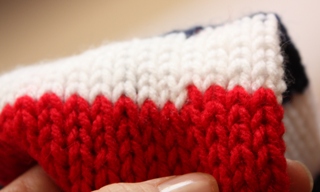
 But if you join the new color at the beginning of a row, the
color transition is smooth and the yarn ends can be hidden
in the seam.
But if you join the new color at the beginning of a row, the
color transition is smooth and the yarn ends can be hidden
in the seam.
 But what to do about knitting in the round? The whole point
of knitting circularly is that there ARE no seams that require
sewing … but also no seams in which to hide color changes.
Luckily there are a few tricks to help make the color change
a little less obvious.
But what to do about knitting in the round? The whole point
of knitting circularly is that there ARE no seams that require
sewing … but also no seams in which to hide color changes.
Luckily there are a few tricks to help make the color change
a little less obvious.
Be sure the beginning of the row is placed so that the color
changes happen in an inconspicuous area – the underside
of your arm, the side of a raglan sweater, the inside of your
leg for socks or leg warmers. It’s also not completely
necessary that the color changes at the same point as you increase
/ decrease. For me the combination of color changes and shaping
at the exact same point makes a bit of a mess.
Be sure to keep the stitches nice and tight when changing
yarns! I struggle with this myself – but it’s worth
being careful about - big loose stitches make everything look
sloppier.
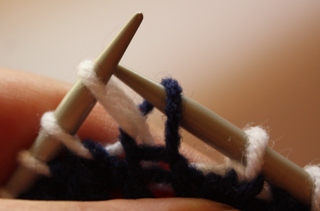
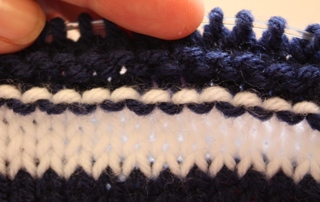
Try knitting the first stitch of a round with BOTH colors,
the old and the new…
then once you’ve knitted a few rounds more, use the end
of a needle to tug the yarn ends …

so that the old color is on the right hand
side of the V of the knit stitch and the
new color is to the left. This makes the
color change effectively in the middle
of a stitch, so that it’s a bit less obvious:
Compared to the color change happening between stitches:
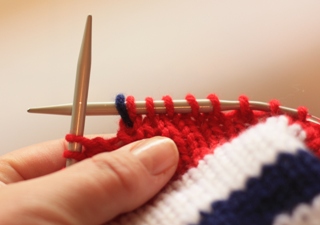
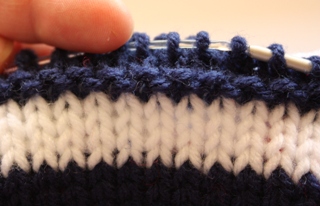
 You can also wait until you’ve completed one round with
the new color, then lift the right half of
the last stitch of the old color…
You can also wait until you’ve completed one round with
the new color, then lift the right half of
the last stitch of the old color…
and place it on the left hand needle then
knit both loops together just as you would
a k2tog…
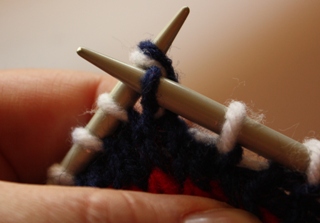
Then tighten up and adjust the stitches as
above.
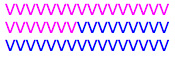
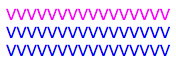
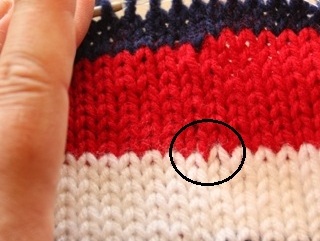
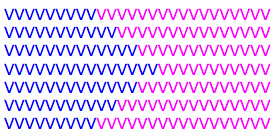
Another trick that helps keep the color changes from being
obvious is to stagger or zig-zag the point where the color
change occurs so that they don’t line up vertically:
Stripes in other stitch patterns
Another
issue with stripes is making purl stitches with a new color
directly over a row of the old color. All purl stitches have
a bump at their base that pulls a loop of the yarn from the
previous row through to the front. This occurs both when knitting
flat and knitting in the round – any time that
you’re making a purl bump on the front / right side with
a color that is different that the row before. The problem
with making a purl stitch with a new color directly over a
row with the old color is that the bump at the base pulls the
old color through – and looks like this:
The solution is to always make one row of knit stitches on
the right / front side of your work with the new color before
you launch into any stitch patterns that involve purl stitches – including
ribbing, moss or purl stitch, basket weave, etc, etc, etc.
so that instead of pulling the old color through, the purl
stitches pull their “own color” through:
Remember also that a purl stitch is just a knit stitch reversed,
so if you’re knitting a row on the “wrong” side,
you’re making a purl stitch on the “right” side
at the same time. Keep this in mind when
switching colors in garter stitch and plan
to make color changes while making a row of knit stitches on
the right / front side.
|