
|
 |
|
|
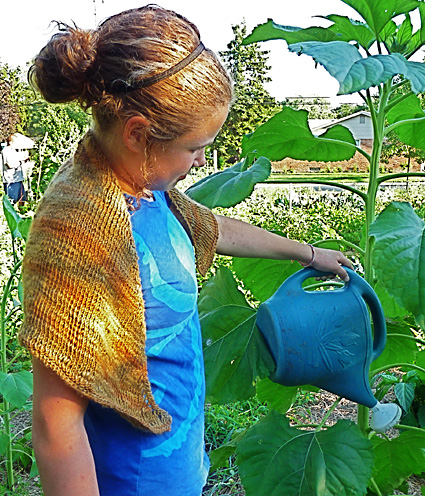
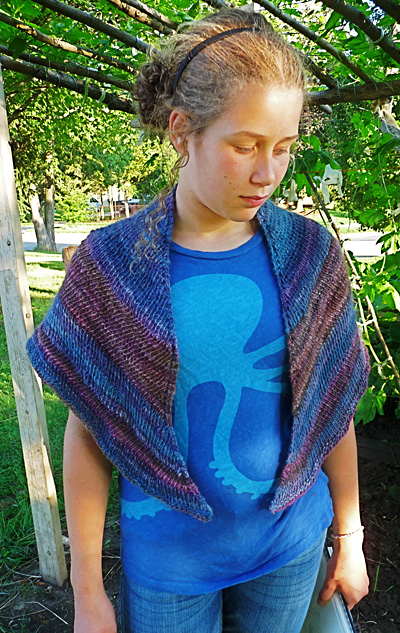
Ever since the very first time I set eyes on Kathryn Alexander’s work with energized singles I’ve been smitten. She knits with singles fresh off of the bobbin, letting the energy of the unblocked single bend and twist knitted stitches. It’s gorgeous and sculptural. I love the look of her work, but her style of spinning and knitting is not my style of spinning and knitting – she works with Shetland spun worsted and knit fine. I spin woolen and am a seriously slow knitter, so don’t like to work at less than 4-5 stitches per inch. I wanted to do something very simple that explores the basic slant of the knitted stitches. Singles that are spun Z [clockwise] lean to the right and singles that are spun S [counter clockwise] lean to the left. Nothing's easier than a shawl, one half leans left and one half leans right. I spun and knit a shawlette using Z-spun singles for the right side and S-spun singles for the left side, alternating the two singles for the spine of the shawl to balance their energy and to keep it from leaning in one direction. The stitches leaned and undulated, creating a visual energy that balanced [or blocked] yarns don’t. The flow of the stitches works great with the fiber I selected, Briar Rose, which has a gorgeous tonal roll of color. I made an interesting discovery while blocking the small shawl [shown above]. When I finished knitting it, I noticed that the shape of the shawl was more of a diamond than a triangle. As I was pinning to spray block, the shape bloomed. I intended to barely block the piece, keeping the lean of the stitches, but providing a triangle shape by opening the yarnovers. The energized stitches not only leaned but they pushed out, creating a curved shape and making the tips curve inward like ram’s horns. It looks like curvy diamond rather than a triangle. Because I just can’t leave something alone, I wondered what would happen if I added stripes to a shawl in a single that leaned in the opposite direction [an S-single stripe on the right side and Z-single on the left]. I worked the stripes in a different color to make the effect stand out further. I thought the stripes would create a clean visual break, leaning in the opposite direction, creating a zig zag. But I was wrong and I’m glad I was. This second piece has tension between the two types of stitch
direction that looks like a visual vibration.
It’s much
less of a sharply shaped shawl, looking
more organic and crafted by hand. |
||
|
|
Tweet
|
|
|
SIZE |
|
FINISHED MEASUREMENTS Large: |
|
MATERIALS Large Finished Yarn: Tools |
|||||
|
GAUGE |
| 16 st /24 rows = 4 inches in stockinette stitch after blocking |
|
PATTERN NOTES |
 To keep track of which bobbin holds your Z and S yarns, it’s helpful to mark your bobbins. I write a Z or S right on the end of my wooden bobbins. Knitting Notes: The gauge is variable for this shawl. The tighter the gauge, the more the energy will show on the surface, but the overall fabric will be stiffer. It is easier to knit from your bobbins if you put them on a lazy kate or leave them on your wheel. It helps to keep the singles from tangling and to remember which is Z and which is S if you place one on each side of you. When I knit, I placed one bobbin on my lazy kate to my left and knit from the other while it was still on my wheel (I took off the brake band). When you start a new yarn, work the end in immediately, otherwise the twist will untwist and keep untwisting and losing its energy into your knitted fabric. The 2 stitches on the outside edge of the shawl will be knit
in garter stitch (k on both sides) throughout. |
|
DIRECTIONS 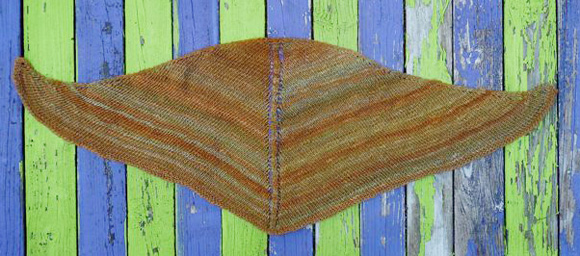 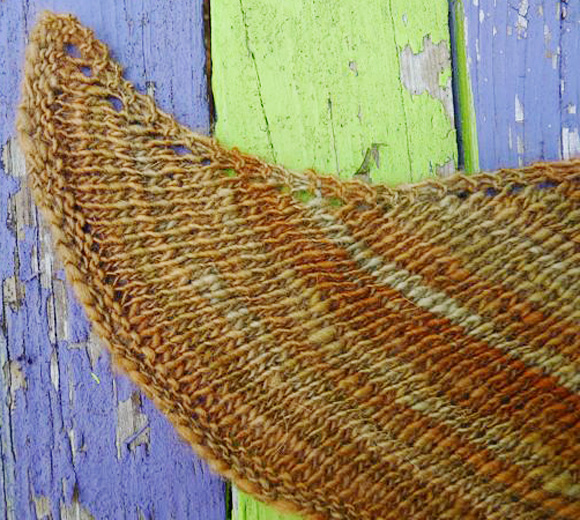
Using Z-spun yarn, CO 6 stitches. K 2 rows. Setup: Note: When changing yarns in subsequent
rows, be sure to twist them to prevent
gaps. Shawl body: Repeat these 4 rows until piece measures close to 13 inches
vertically in the middle. Large shawl [shown below] 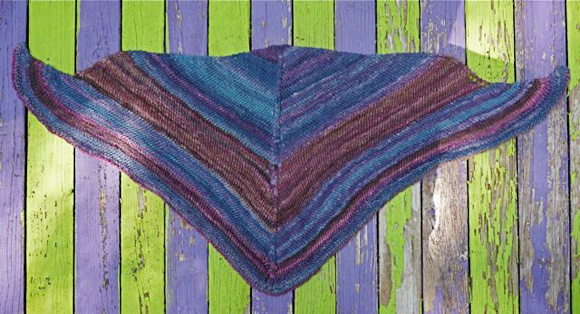 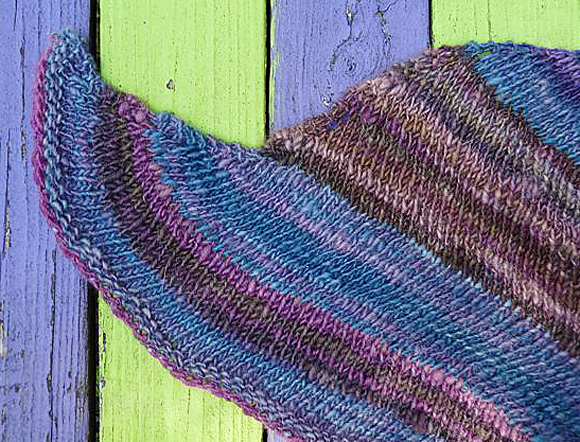
Prepare your yarns as follows: Using Z-spun MC yarn, CO 6 stitches. K 2 rows. 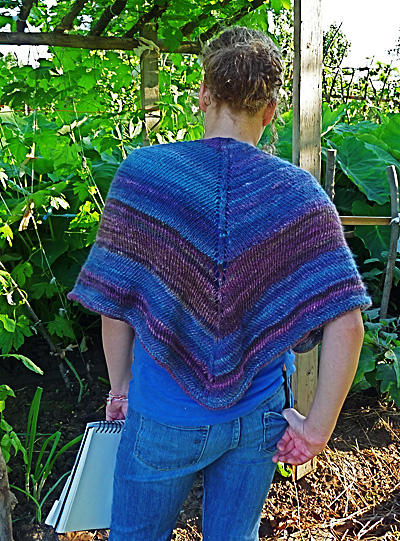 Using MC: Row 1 [RS]: Using Z-spun yarn, K2, yo, k1, pm, k1, yo, k2 Row 2 [WS]: K2, p to last 2 sts, k2 Row 3 [RS]: Using Z, k2, yo, k1, yo; attach S yarn, and using S, k2, yo, k1, yo, k2 Note: When changing yarns in subsequent rows, be sure to twist them to prevent gaps. Row 4 [WS]: Using S, k2, p to 1 st past marker; using
Z, p to last 2 sts, k2. Shawl body: MC Section: Repeat these 4 rows until the pair of MC bobbins are empty, ending with a Row 4. Cut MC. CC Section: Repeat MC Section, CC Section and one more MC Section. Piece should measure close to 19 inches vertically in the middle. Join Z-spun CC. K 3 rows and bind off loosely. |
|
FINISHING |
| ABOUT THE DESIGNER |
|
|
|
Pattern & images © 2011 Jillian Moreno. Contact Jillian |
