|
|
 |
|
|
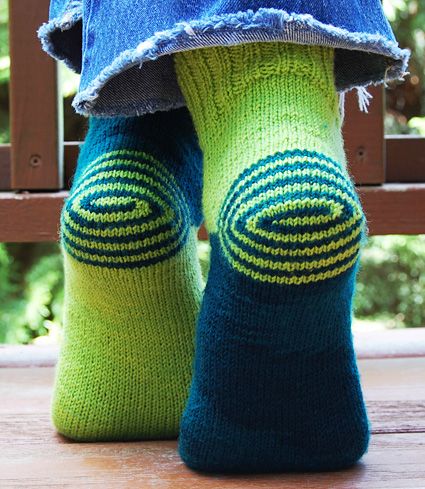
I’ve always been especially fond of spiral motifs, and
this heel design was in my head long before I figured
out how to do it. There are two main techniques you’ll
learn in doing this pattern: There are many different ways to wrap a helix around a foot, and this pattern shows but one interpretation designed specifically for high-contrast, semisolid yarns. Additional interpretations are available on my blog. Heel-out sock construction lends itself nicely to variations as well. Since it doesn’t matter whether the foot is worked before or after the cuff, I did the foot first in sock #1, and the cuff first in sock #2, resulting in a positive/negative effect. Several acknowledgements are warranted here. Thanks to sarah-marie
belcastro for her various spiral and helix projects posted
on Ravelry, and to Kathleen Sperling for publishing the Hat
Heel Sock. These inspirations provoked a flurry of ideas
for alternative sock constructions featuring spiral motifs.
Also, thanks to my friend Leila
Wice for coming up with the name “Heelix.” |
||
|
|

|
Tweet
|
|
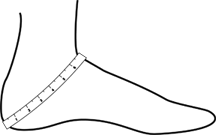
SIZE Small: 11.25-11.75 inches |
|
FINISHED MEASUREMENTS |
|
MATERIALS Notions |
|
GAUGE |
| 32 sts/44 rounds = 4 inches in stockinette stitch. |
|
PATTERN NOTES |
|
New! Jeny has provided a video of the cast on and first 2 cycles of Double Heelix. Watch it here. What is Helix knitting?
Technically these are spirals, not helices, but you get the idea. Featured techniques:
Using Judy’s Magic Cast On to increase
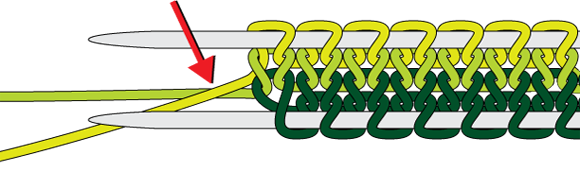
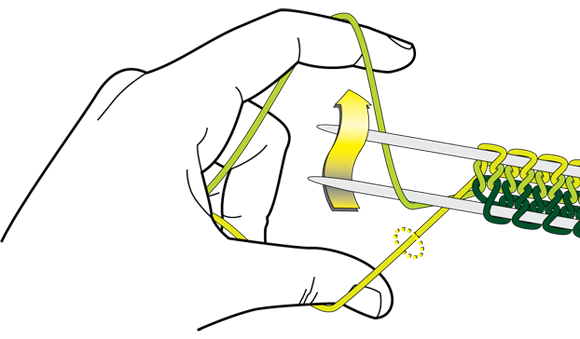
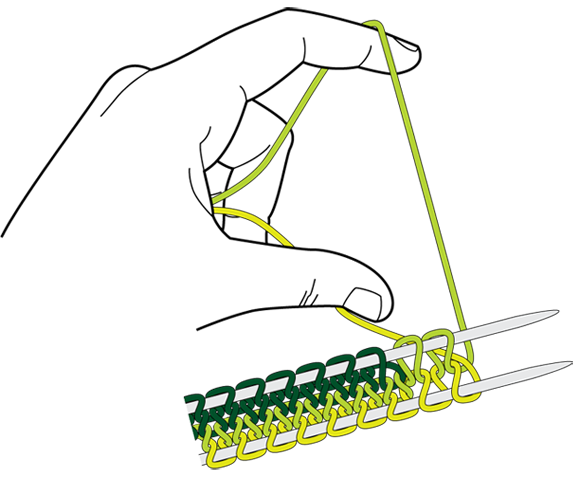
stitches Step 1: Immediately following the Double Heelix Cast On (see “Double Heelix Cast On” section under Pattern), your stitches should look like the illustration below. Take the top CC strand and cross it in front of the bottom strand (see arrow). Note: For illustration purposes, 2 different colors are used for the top (yellow) & bottom (light green) strands of CC.
Step 2: Hold the strand from the bottom row of CC over your forefinger and the strand from the top row over your thumb. Bring the forefinger strand up in front of the bottom needle and behind the top needle.
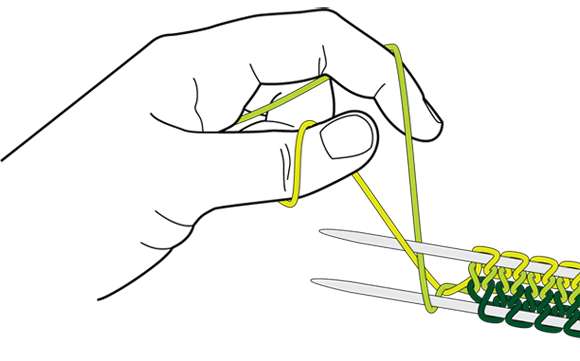
Step 3: Bring the thumb strand up behind the bottom needle and in front of the top needle.
Your work should look like this:
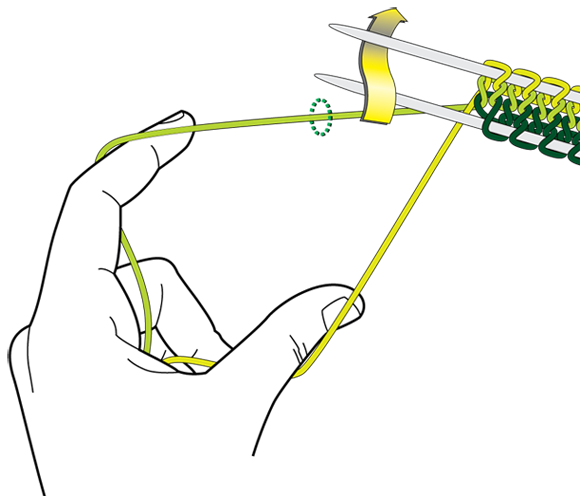
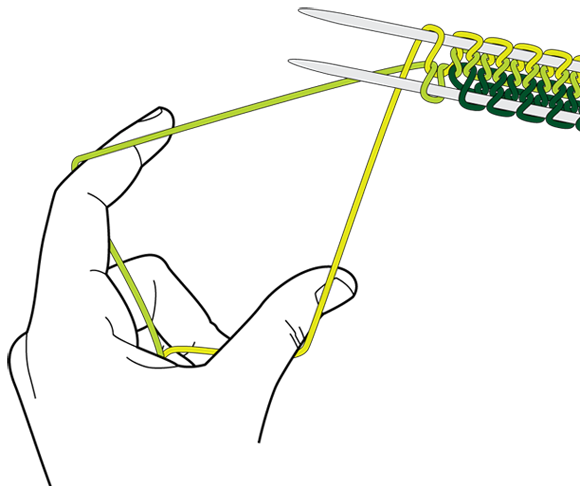
Step 4: Swing your hand down behind the needles…
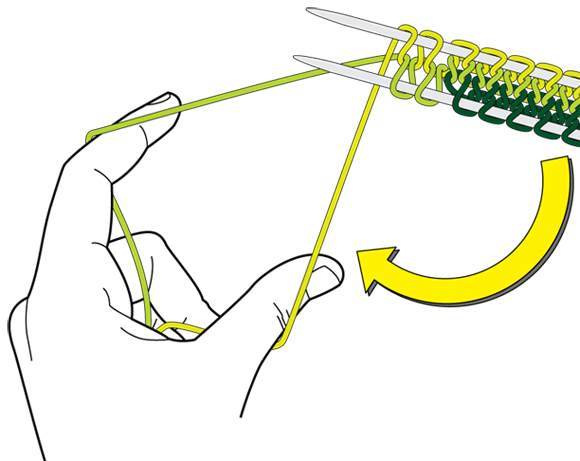
And voila! You’ve just cast on 1 stitch on each needle. Repeat Steps 2-4 until you have cast on all the sts you need (Step 5 diagram shows 2 sts cast on each needle). Then: Step 5: Holding both strands securely, pivot the needles clockwise around the cast on sts.
Your work should look like this:
Step 6: Hold the thumb strand behind the work and the forefinger strand above the work. If using cable needles, pull the cable through the bottom sts. Slip the first stitch purlwise.
Using the forefinger strand, knit the rest of the sts on the needle.
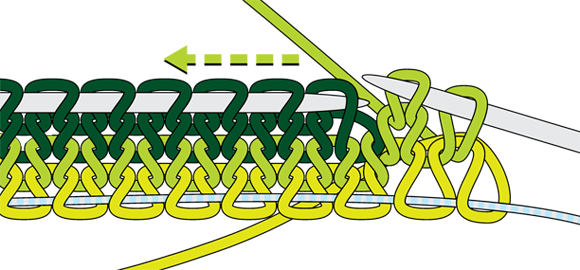
Throughout this pattern, you’ll do a JMCO increase every time you have 2 working strands of the same color on each side. Increasing sts with JMCO instead of traditional increases maintains a stronger visual continuity of the spiral. Working Wrapped Stitch |
|
DIRECTIONS 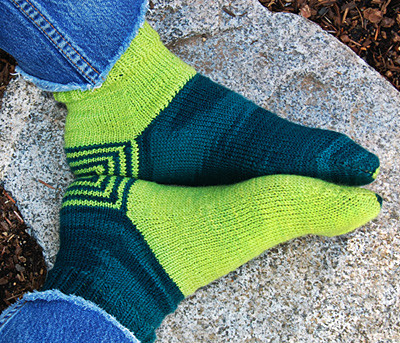
Pre-wind your yarn so that you have access to both ends. Pull out a long tail from each ball of yarn, approximately 15 feet in length. Fold the yarn at this point – this is where you will cast on. Double Heelix Cast On At this point your work should look something like this:
It will be a bit easier to explain if I use diagrams… Note that for each color, there are two working strands at each end, yielding a total of 4 working strands. On the first round (see Heel section, Cycle 1), you’ll knit the first half with CC and the second half with MC…
… yielding a result that looks something like this.
This is Configuration B, in which the two strands at each end are different colors. On the following round (still Cycle 1), you’ll do this again…
… yielding a result that looks something like this.
This is Configuration A, in which the two strands at each end are the same color. Get the idea? The strands keep chasing each other around in an interlocking spiral. Heel Each cycle is 2x around, starting and ending with Configuration A. Note that Cycle 1 is slightly different than all subsequent cycles. 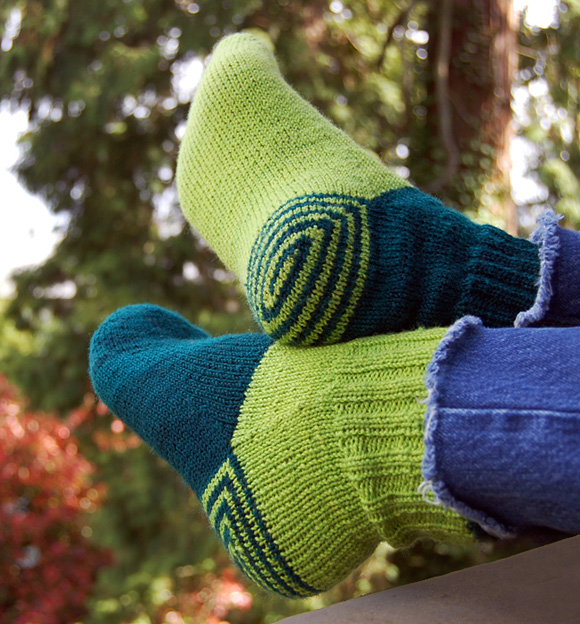
Using the 2 CC strands, JMCO increase 2 sts each needle. 12 sts on each needle. Rotate. With CC, Sl1, k11 to end. You’ll have 1 CC strand and 2 MC strands at the end. Rotate. Sl 2 sts so that you have access to the strand of MC that is 2 sts in from the end (see “Double Heelix Cast On” diagram above). With MC, k10 to end. Rotate. Now you should have Configuration B. With CC, k12 to end. Rotate. With MC, k12 to end. Now you should have Configuration A. Cycle 2 Cycle 3 Heel shaping: Up to now you have been casting on 2 JMCO sts at a time on each needle (adding 4 sts on each end). For the rest of the heel, you will cast on 1 JMCO st on each needle (adding 2 sts on each end), thereby shifting to a more gradual angle. This shaping will make your heel more rounded and less trapezoidal. Cycle 4 Cycle 5 Cycle 6 Cycle 7 Cycle 8 STOP HERE if making size S. Cycle 9 STOP HERE if making size M. Cycle 10 Status check: You should have 30[32, 34] sts on both needles, for a total of 60[64, 68] sts. On each side, you should have 2 strands of the same color: 1 working strand, and 1 long tail (see diagram “Bridge Setup” below). Trim the 2 tails to a shorter length for weaving in later. Next, you will use the MC working yarn to knit the instep & foot. Leave the CC working yarn attached; you’ll pick this up later when you knit the cuff. Bridging the Instep
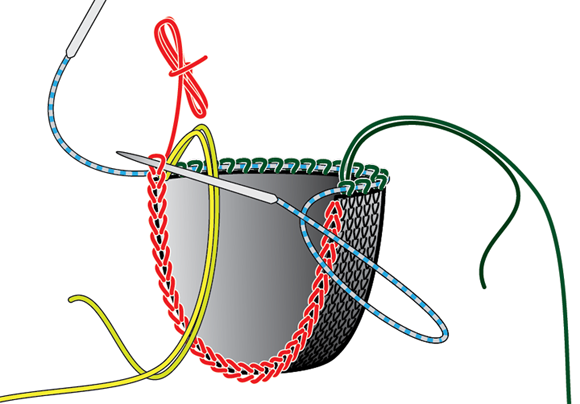
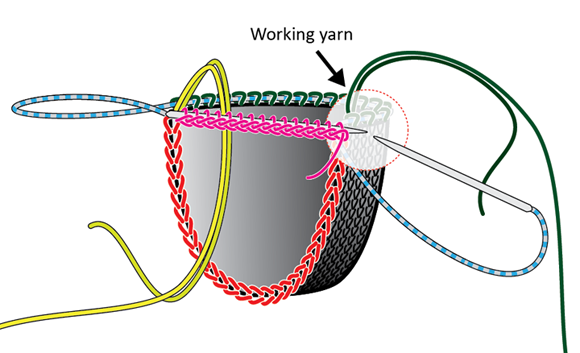
1. Bind off half the sts with scrap yarn
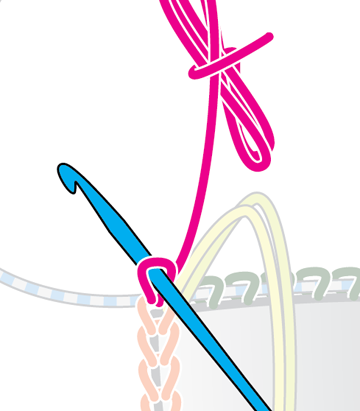
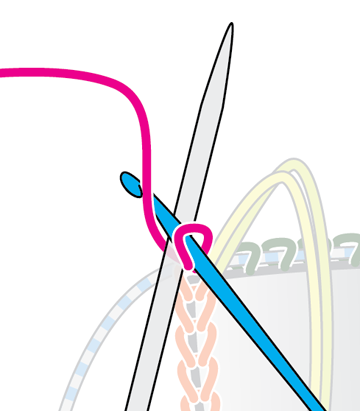
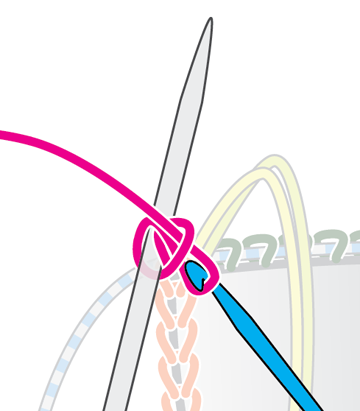
2. Make a crochet chain with scrap yarn (requires crochet
hook)
Place your L needle behind the crochet hook. Swing the scrap yarn around behind the needle and in front of the crochet hook.
With your crochet hook, pull a loop through.
Repeat these steps until you have a total of 38[40, 42] loops on your knitting needle. If desired, chain a few more loops off the needle like Lucy does in the video. On last loop, cut scrap yarn and pull end through. 3. Join the instep bridge to the other side of the heel
Once you have knitted all the sts in the chain, continue knitting across the 30[32, 34] heel sts with your MC working yarn. Instep & Gusset (to Toe) All rounds worked with MC. The first 30[32, 34] sts of the round form the instep; the second 30[32, 34] form the sole. Rearrange your stitches or place a marker to divide them up. Foot 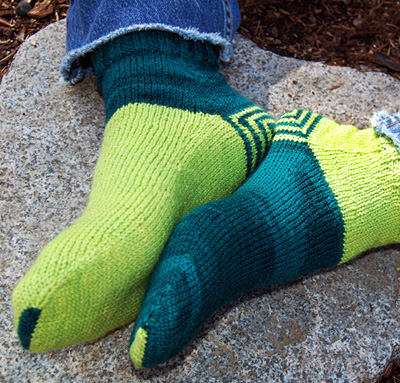 The toe uses a combination of shaping, mitered decreases, and short rows to achieve an appearance that pairs nicely with the heel. If you prefer, any toe construction may be substituted. All rounds worked with MC. Remaining rounds worked in CC. Instep & Gusset (to Cuff) Magic Loop users: Slip the heel sts purlwise from left to right needle until you have access to the working strand of CC. All rounds worked in CC. Cuff & Bindoff |
|
FINISHING |
| ABOUT THE DESIGNER |
|
You can find her on Ravelry as curiousjeny and she blogs here. |
|
Pattern & images © 2011 Jeny Staiman. Contact Jeny |


 Double Heelix Cast On


 Bridge
Setup
Bridge
Setup