
|
|
 |
|
|

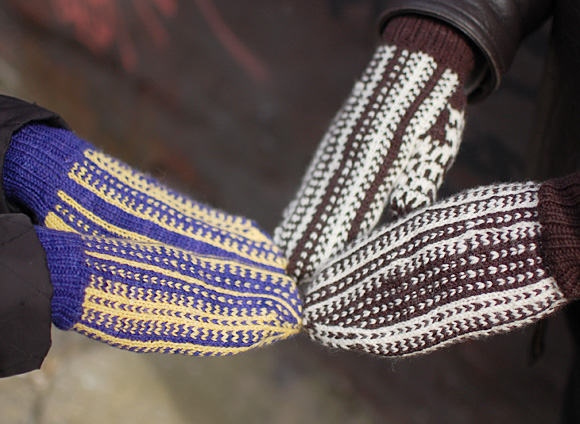
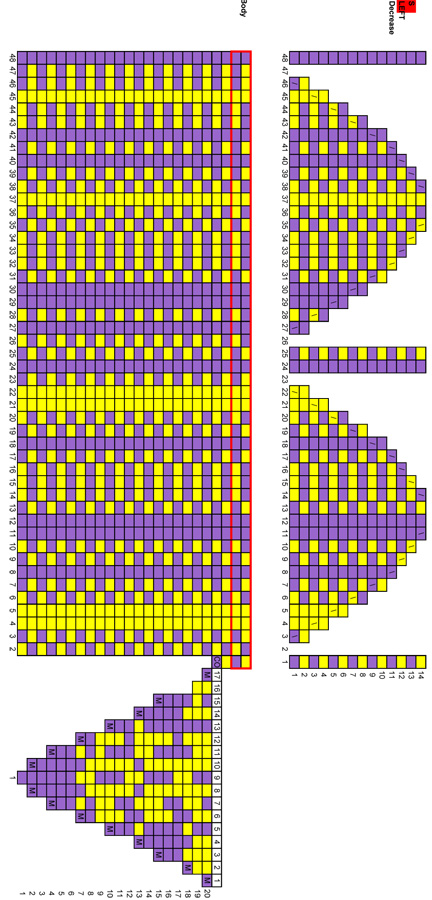
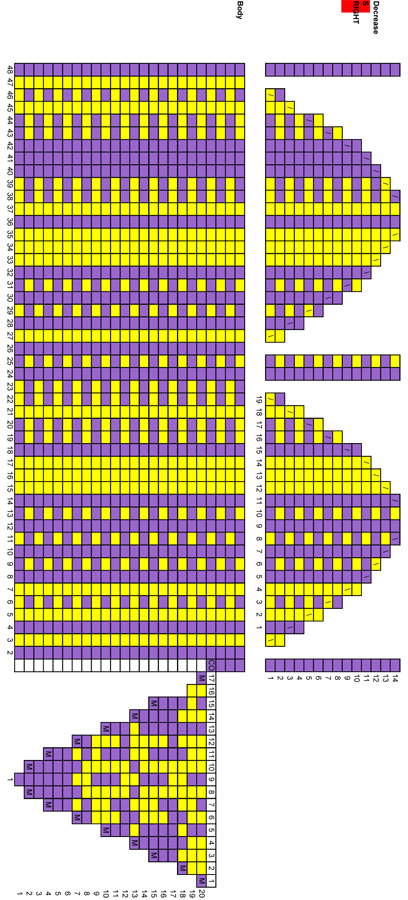
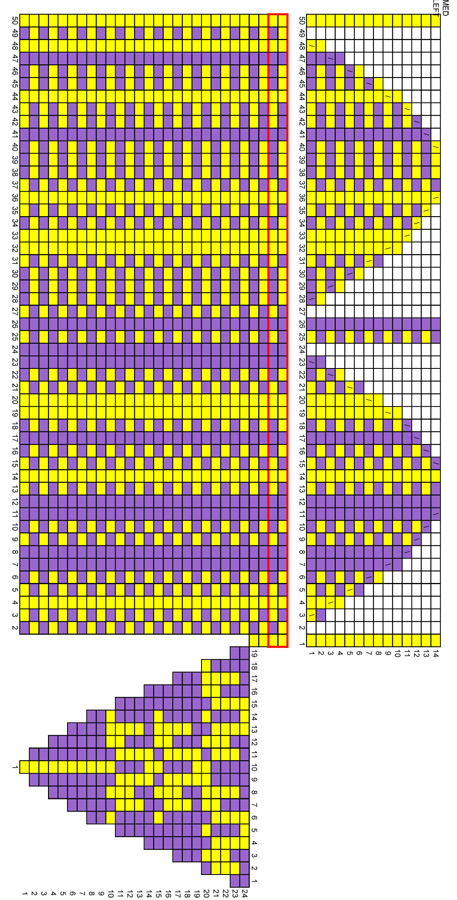
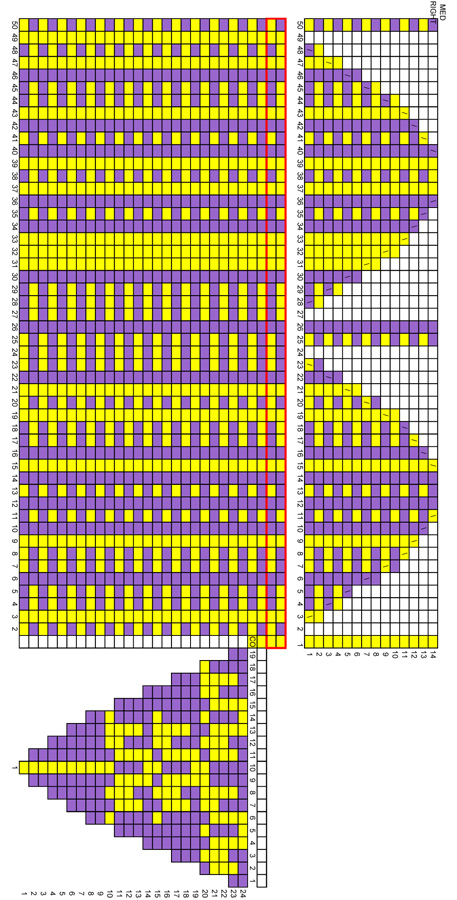
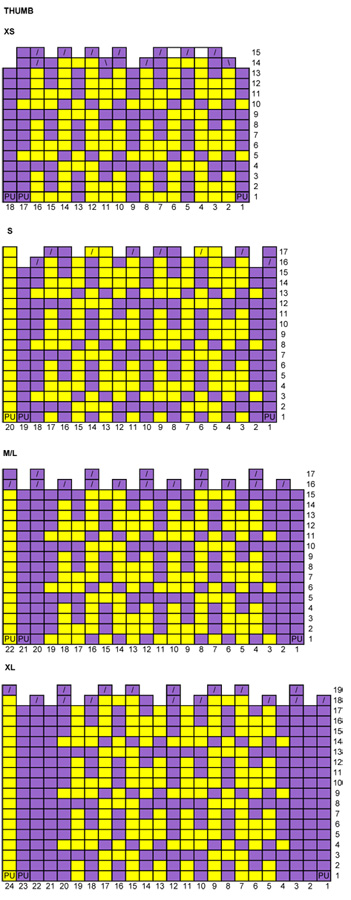
When I was teenager, I had a keen interest in the story of the Titanic. I was particularly captivated by the tale of the two wireless radio operators, Jack Phillips and Harold Bride, who manned their stations until the very end, tapping out messages in Morse code. Earlier this year, I was doing some research on traditional Fair Isle patterning, and after days on end of looking at charts, I realized I was starting to treat everything as dots and dashes. I did a bit of googling, and realized that the rules of Morse Code lent themselves very nicely to Fair Isle. In Morse Code, there are two basic elements: a dot and a dash. A dash is three dots. Each letter is made up of combinations of dots and dashes. Letters in a word are divided by a space three dots in length; and words are divided by a space seven dots in length. For example, the word mitten becomes: --- --- - - --- --- - --- - So, why not mittens with messages on them? In code! Each mitten clearly identifies which hand it is to be worn on, and the thumb says, simply enough, “thumb”. Want to change the message? Here you go. (Adepts of Morse Code will notice that I might have made a couple of tiny cheats in the spacing to make the stitch counts work out, but I’m hoping you won’t mind too much.) |
||
|
|

|
Tweet
|
|
SIZE |
|
|
FINISHED MEASUREMENTS |
|
MATERIALS Notions |
|
GAUGE |
| 28 sts/32 rounds = 4 inches in stranded stockinette stitch using larger needles, after blocking |
|
PATTERN NOTES |
|
2x1 Rib (Worked in the round over a multiple of 3 sts): Instructions for the Backward Loop Cast
On can be found here. |
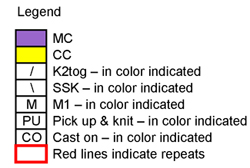
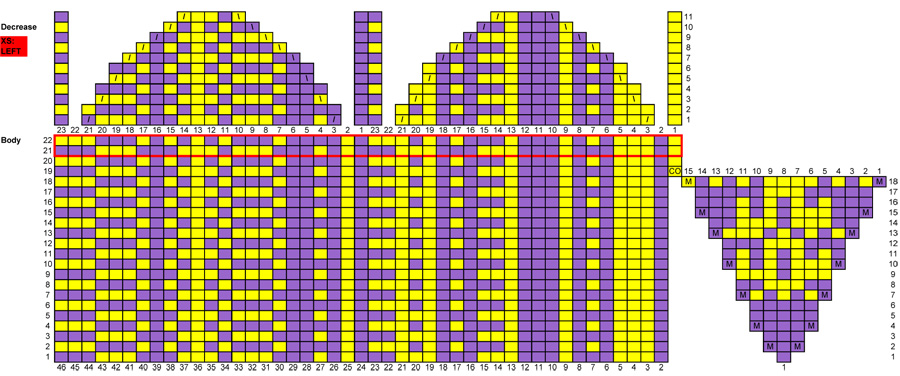
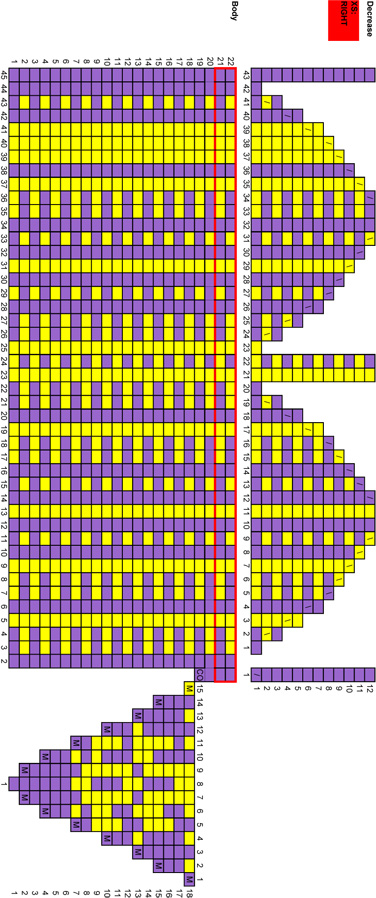
XS
left • XS
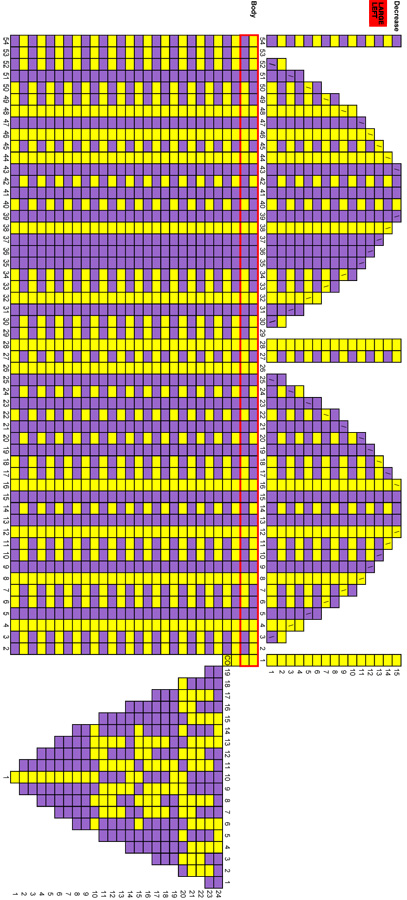
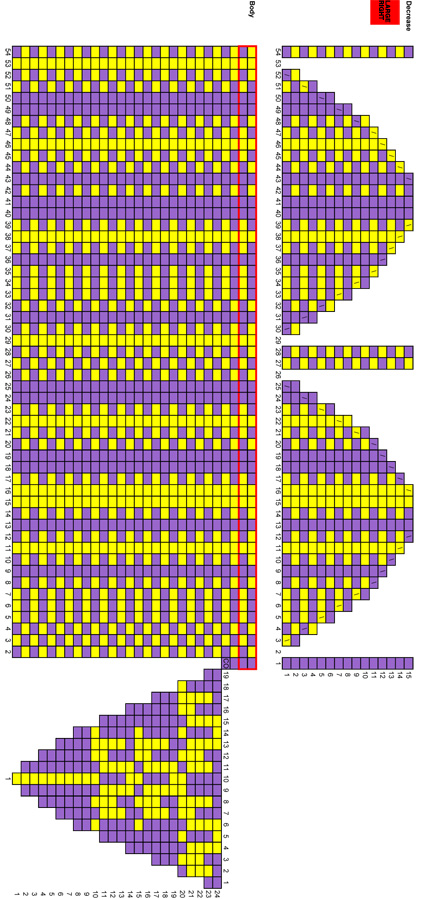
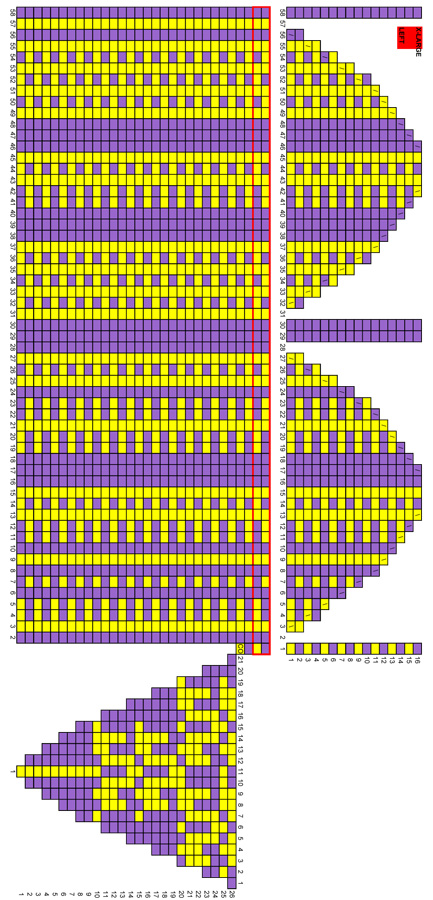
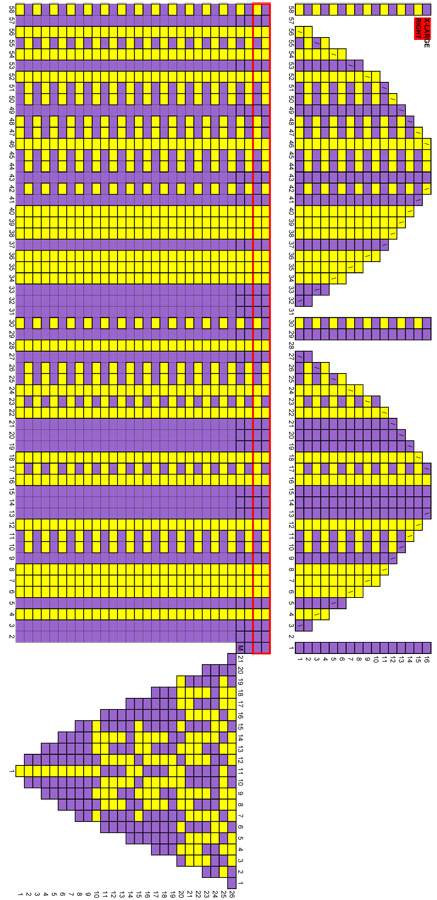
right Each chart spells out a secret message. Well, not so secret any more. Here's the key: Size XS Left Body & Decrease – “The Left Mitten” Size XS Right Body & Decrease – “Right Mitten” Size S Left Body & Decrease – “The Left Mitten” Size S Right Body & Decrease – “A Right Mitten” Size M Left Body & Decrease – “My Left Mitten” Size M Right Body & Decrease – “My Right Mitt” Size L Left Body & Decrease – “The Left Mitten Size L Right Body & Decrease – “The Right Mitten” Size XL Left Body & Decrease – “Warm Left Mitten” Size XL Right Body & Decrease – “My Right Mitten” The thumb charts all read "thumb". 
|
|
DIRECTIONS 
Using smaller needle(s) and MC, CO 39[39, 42, 45, 51] sts. Divide sts between needles and join to begin working in the round, being careful not to twist. Work in 2x1 Rib until cuff measures 3 inches. After the first few rounds have been worked, place safety pin or split ring marker in work to indicate beginning of round. Continuing in 2x1 Rib as set, work next round as given for your
size: MITTEN BODY Continue in pattern, shaping gusset as shown, until you have completed Round 18[20, 24, 24, 26] of chart. 59/60[64, 68, 72, 78] sts. Remove marker(s) when working next round; leave end-of-round
marker in place if desired. Continue in pattern, repeating last two rounds of Body Chart,
until work measures 1.5[1.5, 1.5, 1.75, 2] inches less
than desired length to top of hand. End with last round of Body
Chart. MITTEN TOP THUMB Work all rounds of Thumb Chart. After final round, cut yarns, leaving 6-inch tails. Draw tails through remaining sts to secure. |
|
FINISHING |
| ABOUT THE DESIGNER |
|
|
|
Pattern & images © 2011 Kate Atherley. Contact Kate |
 Charts