
|
|
 |
|
|
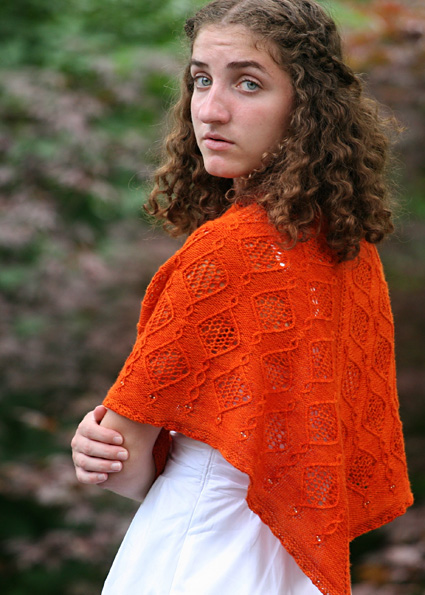
I like lace shawls. I like twisted stitches. This design is
a fusion of those two ideas – sinuous small cables provide
movement and structure, while simple knitted lace panels within
the baubles provide loft and airiness. |
||
|
|
Tweet
 |
|
|
SIZE |
|
|
FINISHED MEASUREMENTS |
|
MATERIALS Notions |
|
GAUGE |
28 sts/38 rows = 4 inches
in stockinette stitch |
|
PATTERN NOTES |
|
Construction: This shawl is knit from the top down with yarn overs on the edges and around a center ktbl stitch. A border of 3 garter stitches is used. Beads: Beads are used to add a bit of decoration to the shawl
and may be omitted if desired. This
article provides
information on how to add beads using
a crochet hook, the method used in this
design. C1R p: place next st on cable needle and hold behind work, k1
tbl, p1 from cable needle |
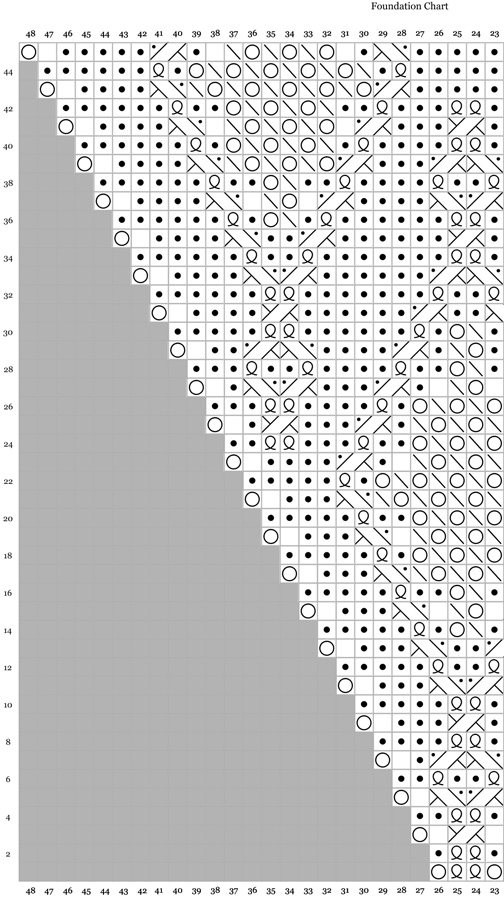
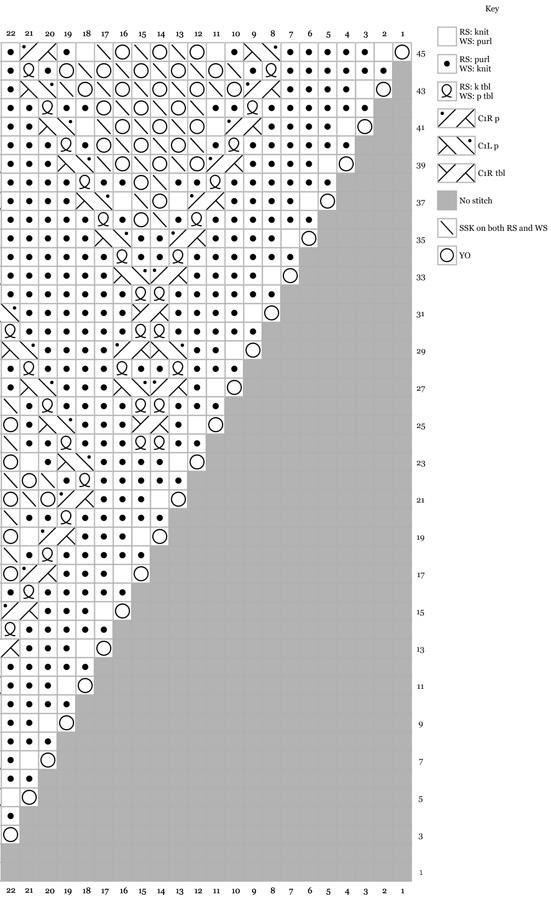
Foundation,
Left side • Foundation,
Right side |
|
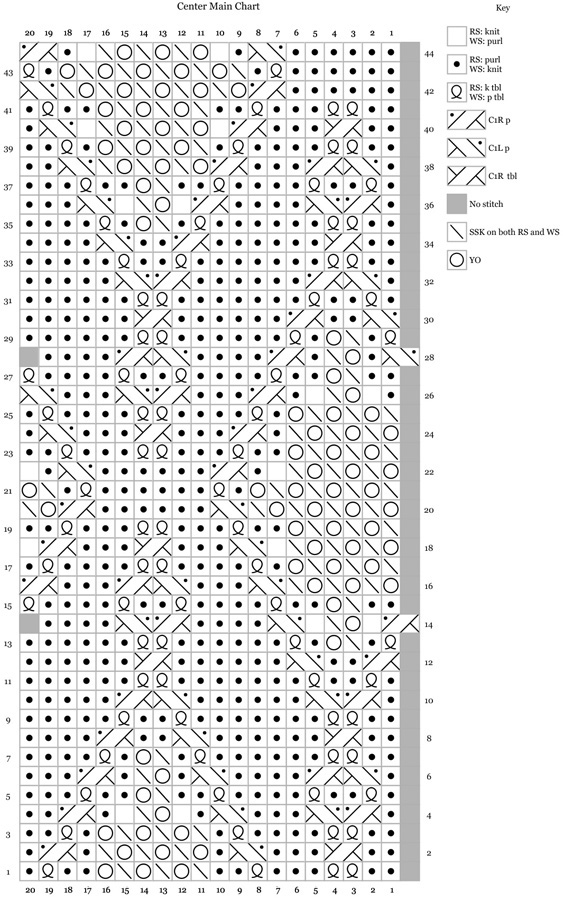
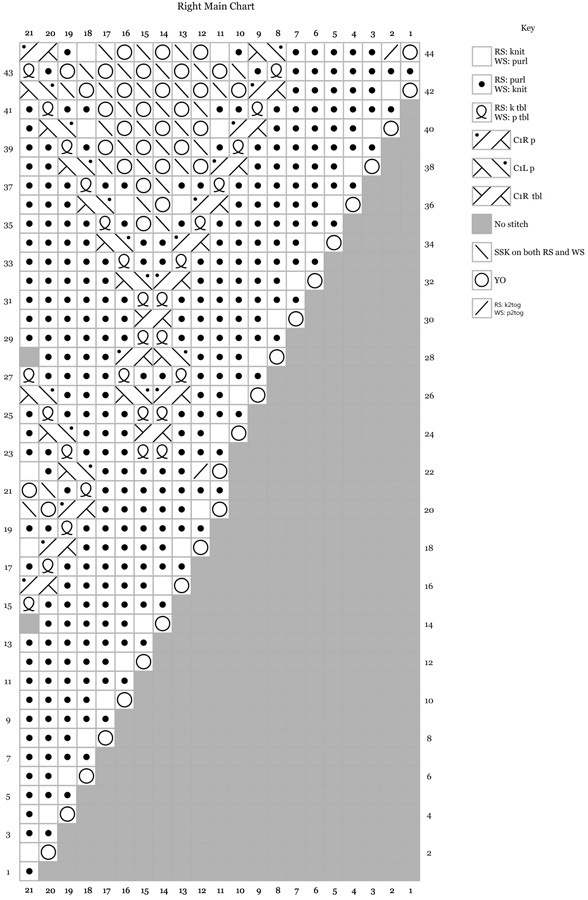
DIRECTIONS Work 10 rows in garter stitch (knit every row). Note: Odd numbered rows of foundation chart are worked on the RS from right to left, even numbered rows are worked on the WS from left to right. Row 1 [RS]: K3, *work Row 1 of foundation chart*, k1
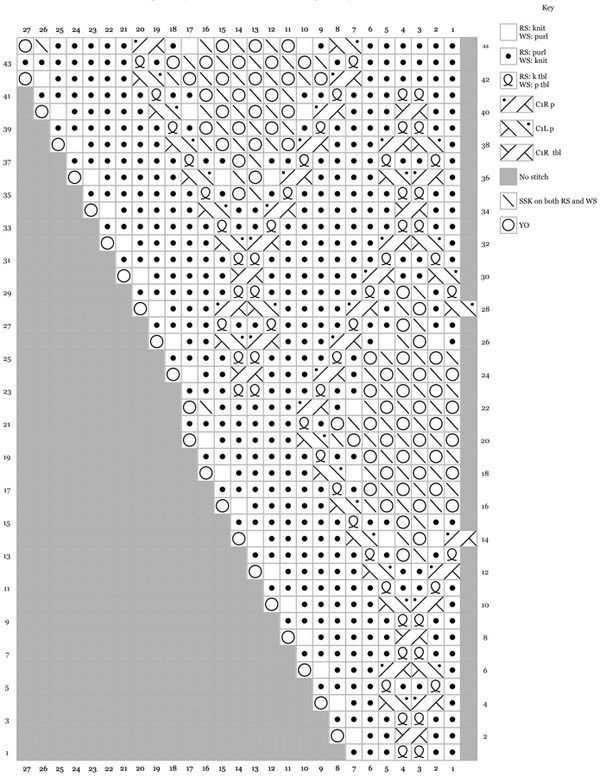
tbl (center st), rep from * to *, k3. Odd numbered rows of the Left, Center, and Right Main Charts are worked on the WS from left to right, even numbered rows are worked on the RS from right to left. Row 1 [WS]: K3, *work Row 1 of Left Main Chart, work
Row 1 of Center Main Chart chart 2 times, work Row 1 of Right
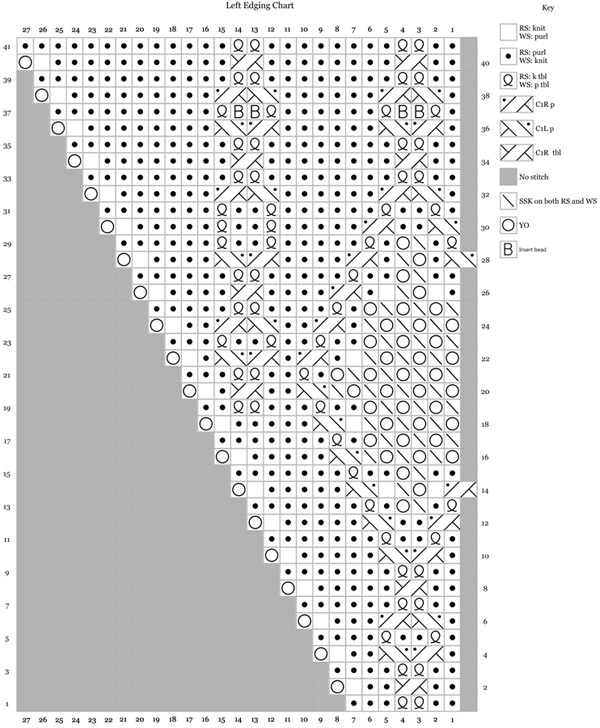
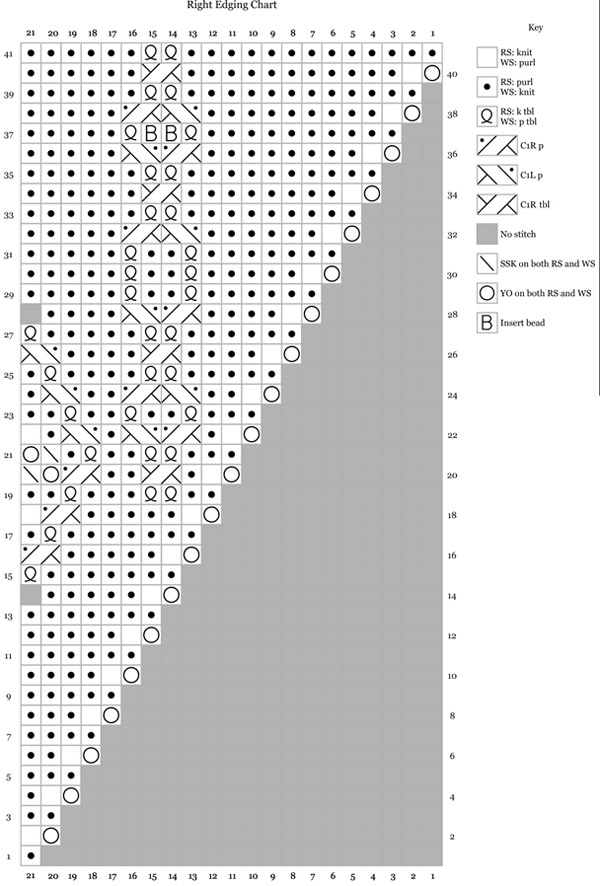
Main Chart*, p1 tbl, rep from * to *, k3. Work another repeat of the Main Charts as follows: Edging Charts Row 1 [WS]: K3, *work Row 1 of Left Edging Chart, work
Row 1 of Center Edging Chart 6 times, work Row 1 of Right Edging
Chart*, p1 tbl, rep from * to *, k3. Border Next row [RS]: K3, yo, k to center st marked by yarn
overs, yo, k1 tbl (center st), yo, k to last 3 sts, yo, k3 BO all stitches loosely. |
|
FINISHING |
| ABOUT THE DESIGNER |
|
Kathryn McNaughton manages to find time
to design knitting patterns in between
her secret other life as a high school student. |
|
Pattern & images © 2012 Kathryn McNaughton. Contact Kathryn |