
|
|
|
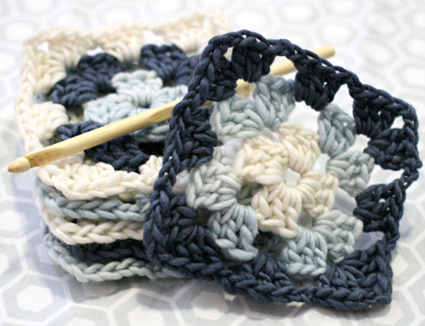
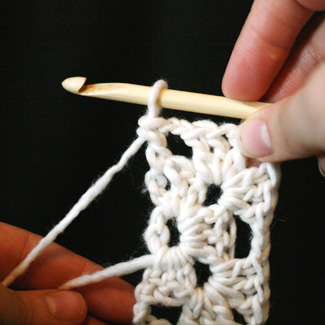
Why Granny? The earliest reference to the style of crochet now called granny squares that we can find in our own collections comes from a Dover reproduction edition of Weldon's Practical Crochet circa 1895. Weldon's calls it "Patchwork Crochet." So the association between crochet and grandmothers must have come later. We're about to dive in and guide you through your first granny square. But we'd be remiss if we didn't offer a few warnings before we begin. Granny squares are addictive; it's nearly impossible to make just one. They use up scrap yarn. They're great for colorplay and trying out new fibers. They can be made in minutes with just a few yards of yarn and a hook that can be stashed in just about any sized bag or pocket. Don't say we didn't warn you! Ending Before We Begin Weaving in crochet ends is mostly like weaving in knitting ends. After you fasten off (by cutting the yarn and pulling the tail end through the remaining loop on your hook) you thread your end on a tapestry needle and weave on the back of the work finding bumps to slide under. You look for strands of the same color as your end to hide your work, and you don't take your ends in a straight line, but zig and zag so the ends don't unravel. Hiding ends in crochet is a little easier than in knitting because the stitches themselves are irregular with strands going vertically, horizontally, and diagonally. 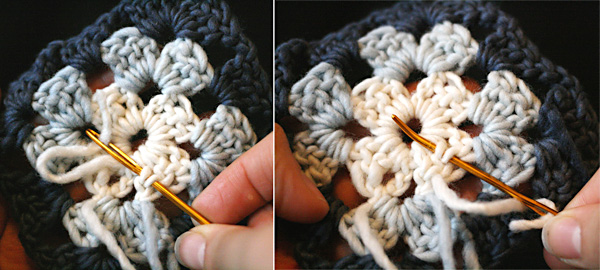
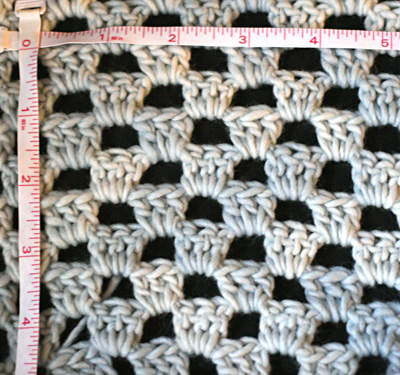
Row gauge can be especially tricky because different crochet stitches have different heights, and in fact, stitch height can vary within a row if the stitch pattern uses a variety of stitches. That's why it's essential to make a swatch big enough to capture a few repeats of your pattern stitch and measure carefully. Sometimes, in crochet patterns there will be a small side pattern for creating a gauge swatch big enough to get an accurate measurement. Begin by using the hook size suggested in a pattern and make a swatch in the pattern stitch, then use a larger or smaller hook as necessary to get the required gauge. If you're crocheting without a pattern (or with a different weight of yarn than the worsted we recommend for these granny squares), this chart from the Craft Yarn Council of America is a good place to start. Keep in mind that your knit tension and your crochet tension will most likely be different. So while you might use a 5.0 mm (US 8) needle with worsted weight yarn, you might need a hook of a different size to get gauge with the same worsted weight yarn in crochet. A Picture's Worth A Thousand Stitches
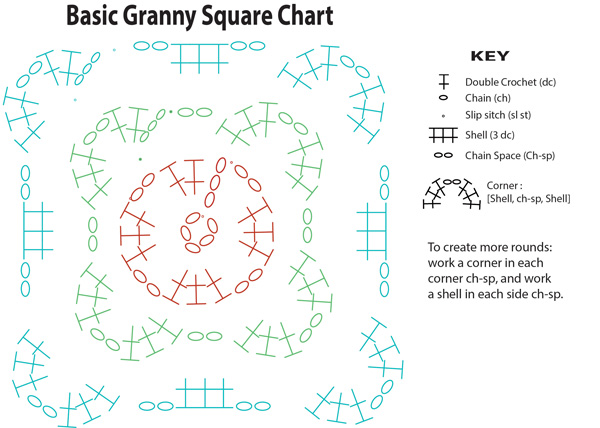
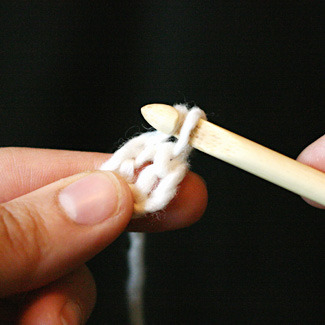
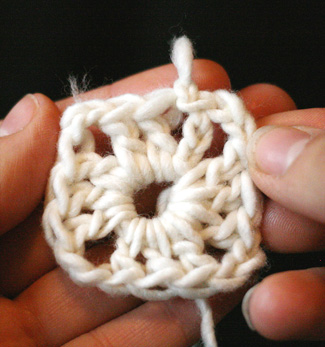
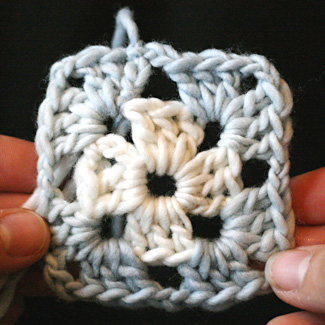
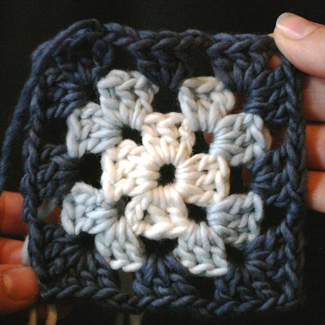
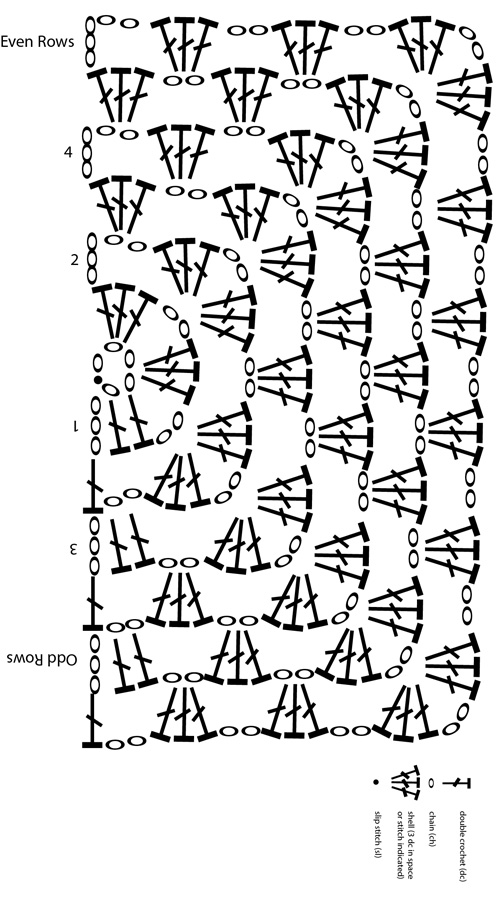
Crochet charts are similar to knitting charts in that you work each stitch as it presents itself, but crochet charts have a few more things to tell you. For instance, a crochet chart tells you where you need to base the new stitches. This makes it a much more accurate visual representation of the finished piece than a knitting chart. A crochet chart will show you if you are working a stitch into a chain space, or show you a special symbol if the stitch is worked only through the back loop of the previous row. Like a knitting chart, you read the chart in the direction of your crochet. In the round, you're reading the chart counter-clockwise for a motif chart, or all rows from right to left for a tube. Back and forth, you read from right to left when you're working the front of the work and from left to right when you're working the back side of a project. Here are written instructions for a basic granny square along with a few step-by-step photos. Try following each round loop in the text and then in the chart. We think you'll get the hang of the charts pretty quickly. Abbreviations: You'll need three colors of yarn, referred to here in the pattern as CA, CB, CC. Begin with three solid, light colors in worsted weight wool with a 5 mm (H) hook. Adjust the hook size as needed to get a fabric you like. Instructions
| ||||||||||
 |
||||||||||
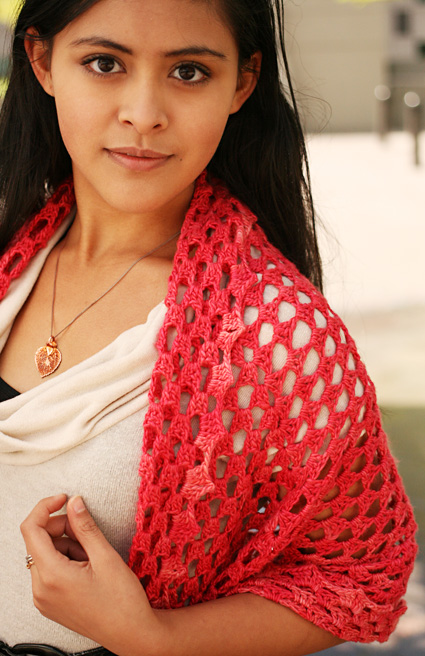 |
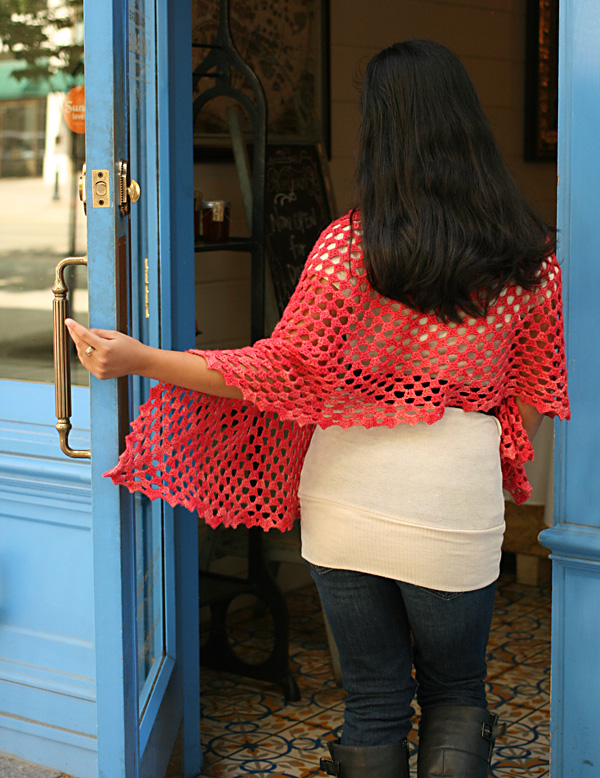
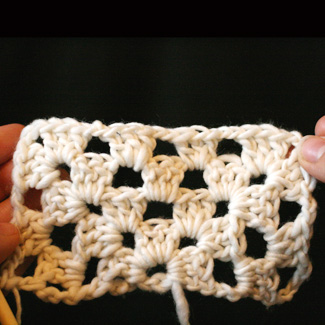
by Amy O'Neill Houck This shawl takes the idea of a granny square and turns it on its head by dividing the square in half. The resulting rectangle, created by having only 2 increase points, is worked in rows instead of rounds. Still, you have the simplicity of a granny square, working stitches mostly into chain spaces instead of into stitches. |
SIZE FINISHED MEASUREMENTS: |
MATERIALS Notions |
| GAUGE |
18 sts/7 rows = 4 inches in pattern stitch |
|
PATTERN NOTES |
Chain: ch Charts
|
|
DIRECTIONS |
Setup
Body Row 1 [RS]: Ch 3, 2 dc in next ch-sp, [ch 2, shell in next ch-sp] to corner, ch 2, corner in next corner, [ch 2, shell in next ch-sp] to corner, ch 2, corner in next corner, [ch 2, shell in next ch-sp] to end of row. Turn. Row 2 [WS]: Ch 5, ([shell in next ch-sp, ch 2] to corner, corner in next corner, ch 2) twice, [shell in next ch-sp, ch 2] to final ch sp, dc in top of turning ch. Turn. Repeat Rows 1-2 8 more times, and work Row 1 once more (19 rows total), or until shawlette is desired size. Fasten off. Edging Ch 3, 2 dc, ch 2, 3 dc all into ring. Working along the top edge of the shawl, create a pointed edge by working a 'corner' into each space along the edge. At the corner, work the corner as normal, and rotate the work. Continue working all the way around the final row, (ch 2, corner) in each ch-sp, working a corner in each corner as set, to the beginning of the edging round. To finish, ch 2, slip stitch into the round's beginning ch to join, cut yarn and fasten off. 
|
| FINISHING |
Weave in ends and block. |
| ABOUT THE DESIGNERS |
 Amy and Miriam both have patterns on ravelry.com. |
| Pattern & images © 2014 Amy O'Neill Houck + Miriam Felton. Contact Miriam |

