
|
|
 |
|
|
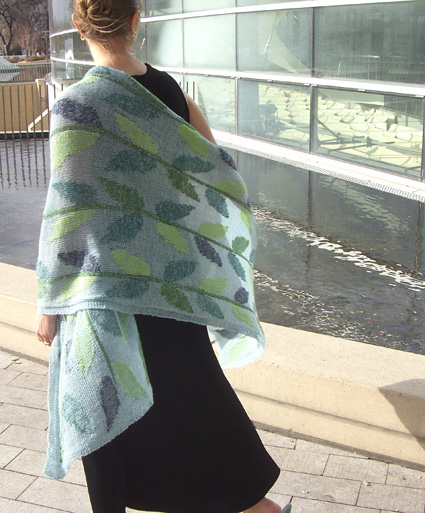 |
Knit out of a lovely laceweight alpaca with a new color work technique, Verdant creates a new sort of colored lightweight fabric. Held up to the summer sun, this wrap casts a leafy shadow. As with fine printed cotton and lovely old woven shawls, a shadowy but perfectly presentable version of the right side image is visible on the reverse. Laceweight yarn knit at a loose gauge is translucent, and in this way light is added to the knitter's palette. In this wrap, just as in stained glass, light shines around and through the leaf motif. This shawl is knit using a techique of my own that I think of as Blended Intarsia. I have been experimenting with blended intarsia for over a year because, although I love the large graphic qualities of traditional intarsia, I prefer sophisticated color relationships. |
Please be relaxed about following the chart. If you make a
small error on a leaf, step back and look at it before ripping
out. Leaves come in all shapes and sizes. If the
design is still pleasing, let it be. For this intarsia
pattern, consider the chart a suggestion rather than a commandment. |
|
|
|
 |
|
SIZE |
|
FINISHED MEASUREMENTS |
|
MATERIALS Notions |
|
GAUGE |
17 sts/32 rows=4” in
stockinette st over blended intarsia pattern, after blocking |

|
|
PATTERN NOTES |
|
This wrap is worked in two halves, beginning with a provisional
cast on. After the first half is worked, the provisional cast
on is removed, and the second half is worked from the resulting
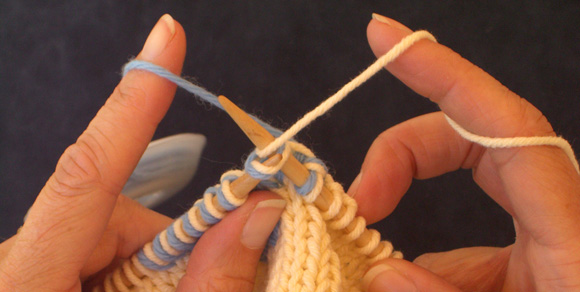
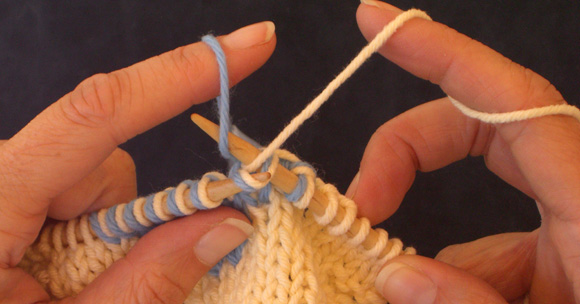
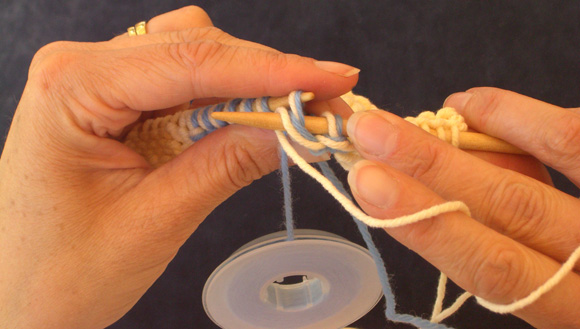
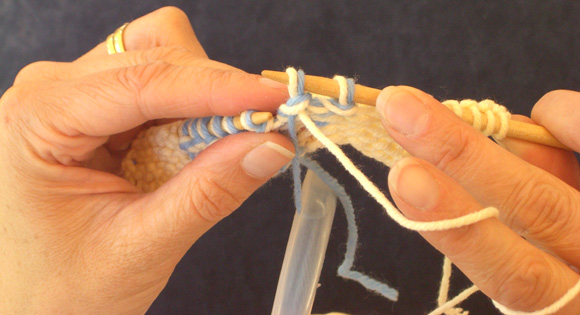
live stitches. The photos and instructions below describe the method for working blended intarsia in a way that results in the CC yarn usually being predominant on the RS of the work, and the MC yarn being predominant on the WS of the work. This will make the design bolder on the RS of the fabric than on the WS. Don't be discouraged if you find that the technique requires some practice! If you find that this way of working is not feasible for you, it is still possible to make this project; simply work CC sts using 1 strand each of MC and CC held together. RS of fabric will show more color blending between MC and CC than in wrap shown. Use a separate bobbin for each stem and leaf, even when a leaf is worked in the same color as the stem. Bobbins will hang on WS of work when not in use. It is not necessary to twist strands of yarn around each other at color changes as in conventional intarsia. When following chart, work MC sts using 1 strand MC. Work CC sts (blended sts) using 1 strand MC and 1 strand CC, as follows. Note that in the directions that follow, “throw” will refer to wrapping yarn around right needle using right hand, and “pick” will refer to using tip of left needle to pick up strand of yarn from left hand. You may find it unnecessary to tension CC strand around fingers; the weight of the bobbin will often provide enough tension that the CC strand can just be hung over one finger. Working blended sts on RS rows: Hold MC using right hand and CC using left hand. Insert right needle knitwise into st, throw MC using right hand, pick CC using left hand. Draw right needle through st on left needle, completing st using both strands of yarn. Most of the time, MC strand will sit to right of CC strand on needle on RS rows, and to left of CC strand on WS rows. Don't worry if this is reversed on some sts. 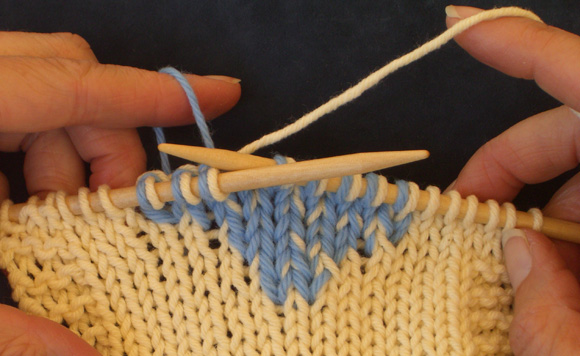
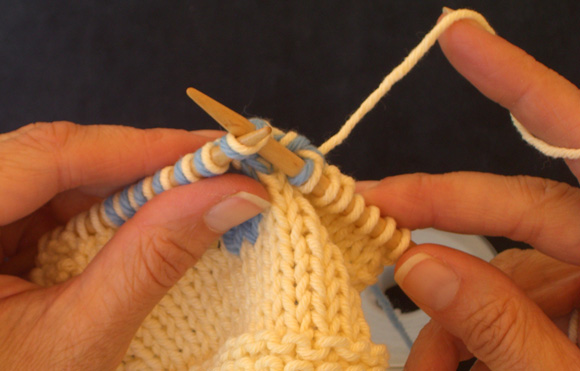
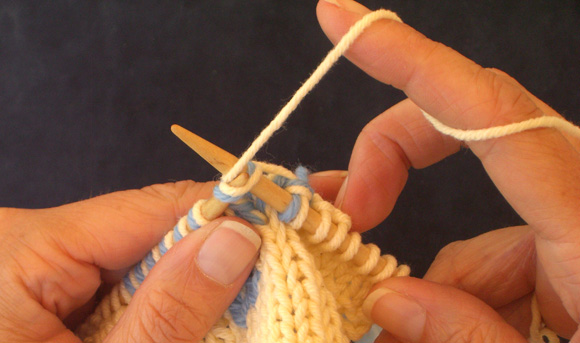
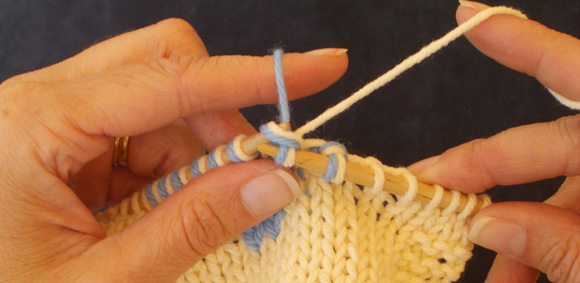
Working blended sts on WS rows: Hold MC using right hand and CC using left hand. Insert right needle purlwise into st, wrap CC strand over needle using left hand, throw MC strand using right hand. Draw right needle through st on left needle, completing st using both strands of yarn. 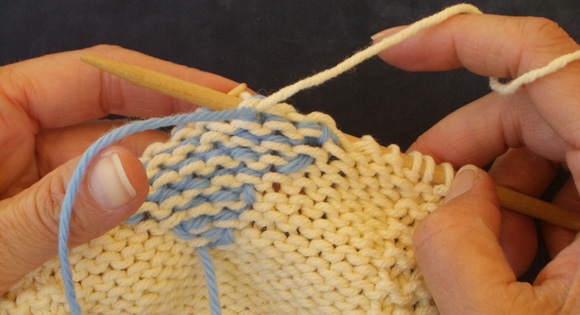


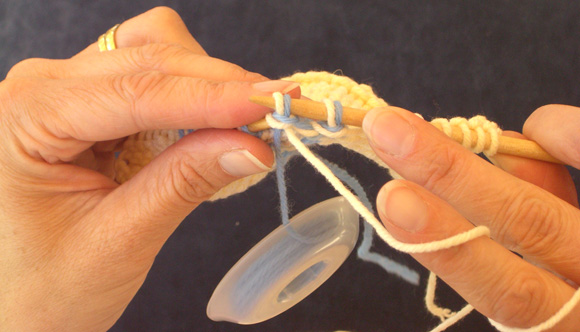
When the chart indicates that the first blended st falls to the right or left of the last blended st worked in the previous row, take care to avoid pulling CC strand tightly or leaving a large loop of CC on WS of work. The strand should lie loosely against WS of fabric. 
Information about blocking can be found here and here. |
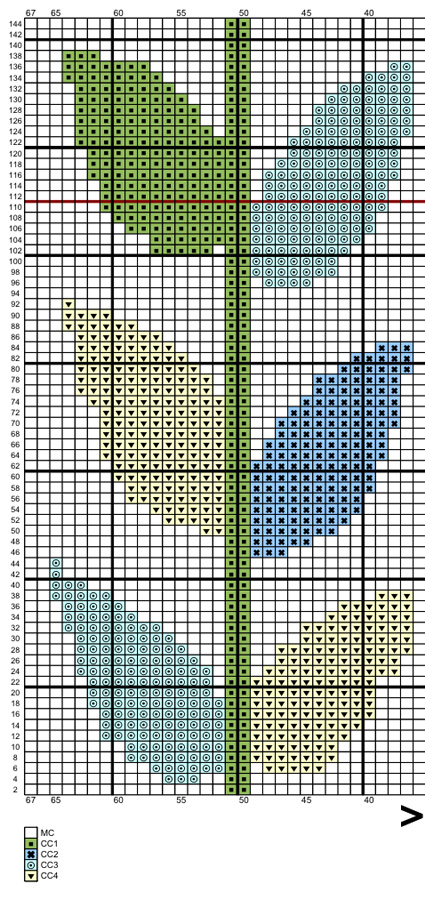
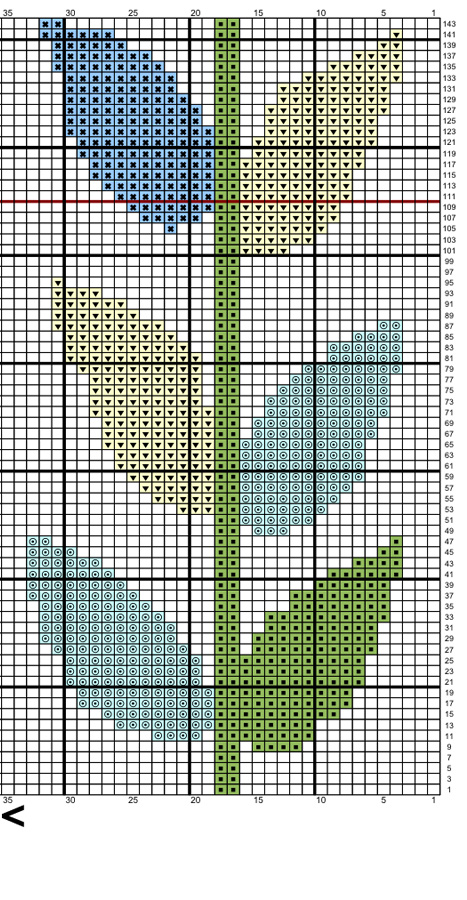
The chart for this pattern is very large and fits on 2 letter-sized pages. Click here and here print the resulting pages. Assemble them with the arrows [ >< ] touching. |
|
DIRECTIONS 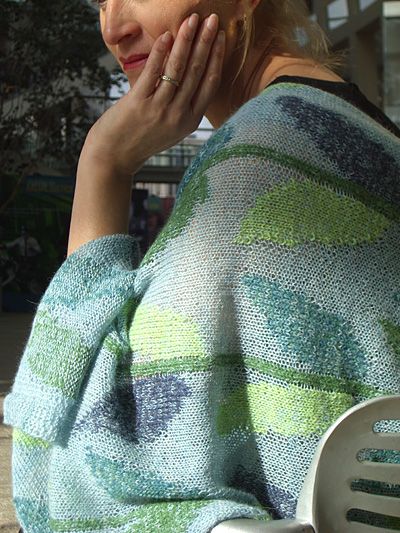
Using provisional method and waste yarn, CO 146 sts. Row 1 [RS]: Using MC, k6, place marker, work Row 1 of chart, place marker, work Row 1 of chart once more, place marker, k6. IMPORTANT: Each row of chart indicates pattern for two rows: a RS row and a WS row. RS row numbers are indicated along right side of chart, WS row numbers are indicated along left side. Next Row: Sl 1, k5, work next row of chart as set, k6. Work Rows 1-144 of chart once more, EXCEPT once you have completed Row 110 (indicated by red line), discontinue working stems – work stem sts indicated using MC only. Using MC only, work 2 rows in stockinette st, maintaining garter
st borders as set. SECOND HALF Join MC with RS facing. When working first row, leave longer tails than usual when joining each stem bobbin. When working stem sts in first row, insert tip of right needle into front of st below st on needle, so that new st is drawn through both st on needle and st below. This will help to disguise the slight jog that may result between stem from first half and stem from second half. If there is still a visible jog, it can be disguised when weaving in ends. Work as for first half. 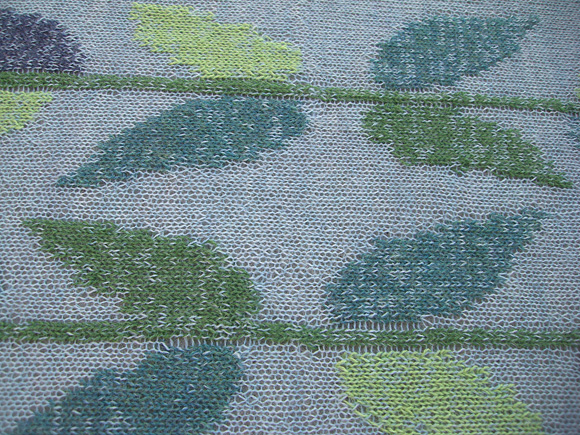
|
|
FINISHING |
| ABOUT THE DESIGNER |
|
|
|
Pattern & images © 2011 Susan Newhall. Contact Susan |
