|
|
 |
|
Tweet
|
|
|
|
|
||||||||||||||||||||||||||||||||||||||
|
You don't need to learn Japanese Many knitters want to knit from Japanese patterns because the designs are exquisite, and often quite elaborate and complex. But to learn to read the patterns, it's best to start with a simple design. In this column we will go over the basics you'll need to get started and in the Naga Fuji shawl pattern, we will look at how to put all of this information together to knit from a relatively simple, but elegant, pattern.
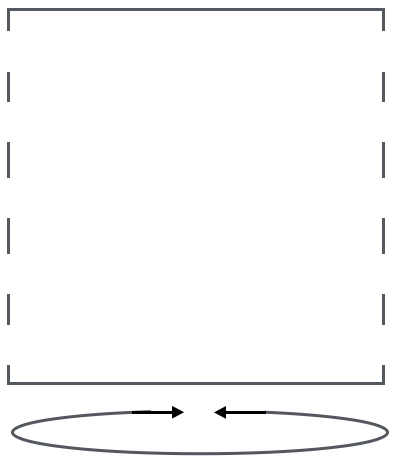
Reading the Schematic
 For circular knitting, it will usually be an oval. If the sides of a piece are drawn with dotted lines instead of solid lines, that is also an indication that a piece is knitted in the round.
Pattern stitches. The pattern stitch names are listed in the middle of the pieces, sometimes in parentheses. Everything -- and I mean everything -- is charted except for stockinette stitch, garter stitch, k1-p1 ribbing, and k2-p2 ribbing (we looked at those symbols in my Deep Fall 2013 column, Japan Style).
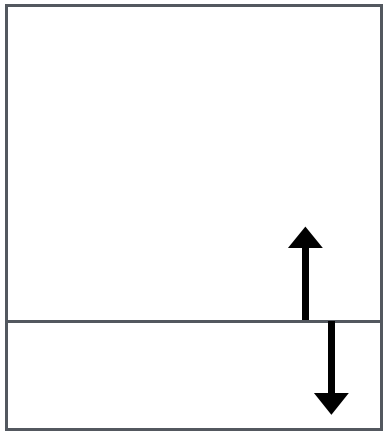
Shaping. Increases and decreases may be marked with the symbols listed in the table above, but remember, if a piece is getting wider you are increasing, if it is getting narrower you are binding off or decreasing. If you are adding or removing 1 stitch at a time, increase or decrease. If you are adding or removing 2 or more stitches at a time, cast on or bind off.
If the direction of knitting is going from bottom to top, follow the instructions from bottom to top as well. For example, for a piece that is getting narrower,
Finishing Unusual symbols will often be defined, with pictures illustrating the knitting technique, but it will be assumed that the reader understands basic chart symbols. An excellent resource is the book Clear & Simple Knitting Symbols. Although you won't be able to read the text, all of the stitches are illustrated with detailed drawings showing how to manipulate the yarn and needles.
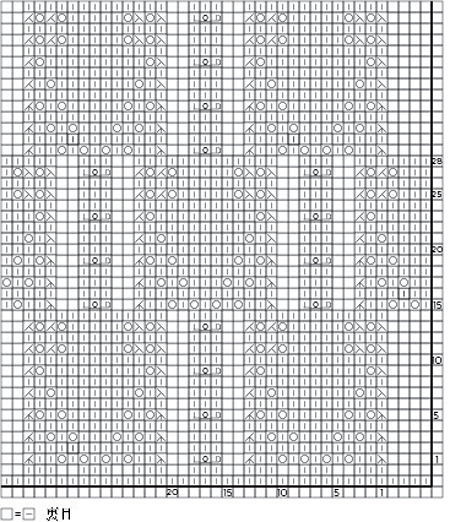
In this pattern, I have included both the Japanese style charts as well as charts in the standard Knitty style for you to compare. As you can see, many of the basic symbols are similar or identical in both styles. |
||||||||||||||||||||||||||||||||||||||
 |
||||||||||||||||||||||||||||||||||||||
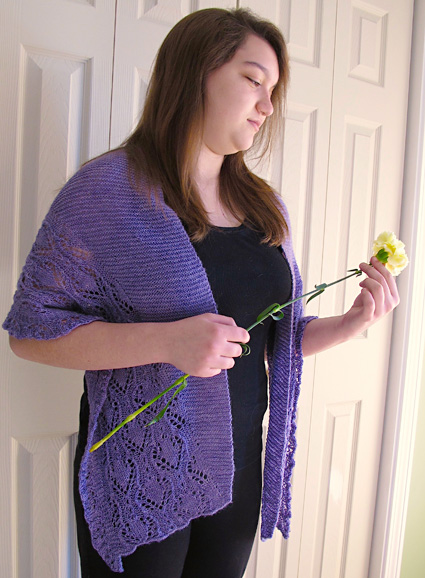 |
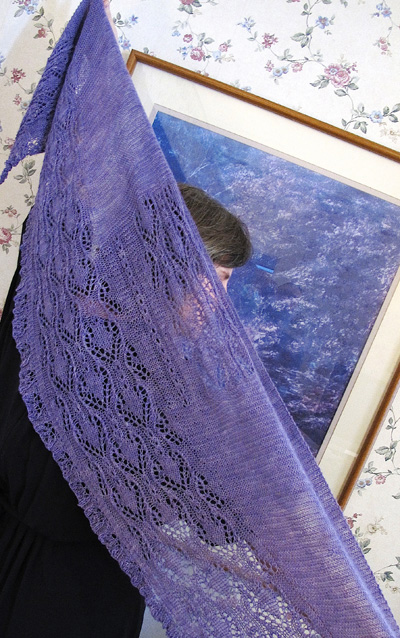
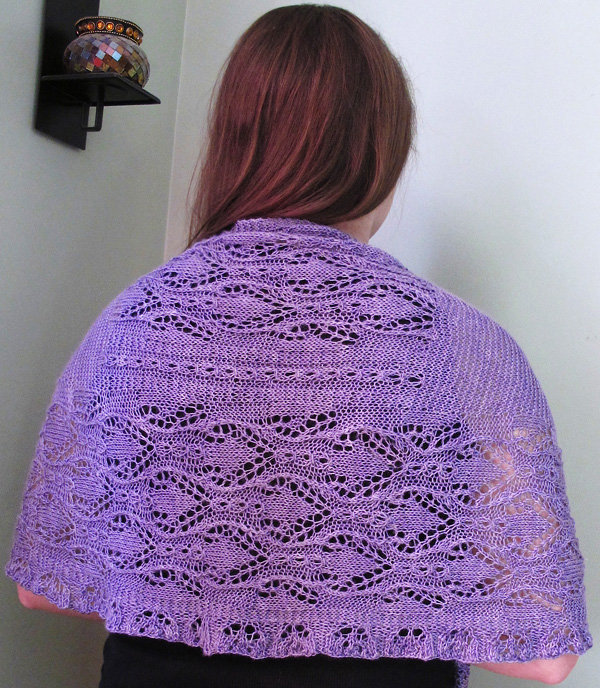
by Donna Druchunas Named for Giant Wisteria trees at the Ashikaga Flower Park in Japan, this shawl is worked with a main pattern and a border from different sweater patterns that I found in my collection of Japanese knitting books. The color and the wavy lines of the lace pattern came together and said wisteria to me. Fuji is the Japanese word for these plants, and Naga Fuji is a specific species that is large with long tendrils of flowers. The shawl is knit from side to side in one piece with a border added by picking up stitches along one of the long sides of the shawl and knitting outward. |
|
Tweet

|
||
SIZE |
|
You will determine if you need straight, double-pointed, or circular needles based on the project. In this case, I chose a circular needle because the border is knitted across the entire width of the shawl. Notions |
| GAUGE |
22 sts/24.5 rows = 4 inches over garter stitch, blocked (note the garter stitch is stretched to match the row gauge of the lace) You will find the gauge by looking for "10cm" in the text on the Japanese patterns. |
|
PATTERN NOTES |
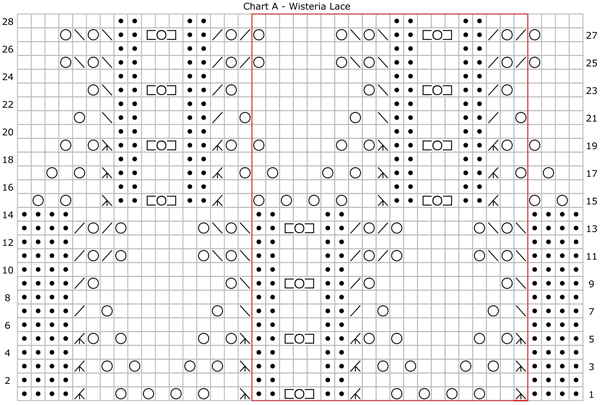
Chart A
Chart B I created this chart from scratch to fill in the center of the middle pattern of the shawl. 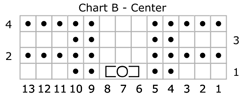
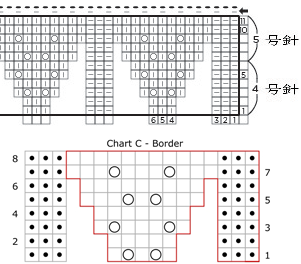
Chart C (Border)
|
|
DIRECTIONS |
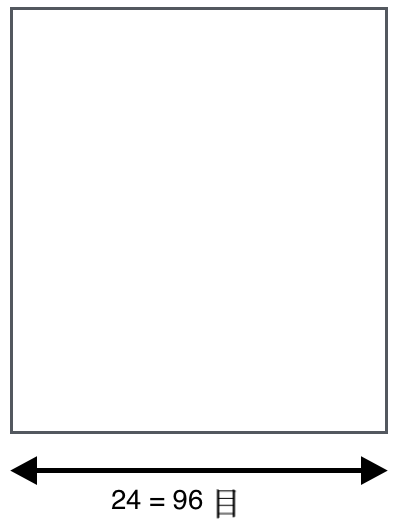
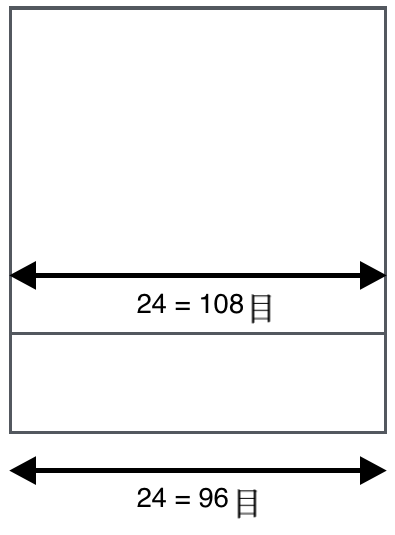
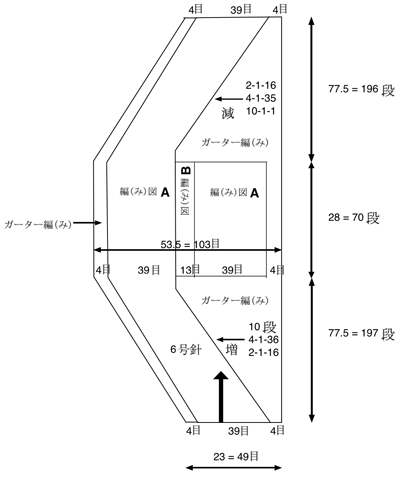
 Look at the bottom of the drawing to see the total number of stitches to cast on. Notice the first 2 rows of the chart are not numbered. They are the cast-on row and the setup row. The chart is 39 stitches wide and there are 4 sts on either side, which will be worked in garter stitch, as indicated in the schematic. The pattern does not specify a specific kind of cast-on. I almost always use long-tail, so that's what I used here. Cast on 49 sts, placing markers 4 sts in from each end. Note: this corresponds to the first row on the Japanese charts, but it is not included on my revised chart. Set Up Patterns Note: The blank squares on the Japanese chart represent the purl symbol, which means purl on right-side rows and knit on wrong-side rows. Remember to read the wrong-side chart rows from left to right. Row 1 [WS]: K4, k4, (p3, k2) to 2 sts before marker, k2, slip marker, k4. Increase Section Note: The type of increase to use is left to the discretion of the knitter in this case. Sometimes, when increases or decreases are worked in a pattern stitch, the shaping is charted and indicates the specific type of increase to work. I used knit front & back to add stitches) because it does not show in garter stitch. Inc row [RS]: Knit to last st before marker, kfb, work as charted to next marker, k4. Repeat the last 2 rows 15 more times. 20 sts in first garter stitch section. Work Inc row followed by 3 even rows 38 times. 58 sts in first garter stitch section; 103 sts total. Work 10 rows even (until 7 repeats of charted pattern have been worked)—197 rows total, including setup row after cast on. 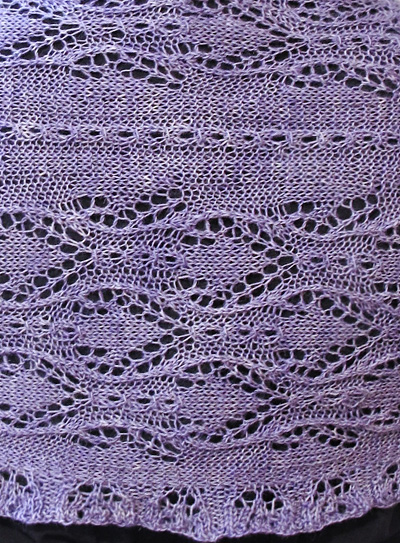
Center Section Decrease Section In this section, you will reverse shaping of increase section, reading the instructions on the diagram from bottom to top, to match the direction of the knitting, as follows: Work 12 rows even. Work 3 rows even. Work Dec row followed by 1 even row 16 times. 4 sts rem in garter stitch section. Bind off rem 49 sts loosely. Border Work all rows of Chart C. 535 sts Bind off loosely in [k1, p1] ribbing. |
|
| FINISHING |
| Weave in ends. Wash and pin to dimensions to block. |
 |
| ABOUT THE DESIGNER |
 Visit Donna's website at sheeptoshawl.com.
|
| Pattern & images © 2014 Donna Druchunas. All rights reserved. Contact Donna |

 MATERIALS