
|
|
|
|
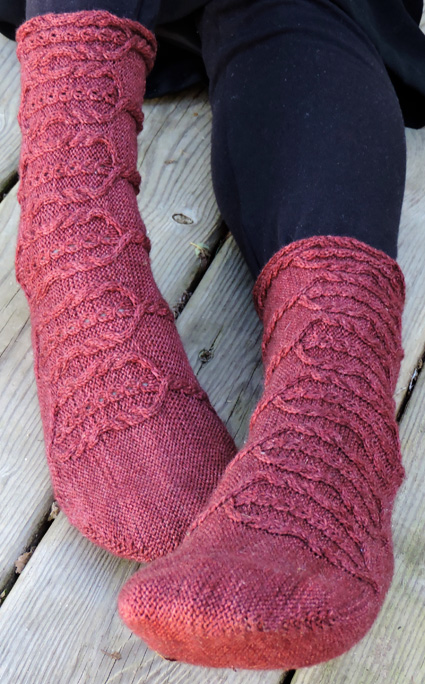
In video games and comics, a common theme is that the more angst the hero has, the more buckles they have on their clothing. This seems to be particularly true in stories drawn from myth and legend. So why shouldn't our angsty hero lose their buckles when they take off their boots? In these socks, horizontal cables lead to a stylized cable "buckle." The soles are in reverse stockinette (to soothe your troubled sole[s]). This sock, rather than being knit from the cuff or the toe, is knit from one side to the other. It is started on one side with Judy's magic cast on (or any other toe up cast on). Increases are worked at one end for the toe and halfway up the cast on for the heel. The sock is then worked even (for the flat middle of the toe and heel). Decreases are then worked to mirror the increases, and the other side of the sock is Kitchener stitched shut. This sideways construction allows cables to run perpendicular to the usual direction, mimicking the buckles and straps on a pair of boots. Left and right socks are mirror images of each other, with the "buckle" running approximately two thirds of the way across the top of the sock from the outer edge. |
||
|
SIZE |
|
|
FINISHED MEASUREMENTS |
|
MATERIALS Notions |
|
GAUGE |
| 36 sts/52 rows = 4" in stockinette stitch |
|
PATTERN NOTES |
|
Sock is constructed lengthways, and therefore length is fixed with the CO. Note that length and circumference are independent of one another -- you can mix and match. Note that because of the construction, the sock should be worked with a little less negative ease than usual -- aim for a size with zero ease or about half an inch of negative ease. If you want to add/subtract from the length of the sock, add/subtract CO stitches, and then add/subtract those from either the foot or leg portion. For example if you want to add one inch of length to the foot of the sock, cast on 18 additional stitches (9 for the top of the sock and 9 for the sole), and work 9 additional stitches after the second heel increase, then before the toe marker. If you want to change the circumference of the sock, you can work fewer or additional even rows in the center portion. The decrease requires 2.5 inches, so work even until your piece is your final desired circumference less 2.5 inches. C4L: Slip next 2 sts to cable needle and hold in front of work; k2, then k2 from cable needle. Instructions for Judy's Magic Cast On can be found here: Instructions for grafting can be found here. |
|
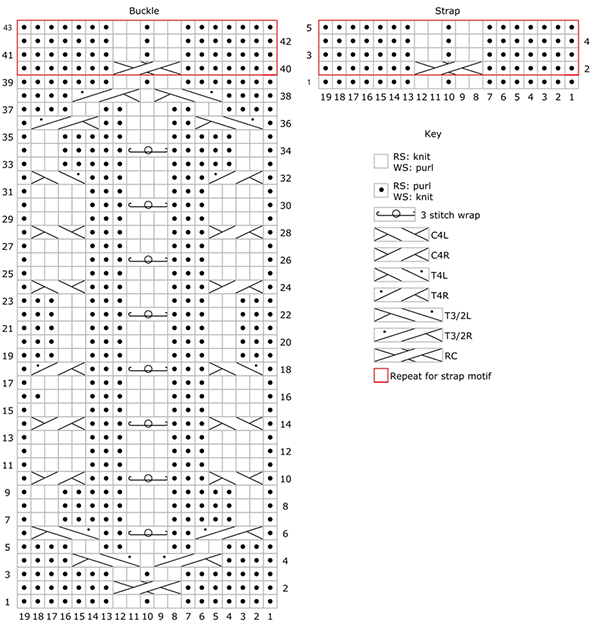
The chart for this pattern is very large and fits on a letter-sized page. Click here and print the resulting page. |
|
DIRECTIONS 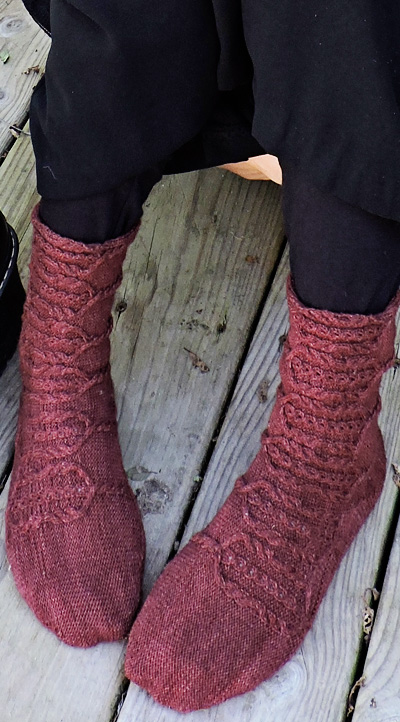
Using Judy's Magic CO, CO 234[250, 268] sts - 117[125, 134] on each side. Note: You will be working back and forth in rows, all the way across both needles. Row 1 [WS]:Work Row 1 of Strap Chart four times; PM, kfb, PM, kfb, PM; knit to last stitch of needle, kfb; kfb in first stitch of second needle; k0[8, 17], PM; work Row 1 of Buckle Chart two times, k2, work Row 1 of Buckle Chart four times. Turn. Note: The first side (with three markers) is the back of the sock, with the heel positioned between the first and third markers. The end with the increases is the toe. The second side (with one marker) is the front of the sock. Row 2 [RS]:Work Row 2 of Buckle Chart four times; p2; work Row 2 of Buckle chart twice to marker; p to last stitch on needle, pfb; pfb, p to stitch before center heel marker, pfb, slip marker, pfb, p to last marker, work Row 2 of Strap Chart four times to end. Turn. Row 3 [WS]: Work Row 3 of Strap Chart to marker; knit to stitch before center heel marker, kfb, slip marker, kfb, knit to last stitch on needle, kfb; kfb, knit to marker; work Row 3 of Buckle Chart twice; p2; work Row 3 of Buckle Chart to end. Turn. Repeat Rows 2 & 3 7 more times, until there are 18 stitches between the first and second heel markers. Sock should measure approximately 2.5 ins. Work even for center of sock, as follows: Row 4 [RS]: Work next row of Buckle Chart four times; p2; work next row of Buckle Chart to marker; p to last marker; work next row of Strap Chart to end. Turn. Row 5 [WS]: Work next row of Strap Chart to marker; knit to marker; work next row of Buckle Chart twice; p2; work next row of Buckle Chart to end. Turn. Repeat Rows 4 & 5 until sock measures 2.25[2.75, 3.25] ins from CO (4.5[5.5, 6.5] inches across the full piece) for a finished circumference of 7[8, 9] inches. Begin decreases for other side of the sock as follows: Repeat Rows 6 & 7 7 more times, and then work Row 6 once more, until one stitch remains between first and second heel markers (total 234[250, 268] stitches remain). Cut yarn leaving a long tail and with RS facing, graft side seam. Note: You'll need a tail about four or five times the length of the seam for the grafting. 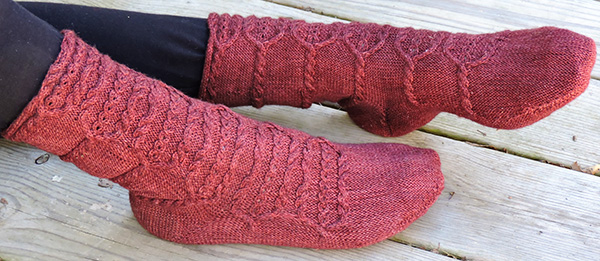
Right Sock Note: You will be working back and forth in rows, all the way across both needles. Row 1 [WS]: Work Row 1 of Buckle Chart four times; k2; work Row 1 of Buckle Chart twice, PM; knit to last stitch of needle, kfb in last stitch on needle; kfb in first stitch of center heel needle; k38[46, 55], PM, kfb, PM, kfb, PM; work Row 1 of Strap four times. Turn. Note: The first side (with three markers) is the back of the sock, with the heel positioned between the first and third markers. The end with the increases is the toe. The second side (with one marker) is the front of the sock. 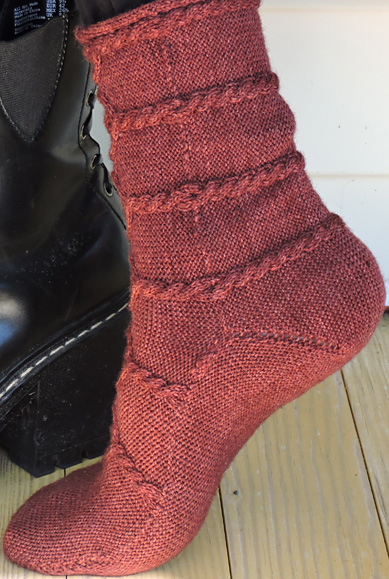 Row 2 [RS]:Work Row 2 of Strap Chart four times; purl to stitch before center heel marker; pfb, slip marker, pfb; purl to last stitch of needle, pfb; pfb, work Row 2 of Buckle chart twice; p2; work Row 2 of Buckle Chart to end. Turn. Repeat Rows 2 & 3 7 more times, until there are 18 stitches between the first and second heel markers. Sock should measure approximately 2.5 ins. Work even for center of sock, as follows: Row 4 [RS]: Work next row of Strap Chart four times; purl to end of needle; purl to marker, work next row of Buckle Chart twice; p2; work next row of Buckle Chart to end. Turn. Repeat Rows 4 & 5 until sock measures 2.25[2.75, 3.25] ins from CO (4.5[5.5, 6.5] inches across the full piece) for a finished circumference of 7[8, 9] inches. Begin decreases for other side of the sock as follows: Repeat Rows 6 & 7 7 more times, and then work Row 6 once more until one stitch remains between first and center heel heel markers (total 234[250, 268] stitches remain). Cut yarn leaving a long tail and with RS facing, graft side seam. Note: You'll need a tail about four or five times the length of the seam for the grafting. |
|
FINISHING |
| ABOUT THE DESIGNER |
|
She has been designing in both knit and crochet for about four years, and her designs can be found on Ravelry and on her blog. |
|
Pattern & images © 2014 Kim Driggs. Contact Kim |
