
|
|
|
|
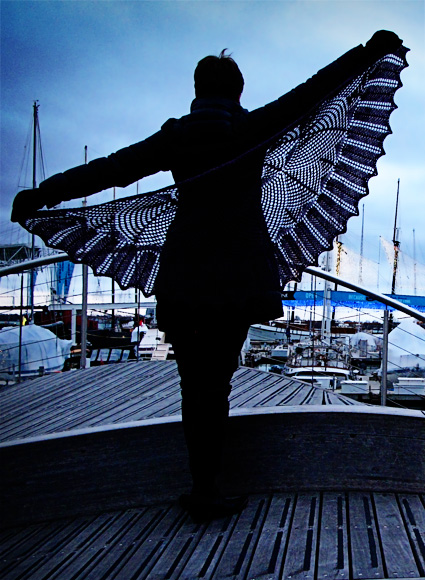
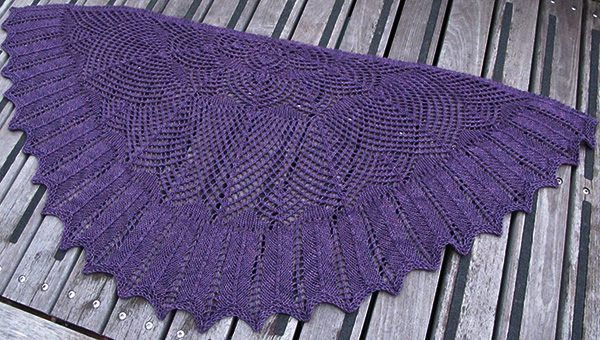
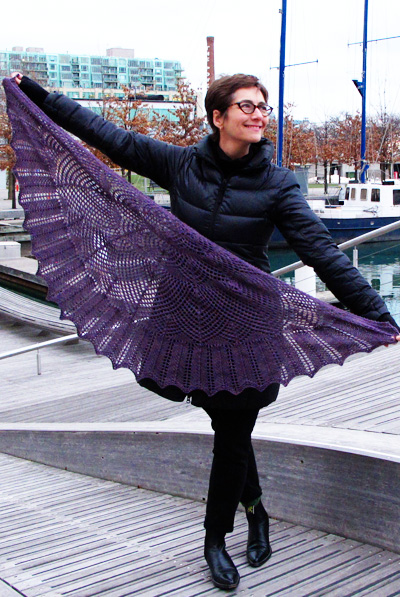
Being of a mathematical bent, I've always been amused by the concept of Elizabeth Zimmermann's Pi Shawl. It exploits a simple mathematical principal, in a clever way. The circumference of a circle doubles as the diameter doubles. More simply: as the circle gets wider, the distance around the edge gets longer, in a very predictable way. If you've worked a triangular shawl, you've experienced something like this already: as you work more rows, adding stitches, the rows get longer. So with a circular shawl, if you start from the center and add stitches as you go, the shawl gets wider and the outside edge gets longer. Rather than increasing every other row/round, like you do for a triangle, our lady of all that is good and knitterly, Ms. Zimmermann, realized that she could apply a geometrical truth to make her knitting easier. Precisely put, as the diameter -- the "width" -- of the circle doubles, the circumference doubles. So she cast on a small number of stitches, and works a short distance -- let's get all mathematical, and call it x. She then doubled the number of stitches, and worked for twice that distance: 2x. And then she doubled the number of stitches, and work for twice the previous distance: 2 times 2x = 4x. And then she doubles the number of stitches again, and works twice that distance: 8x. And so forth. This makes a shawl that's easy to knit, and easy to design, because you've got large sections where the stitch count doesn't change. There's no pesky shaping to incorporate into your pattern, and no stitches to count. You work an increase round, count your stitches once, and then work for a while, without a care in the world. Here's the thing about circular shawls, though: they're easy and fun to work, but they're big. They take a long time to knit, they use up a lot of yarn, and then to wear them you inevitably fold them in half. So why not a Half Pi? A semi-circle, based on the same principle. Fun to design! But also faster to knit and easier to wear! I've also made it faster by using a heavier than usual yarn: who says lace has to be worked in laceweight? The lace looks complicated but it's really not. I've used one of my favourite stitch patterns for the edging: the classic Shetland Razor Shell. Please pay attention to the CDD. There are a few different ways to work a CDD, and I'm very particular about how this should look. Editor's note: The pattern is named for the place where we shot the photgraphs, the Simcoe Wavedeck on Toronto's waterfront. When trying to find a location to shoot such a beautiful and unique shawl, the image of the Wavedeck's undulating pathways flashed in my brain and I knew it was the right spot. Thus endeth the longest introduction in Knitty pattern history. |
||
|
|
||
|
SIZE |
|
|
FINISHED MEASUREMENTS |
|
Notions
GAUGE Note: stitch gauge is a funny thing in a Pi shawl, because the fabric is stretched to different degrees at different points in the fabric. Ultimately, as long as you like the fabric that results, you're good. |
|
PATTERN NOTES |
|
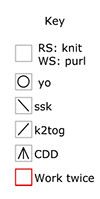
CDD: Slip 2 sts together, as if to k2tog, k1, then pass 2 slipped sts over. The backwards loop cast on instructions can be found here.
|
|
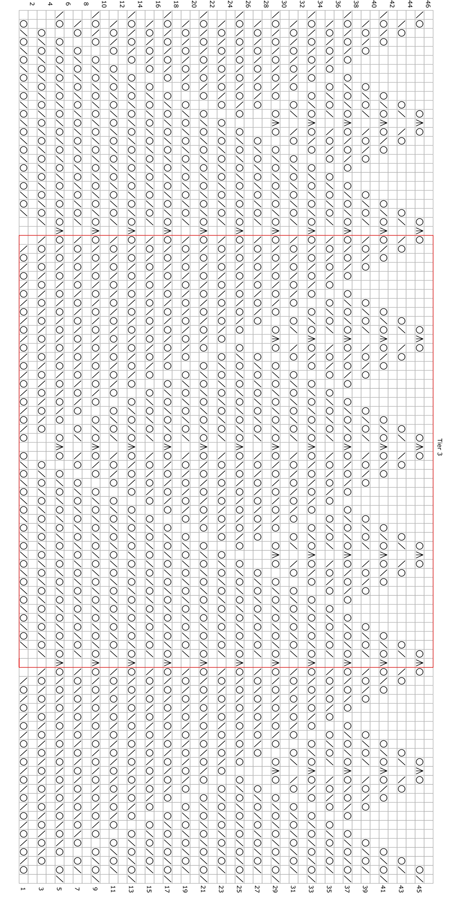
DIRECTIONS 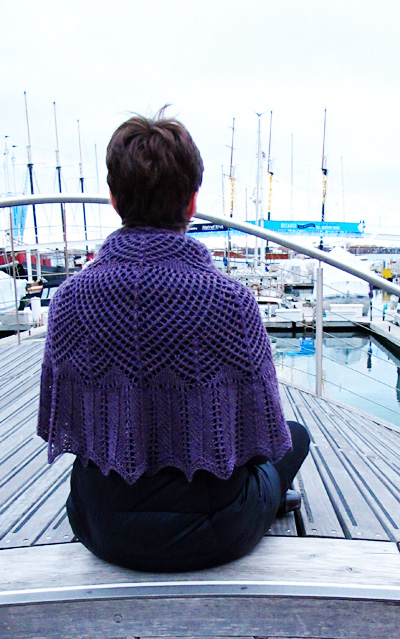
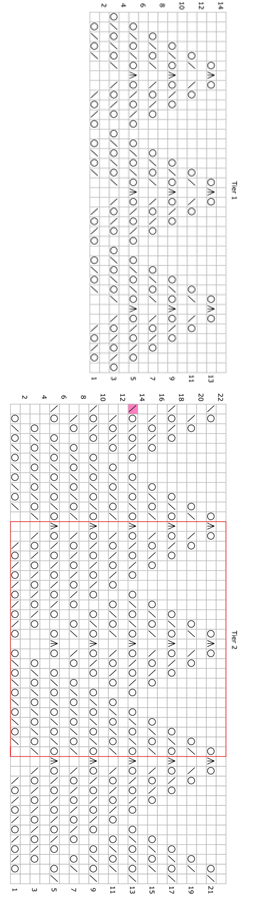
Using the backwards loop (e-wrap) method, CO 3 sts. Knit 8 rows, for 4 ridges. Row 1 [RS]: K3, pick up and knit 4 stitches along the edge of the garter strip, pick up and knit 3 sts in the CO edge. 10 sts. Row 3 [RS]: K3, (yo, k1) 4 times, yo, k3. 15 sts. Row 7 [RS]: K3, (yo, k1) 9 times, yo, k3. 25 sts. Row 11 [RS]: K3, (yo, k2tog) 10 times, k2. Row 15 [RS]: K3, (yo, k1) to last 4 sts, yo, k2tog, k2. 43 sts. Tier 1 Row 15, increase [RS]: K3, (yo, k1) to last 3 sts, yo, k3. 81 sts.
Tier 2 Row 23, increase [RS]: K3, (yo, k1) to last 3 sts, yo, k3. 153 sts. Tier 3 Row 47 [RS]: K3, (yo, k1) to last 3 sts, yo, k3. 297 sts. Edging Lower Border BO on WS as follows: K1, [k1, insert tip of needle into the two sts as if to ssk; knit them together] until all sts have been bound off. |
 |
|
FINISHING |
| ABOUT THE DESIGNER |
|
|
|
Pattern & images © 2014 Kate Atherley. Contact Kate |
 This pattern is pretty flexible in its yarn requirements. If you've got more yardage, and you want to make it bigger, just work more repeats of the Edging pattern. The Lower Border took about 22gms of yarn -- weigh as you go to keep track of your yarn usage. You'll need about 7 rows' worth of yarn to work the Lower Border and BO.
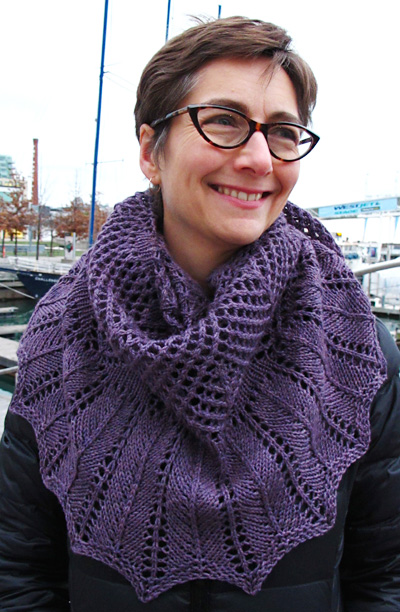