|
|
 photos: Charlene
Schurch
photos: Charlene
Schurch |
by Charlene Schurch

There are any number
of starting places when
working on a handspun,
handknit project. One way is to envision exactly
the end result you want
and then find the fiber,
spin it, and knit
the piece.
Or
you can see the hand-painted
fiber, fall in love,
contemplate how to spin, spin the fiber,
contemplate the yarn
and then knit the piece.
In this case I chose the latter.
I was at a spinning event and Lisa
Milliman of Dicentra
Designs was
a vendor. I kept
wandering by her booth
and finally succumbed
to a 5 oz piece of
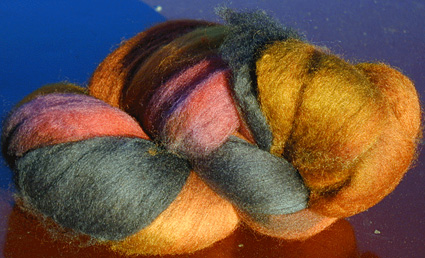
hand-painted top named Rusty Nails. There
were beautiful clear
colors of Gold, Rust, Burgundy and
Dark Turquoise. I
loved each color individually
and the way they were
placed next to each
other was irresistible.
I contemplated the fiber for a while,
and in laying it out
it looked like the fiber
had been laid out back
and forth at a given
length horizontally,
and the dye applied vertically. When
the top was laid out
it then had a symmetrical
appearance. So
how to spin? Since I loved the colors, I did not want
to approach the spinning
and plying randomly and
have lots of visual blending,
making a muddy looking
yarn (although it would
no doubt be beautiful).
Margaret
Heathman teaches
a class on a variety
of ways to spin hand-painted
top to keep the colors
clear. One is to spin and
work with the singles;
the second is to spin
a singles and navajo
ply; third is to split
the top into two individual
pieces, spin and ply. Since
I find navajo plying
fiddly, I rejected
that. I worry about
the durability of singles
and I want to have
this for a long time. So I was
willing to try the
split it in half and
ply together.
I did a few things to make this as precise as possible:
- First
I determined which
was the head end.
If you pet top,
one way is smooth and
the other is rougher. If
you spin from the end
the top was created,
it drafts smoother
and easier.
- Starting
at the head end, I
divided the top in
half vertically. I
worked alone and quietly
and slowly. This
gave me the most even
division I could muster.
Just grabbing and pulling
hard and fast may give
you a very uneven distribution
-- you could end up
with a 90/10 split
at the end instead
of the 50/50 you're
aiming for.
- Next
I spun my habitual
lace weight, which
works out to a singles
at about 6,000 yards
per pound and a 2-ply
yarn at 3,000 yards
per pound. I spun about
an hour a day, every
day until all the yarn
was spun. It took
about a week. By
continuing to spin
every day (and not
spinning anything else
during the time) my
hands could remember
what they were doing
and the work stayed
consistent.
- Before
plying, I wound the
yarn onto little plastic
bobbins. I read somewhere
that if you ply the
singles in the same
order as you spun them,
you will have a smoother
yarn. Also if my division
or spinning diameter
was off at any point,
starting at the end
would be off. So
thought I’d start plying
at the start.
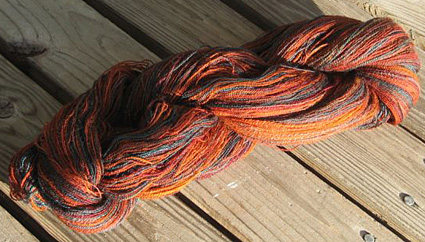
As
you can see from the
skein, the colors
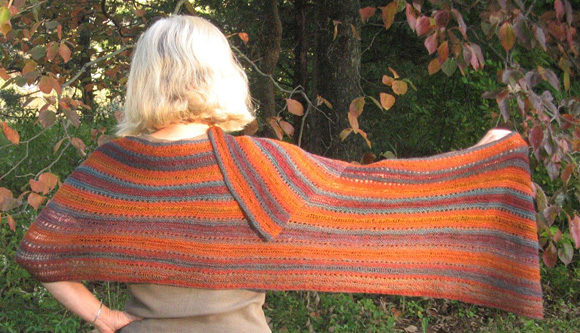
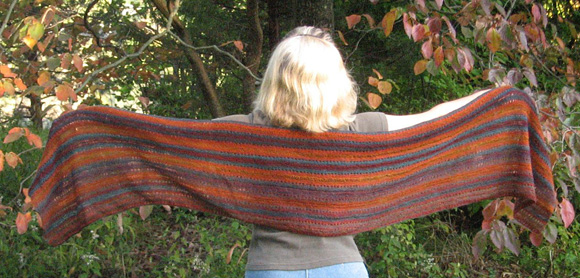
look clear and bright. There are 1,000 yards of this lovely
yarn.
Next came the decision of what to
knit. I like to
simplify my choices by
making them A or B. In this
case I wanted to knit
a scarf or shawl. I
believe that a shawl
can be about the yarn or it can
be about the knitting. Since
the color is so clear
and compelling, it
would have to be about
the yarn color. If
I knit a complicated
lace pattern, the only
thing anyone would
see would be the stripes
of colors.
In designing the shawl, I wanted to
make sure the piece
was long enough. By
casting on the longest
side, I am ensured of
having a long-enough
shawl and there will
be long stripes along
the shaw, giving it a
more woven appearance.
After a gauge swatch, I cast on and
started a few rows
of garter stitch. I chose
two very simple lacy
looking patterns to give a little bit of interest to the
knitting. I
chose holes just YO,
K2 tog, and the elongated
twisted stitch. These
are simple and horizontal
so they work with the
colors while not competing.
This was one enchanted project from
start to finish. It
all just worked out for
me. I loved the top,
the division was even
(until the end) and the spinning was
soothing and good. While knitting
and deciding on my
simple pattern, I noticed
that the colors were
lining up with the
yarnover holes as well
as the elongated stitches.
Don’t
think I could plan
that one. |
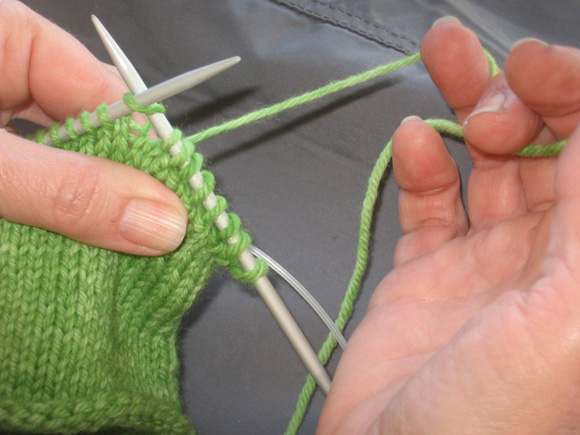
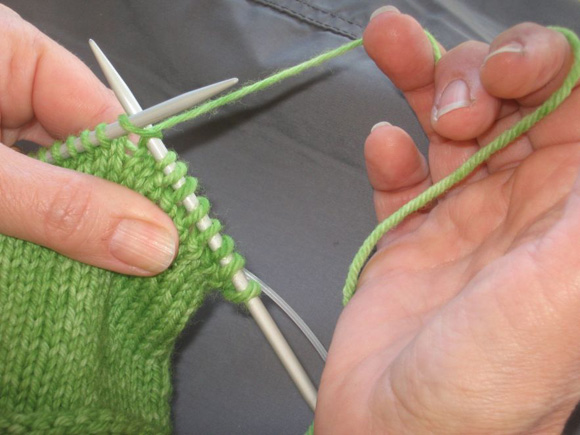
Elongated
Open Garter Pattern (Worked over a multiple
of 2 sts + 5 sts)
Rows 1-6: K all sts.
Row 7: K3, [yo, k2tog] to last 2 sts, k2.
Rows 8-14: K all sts.
Rows 15 & 16: K3, work Long Twisted Knit stitches
to last 3 sts, k3.

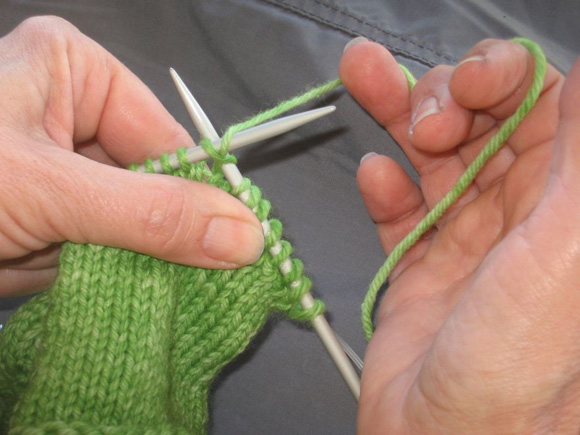
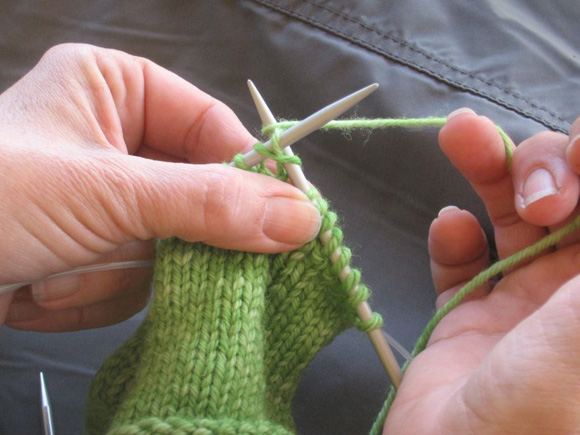
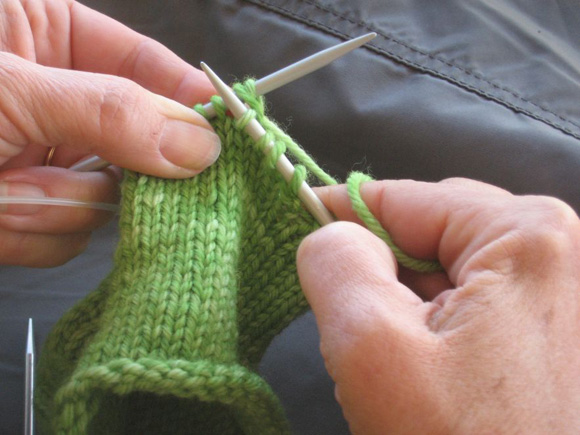
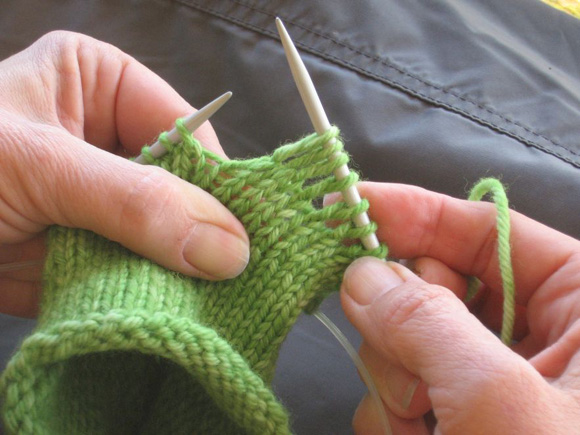
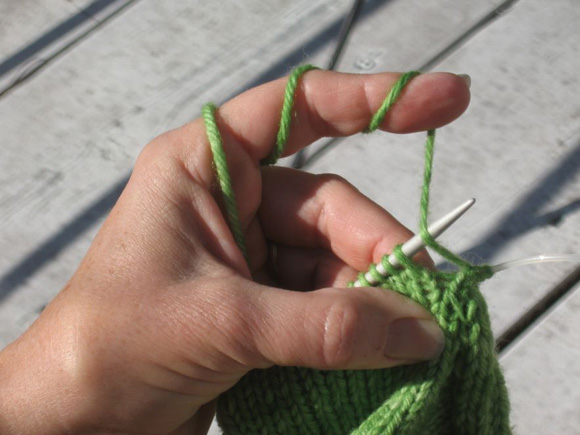
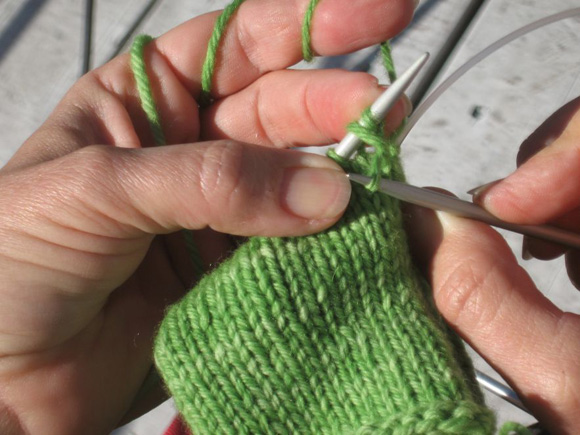
Long Twisted Knit Stitch
This triple-wrap method produces
a firm, twisted, elongated
knit stitch. It's a
bit fiddly to master, but moves quickly once you've got
the hang of it. The resulting stitch will be longer
than usual, and have a
twisted base.
For knitters who throw or work
English/American style:
Insert the right needle
to knit and wrap the yarn
around the needle, as normal. Then
bring the yarn towards you and over the left needle,
and again wrap it around the right hand needle as normal. Pull
only the very last wrap
through the stitch on the
left needle.
See also the “Double Elongated Stitch” in Mary
Thomas's Book of Knitting
Patterns.
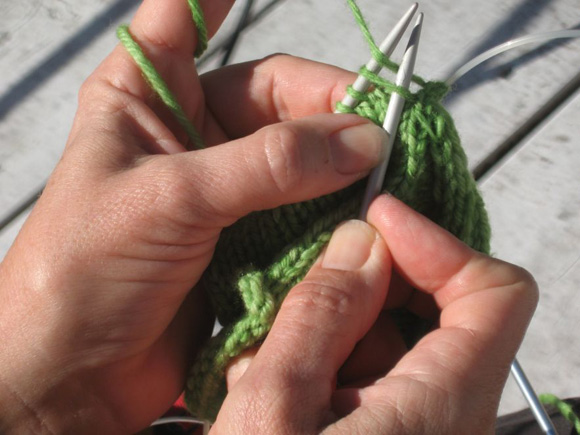
For knitters who work Continental style:
Bring the working yarn in front
of the left needle (as
if to purl). Bring the right needle over the
working yarn, and insert
the tip of the right needle through the first stitch on
the left, as if for a knit stitch. Insert
the right needle into the
stitch as if to knit, bringing the tip of the needle
over the working yarn on its way through to the back. Make
sure the point of the right needle lies over the working
yarn. Drape the
working yarn over the left
needle, and wrap it around the right needle as normal. Pull
only the very last wrap
through the stitch on the left needle.
See also the discussion of “Long,
twisted knit stitches” in Knitting in the Nordic
Tradition, by Vibeke Lind. |