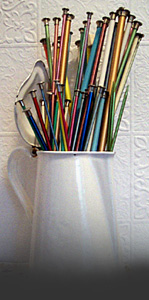
Circular needles
One of the first knitting books that fell into my hands -
I'm one of the lucky ones - was Knitting
Without Tears by Elizabeth Zimmermann. She called
circular needles her "particular pets" and provided
us with pattern after pattern for seamless sweaters
made on circular needles.
Since then, I've done most
of my knitting in Norway where traditional
two-color stranded sweaters are worked in
the round, then sewn and cut for the front
and arm openings [known as "steeks"
to American knitters... Norwegians just call
it finishing a sweater]. As a result,
I have exactly 1 pair of straight knitting
needles, of which one is a US size 5 and the
other a US size 8. The one time I tried, on
a whim, to buy straight needles in Norway,
I was told they were no longer selling them
since there wasn't any point to using them.
Circular needles arrived on the
scene early in the 20th century and eliminated the
need to employ multiple sets of long double-pointed
needles to knit in the round. But circular
needles aren't just for knitting circularly. Anything
that can be knitted on two straight needles can
be knitted back and forth on circulars just as easily
and with less shoulder and wrist strain. When working
flat with circulars the weight of the knitting slides
around the connecting tube, closer to the knitter's
center of gravity, rather than out to the sides
in the pendulum fashion of working with straight
needles.
Most circular needles are
constructed to have non-flexible ends that
look like any other knitting needle at the
pointy end, then taper to a connecting tube
of plastic. The length, which is measured
from tip to tip, ranges from 12 inches, which
I'm particularly fond of for making socks
and mittens, up to an enormous 60 inches which
I assume could be used to knit an entire bedspread
in one piece, if you were strong enough to
hold it up.
For sleeves, caps and the
bodies of children's sweaters, I use 16-inch
needles. 24 to 32 inches are good lengths
for the bodies of most adult sweaters. The
most important thing is that the work has
to be able to slide easily around the needles.
For this reason, you'll want to make sure
the length of the circular needles is somewhat
less than the circumference of whatever you're
knitting. Keep in mind that the first rounds
of knitting circularly are usually a little
awkward because of the nearness of the cast-on
edge to your hands.
That said... it will
likely be necessary to employ double-pointed
needles for sleeve cuffs [before increasing]
and cap crowns [during decreasing]. There
is no set rule for when to change to double
points; whenever the stitches stop sliding
easily around on the circulars is the proper
time to change. And while it is possible to
have too many stitches for any given circular
needle, the number of stitches you can fit
is surprisingly high, especially with thinner
yarns. When you find your stitches so scrunched
up that it's difficult to manage them, run
out and get yourself some longer needles.

Join, placing marker to indicate beginning of round and being careful
not to twist work.
After casting onto circular needles, lay them down on a flat surface and
be sure that the bottom of the cast-on stitches
are all lying on the inside of the circle.
When you have lots of stitches on the needle, this can be a difficult,
but is nevertheless crucial. If you begin
to knit with stitches that spiral around the
circular needle [in other words, are "twisted"],
there's simply nothing you can do about it
except rip out and start over once you realize
the problem. A few rows on, you'll see a pronounced
twist in your work. Really -- rip and start
again.
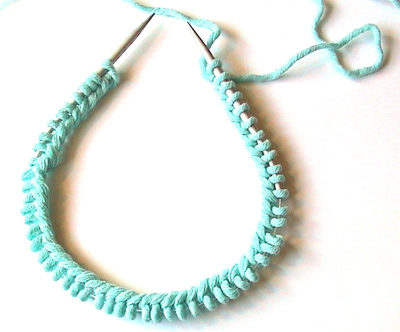
"Joining" is just a fancy way of telling you to attach the first
and last stitch you cast on so that you'll
be knitting an uninterrupted tube. First,
arrange the cast-on stitches so that they
are evenly spaced along the length of the
circular needles. Make sure that the stitches
are close to the tips of both ends with the
working yarn coming from the stitches on the
right-hand needle. Insert the right-hand tip
into the first stitch on the left-hand needle
and voila! you've created a tube.

When you knit in the round, it's
a good idea [and often essential] to mark the beginning
of the round by slipping on a stitch marker before
you join your work. Sometimes a pattern will call
for an additional stitch marker to be placed at
the end of what would have been a flat row [think
of where the side seams would be, if you were working
flat]. You'll find this point of reference especially
important when it comes to shaping, changing colors
or working any other design feature.
To make the joining point a bit neater, try the following:
- If you're
using a long-tail cast on, make sure you
make the slip knot so that the knot gets
tighter when you pull on the tail rather
than the working yarn.
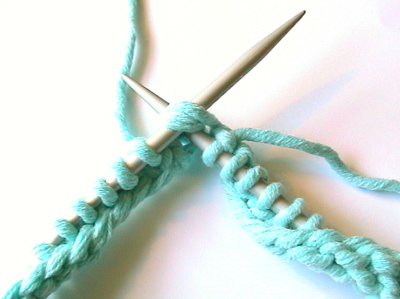
- Cast on one
more stitch than called for in your pattern;
when joining, slip the extra stitch from
the right-hand needle onto the left-hand
needle and knit them together [see below].
- Use the cast-on
"tail" to go through the bottom
of the first cast-on stitch before weaving
it in on the inside of the knitting.
Knitting flat with circular needles
To knit back and forth with circular needles, simply cast on and treat
the two ends of the circular needles as you
would two straight needles. After casting
on, simply turn the work and work back over
the last cast on stitch. When you reach the
other end, switch the needles so that you're
holding them in the opposite hands and continue
on with the next row. This is great for knitting
on the road -- you can't drop a needle when
it's attached to your work!