|


![Read exactly what FREE PATTERNS really means...respect our designers and authors rights [and thank you]](../images/OFFnavLEGAL.gif)

 
|
|
 <click
for more! <click
for more!
 
|

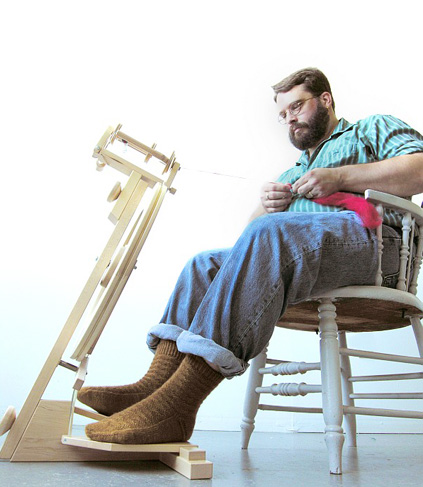 by Danny Ouellette by Danny Ouellette

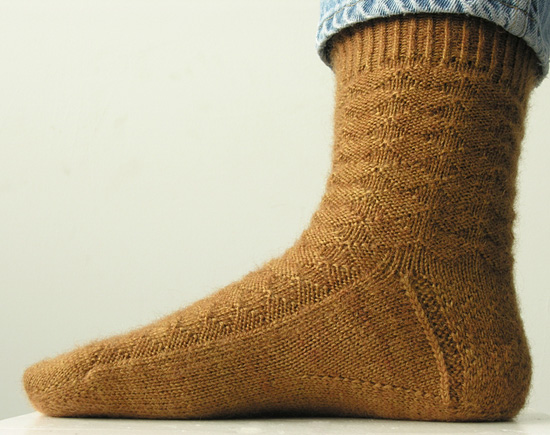
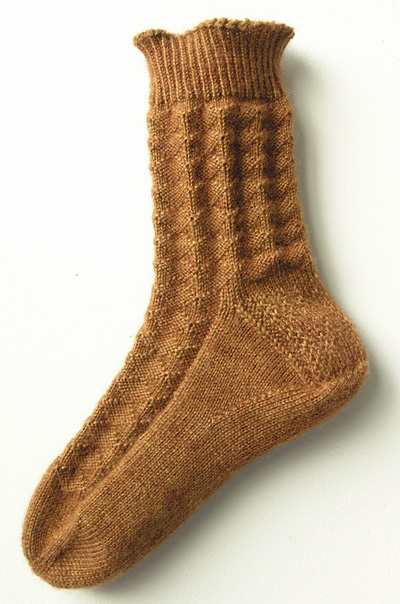
Comfort, warmth, elegance and intriguing construction details; these are things I love in a sock pattern. These socks came about from a meeting of inspirations from a friends socks and a new yarn from a company I love. Back in January 2007 my friend Ted Myatt posted
in his blog a detailed description of his standard socks.
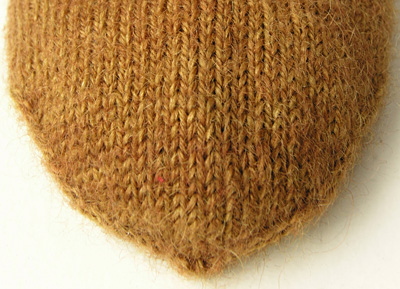
I took his description and played my usual "What if..." game with them. I decided to make my version toe up, to use the gusset shaping along the bottom of the foot, and make the heel with the Eye of Partridge pattern with garter stitch edging. Working toe up allows me to make the legs as long as I want, or as long as I have yarn for, which is more often the case. Then I found that one of favorite yarn companies, Wellington
Fibres, had come out with a fingering weight version of their wool and mohair yarn. Perfect for making warm and comfortable socks.
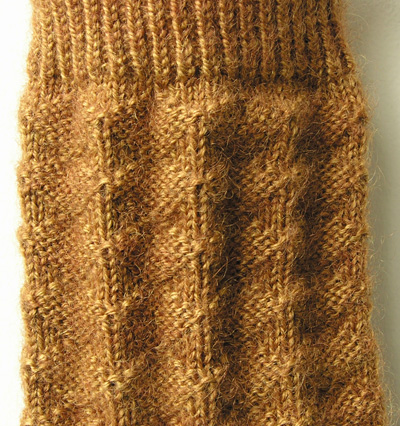
Within days of getting their new yarn these socks were cast on and well on their way. I chose a simple diamond pattern that shows off their yarn nicely and also creates an interesting waffling effect in the knitted fabric. The final construction detail was using a new wrapped short row heel turning I had been working on. Stitches for the heel are made by making stitches in the wraps and working the wraps and wrapped stitches together. No more guessing where to pick up stitches and the transition to the heel is very smooth. |  model: Danny Ouellette photos: Bill Pusztai model: Danny Ouellette photos: Bill Pusztai
| | | |
| Adult Small [Medium, Large] Shown in size Medium. | |
|
| Foot and leg circumference: 7[8, 9] inches; can comfortably stretch up to 0.5 inch larger | |
|
Wellington
Fibres 3 ply fingering weight [60% Wool, 40% Mohair; 250yd/229m
per 95g skein]; color: Golden Honey; 2 skeins
1 set of 5 2.5mm double-point needles
Note:
2.5mm needles are between US sizes #1 and #2
Two
stitch markers
Tapestry
needle
Optional:
1 set of 5 US #2/2.75mm or US #3/3.25mm double-point needles for leg, if a looser leg is desired
|
|
|
| 34 sts/46 rows = 4 inches in stockinette stitch | |
|
[Knitty's list of standard abbreviations and techniques can be found here] |
|
Directions for the Lighter Circular Beginning
can be found here (scroll
down).
All slipped sts are slipped purlwise unless otherwise directed.
M1R
Insert the right needle from front to back under the horizontal strand which lies between the last stitch worked and the next stitch. Place the loop onto the left needle and knit into the front of the loop.
M1L
Insert the left needle from front to back under the horizontal strand which lies between the last stitch worked and the next stitch. Knit into the back of the loop.
Working wraps together with wrapped sts:
When knitting:
Slip the wrapped stitch onto the right needle. Use the left needle tip to pick up the wrap, then slip the wrapped stitch back to the left needle. Knit the wrap together with the stitch.
When purling:
Slip the right needle tip under the back of the loop wrapped around the next stitch and place it onto the left needle. Purl the wrap together with the stitch.
1x1 Twisted Rib (Worked over an even number of sts):
Round
1: [P1, k1 tbl] around.
Repeat this round for 1x1 Twisted Rib.
Wrap & Turn [W&T] – used when
working short rows
To wrap and turn on a RS row, knit to point
specified in pattern, bring yarn to front of work between needles,
slip next stitch to right-hand needle, bring yarn around this
stitch to back of work, slip stitch back to left-hand needle,
turn work to begin purling back in the other direction.
To wrap and turn on a WS row, purl to point specified in pattern,
bring yarn to back of work between needles, slip next stitch
to right-hand needle, bring yarn around this stitch to front
of work, slip stitch back to left-hand needle, turn work to begin
knitting back in the other direction.
Elastic Bind Off:
K first st and pull right needle to elongate st slightly. *Insert
left needle into back of st on right needle, insert right needle
knitwise into next st on left needle and draw it through st on
right needle, k this st and allow both sts (elongated st and
st just knit) to drop from left needle. Pull right needle to
elongate st slightly.
Repeat from * until all sts have been bound off.
Note about turning the heel:
Sometimes the stitches along the sides of the heel turning can
be a bit loose. You can tighten these up while working the last
2 rows before working the heel flap.
After the first of these 2 rows is completed, using another needled,
start at the other end of the heel needle and pull the loops
one at a time to tighten them, moving the excess yarn to the
end of the heel needle.
After the next row is completed, tighten the stitches in the
same way, beginning at the center of the needle and working outwards.
Notes on working with two circular needles or Magic Loop method:
As written, these socks are worked using double-point needles.
If desired, they may be worked using two circular needles, or
one long circular using the Magic Loop method. My sample socks
were knit at the same time using the Magic Loop method.
Place stitches from Needles 1 and 2 onto one circular needle
or the first side of the loop, and stitches from Needles 3 and
4 onto the second circular needle or the second side of the loop.
To work the heel, leave all stitches on the second circular needle
or second loop side, and work the heel as written.
To work the leg, rearrange stitches so that the stitches from
the new Needles 1 and 2 are on one circular needle or side of
the loop, and stitches from Needles 3 and 4 are on the second
circular needle or side of the loop.
| |
|
 TOE TOE
Using the Lighter Circular Beginning, CO 9 sts. Place 5 sts on one needle and 4 on another, and k 1 round. Pull yarn tail to draw sts together.
Set-up Round: [K1, M1R, k1] onto Needle 1; [k2, M1L, k1] onto Needle 2; [k1, M1R, k1] onto Needle 3; [k1, M1L, k1] onto Needle 4. 13 sts.
Increase Round: K1, M1R, k to end of Needle 1; k to last st on Needle 2, M1L, k1; k1, M1R, k to end of Needle 3; k to last st on Needle 4, M1L, k1.
Repeat Increase Round 4[5, 6] times more. 33[37, 41] sts.
Work Increase Round.
K 1 round.
Repeat these 2 rounds 7[8, 9] times more. 65[73, 81] sts. Needle 2 holds 17[19, 21] sts, all other needles hold 16[18, 20] sts.
 FOOT FOOT
Beginning of round is located at left side of foot. Sts on Needles 1 and 2 form instep of sock; sts on Needles 3 and 4 form sole.
In the next round, the instep pattern will be established for the foot.
Sizes S, L Only:
Next
Round: Work sts on Needles 1 and 2 following Foot
Chart for your size; k all sts on Needles 3 and 4.
Size M Only:
Next
Round: K2, work following Foot Chart for your size to last 2 sts of Needle 2, k2; k all sts on Needles 3 and 4.
All Sizes:
Work in pattern as set until work measures approx. 3.5[4, 4.25] inches less than desired foot length, ending with Round 4 or 8 of chart pattern.
GUSSET
Set-up Round: Work sts on Needles 1 and 2 in
pattern as set; k5[6, 7], M1R, place marker, k22[24,
26], place marker, M1L, k5[6, 7].
Work 1 round in pattern as set.
Increase Round: Work sts on Needles 1 and 2 in pattern as set; k to first marker, M1R, slip marker, k to next marker, slip marker, M1L, k to end.
Repeat these 2 rounds 11[13, 15] times more. 89[101, 113] sts.
Needle 1 holds 16[18, 20] sts, Needle 2 holds 17[19, 21] sts, Needles 3 and 4 each hold 28[32, 36] sts.
HEEL
Remove markers when working next round.
Next Round: Work sts on Needles 1 and 2 in pattern as set, k first 18[21, 24] sts from Needle 3 onto Needle 2; k last 10[11, 12] sts from Needle 3 and first 9[10, 11] sts from Needle 4 onto one needle for heel, W&T but do not slip wrapped st back to left needle (wrapped st remains on Needle 3). Slip last 18[21, 24] sts from Needle 4 to Needle 1.
Needle 1 holds 34[39, 44] sts, Needle 2 holds 35[40, 45] sts, Needle 3 holds 20[22, 24] sts. Heel is worked back and forth over sts on Needle 3, beginning with WS facing.
Row 1 [WS]: Sl wrapped st to right needle, p to last st on needle, W&T.
Row 2 [RS]: K to 1 st before previous wrapped st, W&T.
Row 3 [WS]: P to 1 st before previous wrapped st, W&T.
Repeat Rows 2 and 3 4[5, 6] times more. There
are 6[7, 8] wrapped sts at each side of Needle 3, with
8 unwrapped sts in the center.
In the next 2 rows, sts will be increased by working into the wraps of the wrapped sts before working the wraps together with the wrapped sts. When picking up and working sts at the end of each row as instructed, pick up 2 strands of yarn instead of 1; this will close the space at the side of the heel very tightly.
Next Row [RS]: Sl 1, k2, k2tog, k3, k wrap together with wrapped st, [k into back of next wrap, k this wrap together with wrapped st] 5[6, 7] times, pick up and k 1 st in space between Needle 3 and Needle 1. Turn work. 25[28, 31] sts on Needle 3.
Next Row [WS]: Sl 1, p18[20, 22], p wrap together with wrapped st, [p into front of next wrap, p this wrap together with wrapped st] 5[6, 7] times, pick up and p 1 st in space between Needle 3 and Needle 2. 31[35, 39] sts on Needle 3.
HEEL FLAP
In the next set of rows, sts at each end of Needle 3
will be worked together with sts from the edges of Needles
1 and 2. For ease of working, slip a few sts at a time
from Needles 1 and 2 to Needle 3, as needed.
All slipped sts are slipped purlwise unless otherwise directed.
Row 1 [RS]: Sl 1 knitwise, k2, [k1, sl 1] 12[14, 16] times, k3, ssk. Turn work.
Row
2 [WS]: Sl 1, k2, p25[29, 33], k2, p2tog. Turn work.
Row
3 [RS]: Sl 1 knitwise, k2, [sl 1, k1] 12[14, 16] times, sl 1, k2, ssk.
Row
4 [WS]: Work as for Row 2.
Repeat these 4 rows 8[9, 11] times more.
Size M Only:
Work Rows 1 and 2 once more.
All Sizes:
64[72, 80] sts remain.
Needle 1 holds 16[18, 20] sts, Needle 2 holds 17[19, 21] sts, Needle 3 holds 31[35, 39] sts.
 LEG LEG
With RS facing and new needle, sl 1 knitwise, k first
14[16, 18] sts of Needle 3. This point (center of heel
sts) will now be the beginning of the round, and the
next needle (which holds the remaining 16[18, 20] heel
sts) will now become Needle 1.
Resume working in the round as follows:
Next Round: K to end of Needle 1; work sts on Needles 2 and 3 in pattern as set, k all sts on Needle 4.
Repeat this round until you have completed Round 8 of Foot Chart.
Begin working all sts following Leg Chart for your size.
If desired, switch to larger needles after a few inches to achieve a larger leg circumference.
Continue in pattern until work measures approx. 1.75[1.75, 2.25] inches less than desired length, ending with Round 8 of chart.
Work Round 1 of Leg Chart 4 times.
CUFF
If you used larger needles for leg, switch back to smaller needles.
Work 1.5[1.5, 2] inches in 1x1 Twisted Rib.
BO all sts using Elastic Bind Off. Break yarn, draw through last st and pull tight. | |
|
Weave in all ends. Wash
socks and block lightly. |
|
| Danny Ouellette lives in downtown Toronto, where he is a database administrator by day, and a fiber addict by night. Knitting, spinning, dyeing and weaving; there just isn’t enough time in the day for it all, or space in his fiber room. He has a curious mind, always looking for new things to try and new directions to go, always asking "What next?" and "What if....".
You can find out more about him and his fiber habit online here and
here.
|
| Pattern
(c) 2007 Danny Ouellette. Images
by Bill Pusztai of Bill
Pusztai Design. Contact Danny |
|
|
|
|
|