Getting more mileage from
a beautiful roving
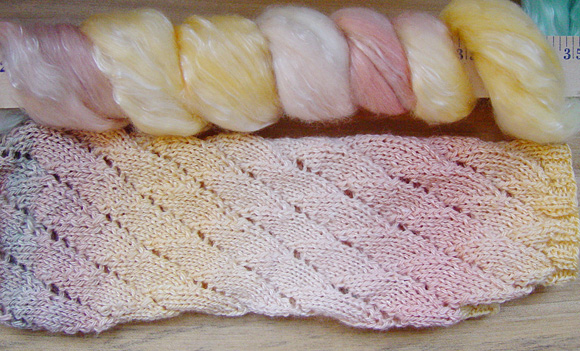 |
| I had to draft two
sections of roving simultaneously to get
these long subtly shifting color bands. |
You’ve been there…you buy (or paint)
this gorgeous roving. The colors graduate one
to the next…so subtle, so magical. Then
you up and spin it to get a variegated, stripy,
spotty, kinda muddy yarn that ruins the whole
effect. So you try to spin the sequence as a
single or chained single yarn but the colors
repeat too often. The bands just aren’t
long enough when you knit them up. Stripes again,
basically.
In case you haven’t already figured this
one out, here’s how to get the effect you
really want. To keep it real, I’ll illustrate
the technique within the framework of a project,
an original fingerless
glove pattern so you can
see just how far my fiber will go. Spinning is
iffy. We all know that. We wouldn’t do it if we weren’t risk
takers, right?
This technique is all
about fiber preparation. The more care you
put in, the more beauty you get out! And it’s designed for a repeating
color sequence, so you if you try to use it with
randomly painted roving you’ll only blend
the colors further. Of course you could use that
to your advantage too, depending on your desired
outcome.
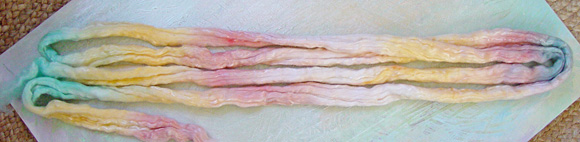 |
| my repeat pattern |
First I’ll lay out my roving to find the
repeat pattern. As you can see, I have a little
more than four lengths of the same color sequence
in my 3 ounce 50/50 merino/tencel roving. I’ll
have to set aside the extra bits of roving that
don’t fit into the repeat sequences and
that’s going to leave me with about 2.8
oz. I’m pretty sure I can get a fingerless
glove out of 1.4 oz of fiber (remember the tencel
is heavier than the wool so it will take more
weight of fiber than wool alone), so I’ll
separate my roving into four repeat lengths,
two for each glove.
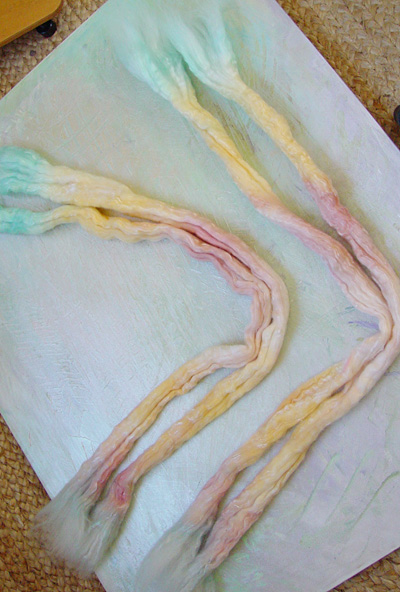 |
| two pairs of repeat
sequences |
To make my fiber go as far as possible I’ll
be careful when I divide my lengths of roving.
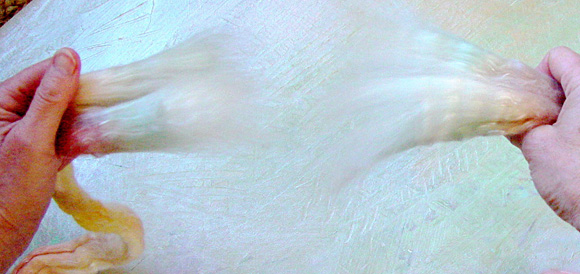
First I’ll fluff the roving sideways to
loosen the fibers’ hold on each other (break
it up, guys, party’s over) so I can pull
the roving apart right where I want.
 |
| fluff it |
Then I’ll bust the roving into four equal
lengths by pulling lengthwise. I’ll position
the place where I want the roving to separate
midway between my hands and I’ll position
my hands just a little farther apart than the
average staple length of the roving, which for
merino tencel is about six inches. If I separate
my hands too far apart, the roving may come apart
somewhere other than midway between my hands.
If I position my hands too close together, the
roving will set its teeth and I’ll wish
I was Wonder Woman.
Once my hand placement is correct, I just haul
off and pull.
 |
| bust it |
Sometimes no matter how hard I try, the rovings
won’t always divide evenly. So I’ll
lay them side by side and pull any extra from
the ends to even it all out. If I wanted my
gloves to be exactly alike (good goddess, life
is too short for me to worry too much over
this fine point) this extra step is really
important. If you want fraternal twins, don’t
bother with this step, as it only wastes fiber.
At this point if I tried to spin the pair of
roving sections together I’d be in deep
doo doo. To get subtle sequence shifts and
clean colors in between it’s necessary
to predraft the pair into a quasi pencil roving.
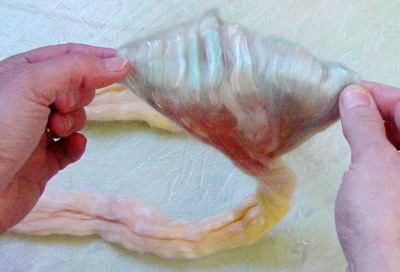
Before I can do this I need to fluff, fluff,
fluff. As you can see in the photo the roving
now appears at least three times its former
diameter. Once it’s fluffed to this point,
lay one section on top of the other, lining
the color sequences up side by side so that
they match up, and fluff the entire thing as
a unit. This way the fibers will flow more
continuously when you start to pre-draft.
 |
| fluff again with
attitude |
(I can’t believe
she pre-drafted the whole thing)
Now’s the time I put on some music that
sits me back in my seat. It takes a while to
pre-draft this amount of fiber (especially when
the fiber is a merino/tencel blend…or
silk for that matter) so I want to give myself
plenty of time. I also need a box or a tray to
hold the pre-drafted fiber, something I can transport
the fiber from my pre-drafting station to my
wheel. (If I tried to pre draft this at the wheel
I’d get all antsy and want to spin it.
Do I know my process or what?) Once the fiber
is in pre-drafted form it is much more delicate
and there will (not may, will) be places where
the roving wants to come apart. Best to cover
my rear ahead of time and pre draft it onto a
surface where it can stay all lined up in its
holding pattern, ready for the wheel.
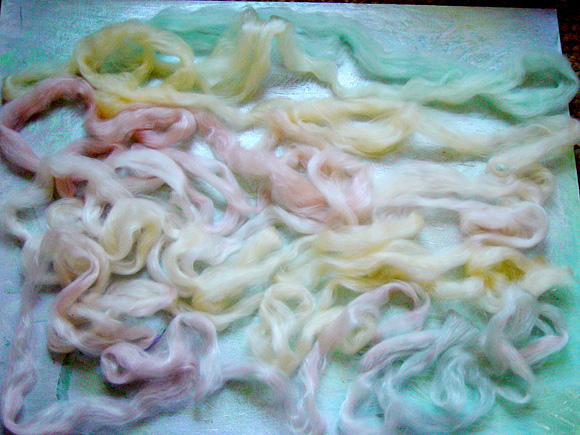
When I’m all set up to pre draft, I grab
the entire roving (pairs should be almost indistinguishable
at this point) and start pulling the fibers from
one end. I only grab what I can hold with my
thumb and forefinger and I pull them slowly and
gently out of the end of the roving. My other
hand has a compassionate chokehold on the main
mass of fibers, my hands just farther apart than
the staple length (like they were when I busted
up the roving). I only want to pull the
fibers of one color at a time, so I keep pulling
until I’ve drafted all the fibers of one
color before segueing on to the next. You’ll
have to pull from the center and the sides…so
basically, if you want yellow, pull on yellow,
until all the yellow is gone.
 |
| the art part:
pre-drafting |
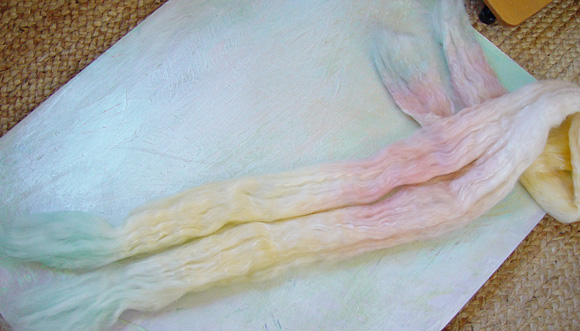
By the time I’m done,
my roving will look like this:
See
the color sequence?
If you want to make identical gloves, predraft
the other pair now into a separate box or tray
(or table where you can move it onto a tray later).
Why? By now you’ve developed a rhythm and
you’ll draft your second pair the same
way. Also, more importantly, you won’t
have to interrupt the rhythm of your spinning
to pre-draft again, thereby guaranteeing your
singles to be of similar thickness for both gloves.
No matter how careful you are, this makes a difference
in your spinning (of course if you are careful,
you probably know this).. For the sake of illustration
I spun my pairs at different times so I could
make that nifty photo at the beginning of the
article. So the second time around my yarn was
a whiff thicker and it made a huge difference
in the thickness of my finished yarn and also
in the length of my colorbands.
Time to breathe! The hard part is over. Time
to spin.
And time to make a choice.
Mine was to spin a chained single (aka Navajo
plied) yarn, mainly because I tend to spin
merino/tencel very fine and it is more durable
as a plied yarn, at least for me. You can spin
your roving as a single if you want to. It’s
up to you. For this pattern the finished yarn
should be in the neighborhood of 13-14 wpi.
Spin one of your pairs
on one bobbin, the other pair on another bobbin.
This way you can keep your color sequences
separate when you go to ply and also to knit,
especially if you want them identical. Spin
one right after the other if you can. If you’re
going to ply, you can do that later. Ply them
and skein them one at a time.
Here’s my single
on the bobbin. Cool huh?
 |
| my color sequence
on the bobbin |
If you are dead set on a two ply yarn (you run
the risk of colors not lining up exactly with
this method), don’t pre-draft the pairs
as one unit as above, but pre-draft each repeat
section separately, taking a lot of care to
pre draft them to the same length. You can
do this by drafting a little of each at a time
on side by side trays so you can keep track.
Spin each length on a separate bobbin in the
same color sequence, that is ABC ABC., then
ply the two singles together. Although your
colors may not line up flawlessly, for the
most part like will ply with like and the segues
between colors will look like they were supposed
to be there, especially if your color changes
are subtle.
Twist and balance…always a consideration.
To balance your singles or chained singles yarn,
wash your skein as usual, blot out excess water,
then hold the skein under tension and rotate
the skein hand over hand (kind of like you were
pedaling a bicycle with your hands) until you’ve
gone the whole way around the skein. Then back-pedal
the whole thing in the other direction. This
will remove most or all errant energy of twist.
Lay the skein flat on a towel to dry. Unless
you started with overspun yarn, you should have
a nice tame skein.
When you wind your skeins
for knitting. Remember to wind starting with
the same end of the skein if you want your
gloves identical. If for some reason your skein
is the same color at both ends but the sequence
in between isn’t an exact
mirror, mark your skeins when you tie them for
finishing by putting two knots in one end of
each skein, one knot in the other. Wind both
skeins into balls from the same knot number.
the thumb
If you want your thumb to fall into sequence
with the rest of the glove there are a couple
things you can try.
After you predraft the roving completely, Take
some of the color/s you think will end up at
the thumb of the glove and hold them aside. You
only need about 6 yds of yarn for the thumb…that’s
not much.
If your color sequences are nice and long, you
can wait till you knit to the thumb and hold
out 6 yds of yarn. Knit a few rows into the hand
before you take out your six yards, making sure
that at the end of the six yards you’ll
have more of the same color to match the hand.
Either way is risky. You may have to figure this
out as you go, but it could be worth it to you
in the end. It’s totally up to you.
If you want to make something on a larger scale,
like a sweater or shawl, you can get the same
effect by adding more repeat lengths of roving. If
you want the color to go three times as far
you’ll need three times as much roving.
Like 6 repeat sequences. Don’t try to
predraft this entire amount like we did for
the glove…that would be insane. First,
predraft each repeat so that all the colors
are about the same length. Then lay them out
on a big table and line all 6 up side by side.
You’ll probably have to snake them back
and forth a little. Once you get the colors
to match up with all 6 sections, THEN predraft
them as a unit.
There are other ways
to do this…but for
that you’ll have to take my class.
Of course if you are a dyer (or know one who
will do custom work) you can dye longer color
bands onto your roving in the first place.
other fibers
I used merino/tencel. So what about other fibers?
Since wool is considerably lighter than tencel,
you can probably get a pair of gloves from
approx 2 oz of wool. Remember that my shortie
and longie gloves weight the same…the
only diff is in the spinning.
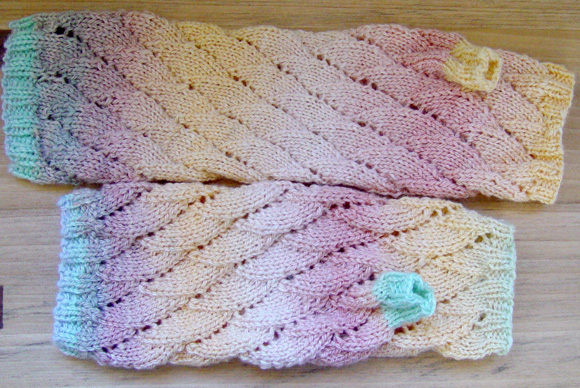 |
| Both gloves
weigh the same and were spun from the
same length of roving. The thicker single
plied into a thicker yarn with proportionately
less yardage. |
|