
 DROPPED
STITCHES
DROPPED
STITCHES
Everyone loves Clapotis,
Kate Gilbert's runaway smash hit pattern
featuring dropped stitches from Knitty's fall
2004 issue. I've been similarly enamored with
Jillian Moreno's Bob & Weave. I love the look of
dropped stitches, and the idea of weaving them
with gorgeous ribbons.
What's held me back from knitting
them, I think, is the idea of miles of stockinette
stitch -- that and realizing that I'd soon be
undoing, what, 20% of my hard work? So it came
to me that I could cheat. I could let someone
else do the grunt work. Why not find something
already knit and then drop the stitches out?
dismantling
I hightailed it down
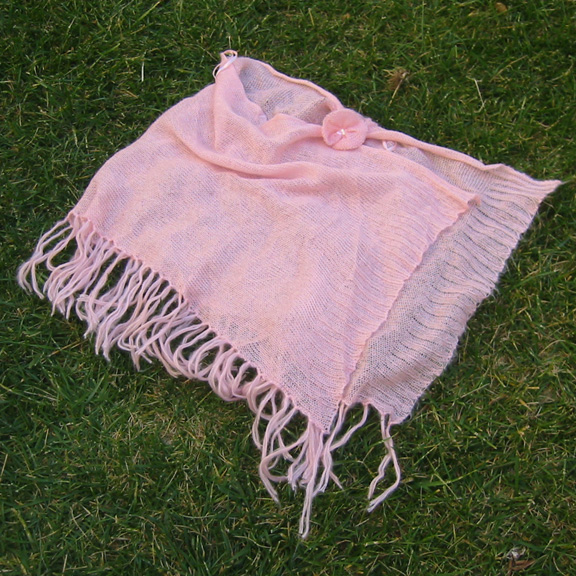
to the local thriftshop and found plenty of
options. I chose a poncho made from a single
large rectangle of mostly stockinette in a mohairy
acrylic that looked fairly easy to dismantle.
Since ponchos and such were last year's ubiquitous
fashion trend, chances are you'll find plenty
to choose from. I was in and out in 15 minutes.
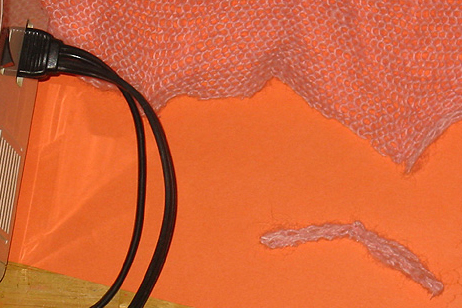
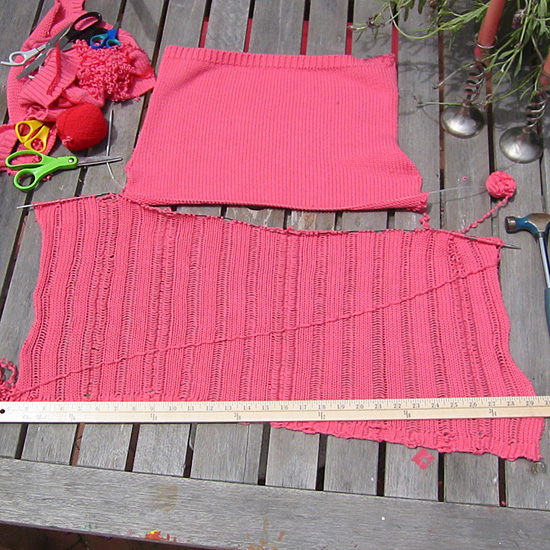
Dismantling
the portion where the rectangle was
sewn together and removing the tag proved
to be the most taxing part of the assignment.
In the end, I just cut them out and
sewed over the missing chunk with the
zigzag on the sewing machine. I used
a contrasting thread so you could see
it, dear readers, but with matching
thread it will be hard to notice.
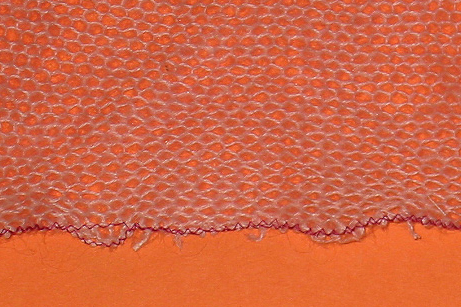
Once the piece
was there, nice and flat, I looked at
the ends and figured out where the bound
off edge was. I was able to pluck it
out and just start unknitting, but in
some cases you may need to cut the bound
off edge open and unravel a couple of
rows. They do mysterious things in the
sweater factory sometimes! Once you
get your stitches freed, place them
on a circular needle that seems about
right for the gauge of the yarn. Bigger
is better than smaller to avoid a too-tight
bind off.

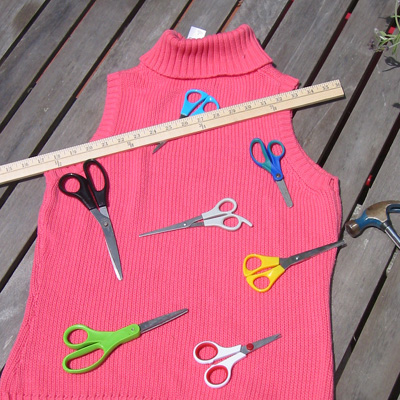
Seized with
this inital success, I grabbed a sleeveless
turtleneck in cotton and thought it
too might have drop stitch possibilities.
Chopping it off below the armholes would
yield a couple of rectangles. If I dropped
stitches they'd get wider. And there
are plenty of great poncho/wrap/stole
variations to be had from a couple of
decent rectangles.
For
this, choose a finished sweater or top that
has seams that you can rip out. The bigger the
sweater, obviously, the more surface area you'll
have to work with. Turn the thing inside out,
stretch out the seam with your fingers and look
carefully at the stitches. If the look like
they are sewn together with a sewing machine,
pass on it. Look for the telltale "ladder"
either in the same yarn the sweater was knit
with, or with some sort of thread.
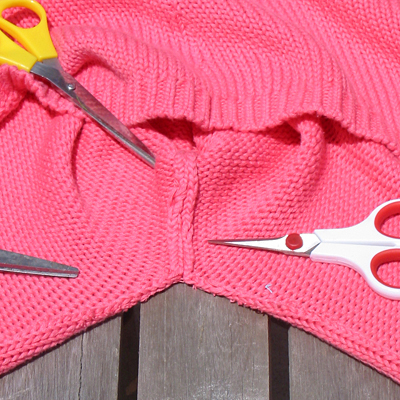
Use your scissors
to carefully cut the ladder. You can
sometimes pull it out, but that's usually
slow and tedious. Use the scissors,
but go slowly and be very careful not
to cut the knitted stitches on either
side.
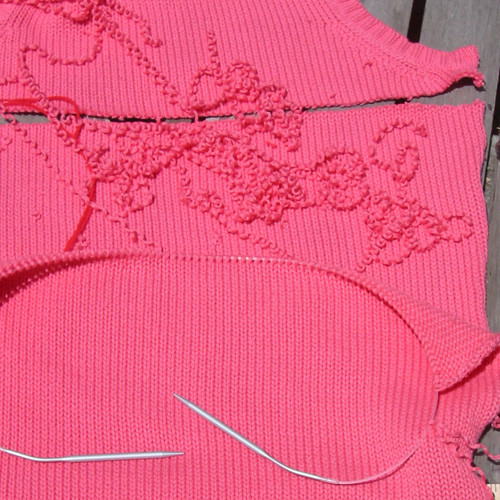
If you do end up cutting stitches, there are
two remedies. The first is to essentially patch
it with a bit of waste yarn from the project
and work duplicate stitch over the cut stitches
and a few neighboring stitches, then secure
the tails well on either side, weaving them
in for several stitches OR to take it to the
sewing machine and take a few quick zigzag stitches
over it with matching thread. The second is
definitely the quick and dirty approach. It
will show a little, but depending on where it
is, you might not care.
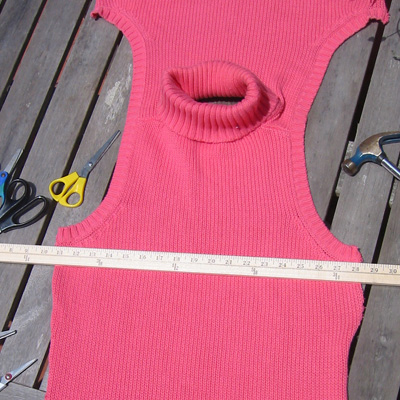
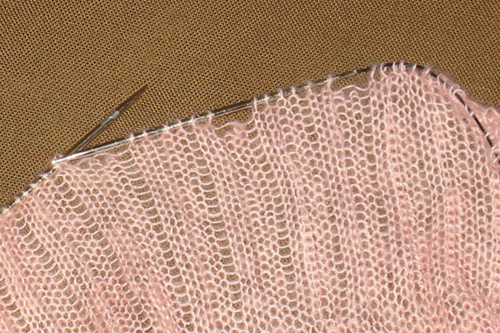
Once
you get the pieces apart, cut each piece
of the sweater straight across just
below the armholes. This should give
you a rectangle somewhere between 10
and 16 inches tall and as wide as the
sweater. If you are a cautious sort,
take a small gauge circular knitting
needle and pick up one leg of each stitch
across one row. Be sure to pick up the
first and last stitches and be careful
to not move up or down a row. Then,
with your scissors, carefully cut a
row or two above the needle. Start plucking
out the bits of fluff and pull at any
end you find until it starts unravelling.
You'll get down to the needle and your
stitches will be sitting there obediently,
all ready on the needle. Keep the ravelled
tail attached to bind off with later.
If
you are not the cautious sort, then
just cut what looks to be a straight
line across one row. Then start plucking
at the yarns at the top creating a pile
of Top-Ramen looking stuff until you
get to the yarn that makes it cleanly
across a row and hasn't been cut. Paydirt!
If you've got a decent tail going, you're
in good shape. Otherwise, you'll want
to rip back another row to be sure you've
got enough to bind off. Then slip the
stitches onto a needle.
dropping
Decide how
often you want to drop a stitch. Since
the light pink wrap had 2 x 2 ribbing
on the ends, I decided to work from
that and drop 2 of every 8 stitches.
Depending on how much of a tail you
have going once you get it on the needles,
you can work forward or backward. Either
work 6 stitches in pattern, drop 2,
work 6 stitches in pattern, drop 2,
or unknit 6 stitches, drop 2, unknit
6, drop 2... The latter approach will
give you plenty to bind off with.
On
the top, all in stockinette, I counted
the number of stitches on the needle
and came up with a pleasing arrangement
of dropped stitches. My sweater had
90 stitches across. I decided to drop
every 5th stitch, so I figured
it'd be a multiple of 5 (knit 4, drop
1), plus 4 more to make it balanced,
I wanted a little extra plain knit on
either side, so I worked out 80 for
my mulitple of 5, plus 4 is 84. The
6 extra stitches I divided into 3 extra
stitches at the beginning and end. So
knit 7, drop 1, *knit 4, drop 1, repeat
from * ending with knit 7.
I
toyed with the idea of varying the dropped stitches
in this piece to create a different look --
maybe knit 4, drop 1, knit 2, drop 1, or something,
but decided to stick to my original, simpler,
drop stitch pattern. When I let the stitches
loose, however, I discovered that, due to some
increasing after the ribbing, or the mysterious
cast-on of the piece, extra stitches dropped
out on their own, leaving a trebled drop stitch
in every other column. Very pleasing, in the
end, but unplanned. Be prepared for serendipity
to be part of your finished piece too!
Because
you don't know exactly how wide the
dropped stitches are going to be, I
prefer dropping them and keeping the
stitches live rather than binding off
at the same time. To do this, unknit
a row and simply drop off the stitches
as you go. After they are dropped, you'll
likely have to encourage them to really
drop all the way down to the cast-on
edge. The top, in cotton, dropped pretty
quickly and smoothly, with only modest
tugging needed to get the last stitches
to fall out. On the other hand, the
mohairy shawl was difficult to work
with, and kept sticking to itself. Fortunately
both yarns were very sturdy, so they
could take a fair amount of abuse.
binding
off
After
the stitches have been dropped out, you'll need
to bind off. How to bind off over the much wider
dropped stitches though? Make sure that you
are using a large enough needle for starters,
especially if you tend to bind off tightly.
You can simply make the stitches over the dropped
stitches wider by making an extra big stitch
just before the dropped stitch. You may have
to do it a couple of times to get it right though.
You can use the technique that Jillian
Moreno did for Bob & Weave. I ended up binding
off using a crochet hook in my right hand, binding
off with it in the usual knit fashion over the
knit stitches and chaining 1 extra stitch over
the single dropped stitches and chaining 4 extra
stitches over the treble dropped stitches.
finishing
Any pattern with dropped stitches benefits
from a good wet blocking. Dunk it or
spritz it, then pat and tug it into
shape and allow to dry flat.
For the two rectangles, you've got a
number of possibilities. My rectangles
from a 19-inch wide sweater ended up
30-inches wide after dropping and blocking.
option
1: Sew the short
ends together to create one long rectangle.
Use as is for a dramatic big scarf/small wrap.
option
2: Sew the short
ends together. Then begin seaming the two long
sides together along one edge starting from
the outside and working in. Stop when you are
10 inches from the seam, to create a 20-inch
hole for the head. This is a lovely assymetrical
poncho with many wearing possibilities. Try
adding fringe to just the straight edge.
option
3: Place the two
rectangles short side to long side in an L-shape.
Seam the two pieces together. Do the same thing
on the opposite side to create a poncho with
a traditional squared shape, but with the strong
vertical lines running in different directions
for visual interest.
option
4: place the two
rectangles with top sides touching. Seam them
up from the outside edges toward the center,
leaving the center 10 inches open, sort of like
a very short serape.
(Okay,
I'm not saying that all these are necessarily
good options. But someone out there
will make a fabulous one of these, just to prove
us all wrong!)
Weave ribbons through the dropped stitches and
add long flowing fringe if desired. What kind
of ribbon? Try Trendsetter's Segue, Colinette
Firecracker or Hana Silk ribbon for dramatic
results. You only paid $4.00 for your thriftshop
sweater. You can afford to indulge in fabulous
ribbon because one skein of any of these has
enough yardage for a whole project. You could
also weave in multiple pieces of a variety of
different yarns from your stash to use up oddballs,
or rip strips from fabric of the appropriate
width.
You can also rip out more of the remaining body
parts of the chopped up sweater, wrap it into
a loose skein, wet it and let it dry to work
out the kinks (hang it up and put a clothes
hanger or two on the bottom end to weigh it
down), then use it to create fringe or crocheted
detailing for your finished piece.


