| 
  by
Amy R Singer by
Amy R Singer

Plastic bags are helping bury our earth in
trash. I do have a stash of reusable
bags in the back of my car to grocery shop
with. But sometimes I forget to bring them
with me when I shop. Now what?
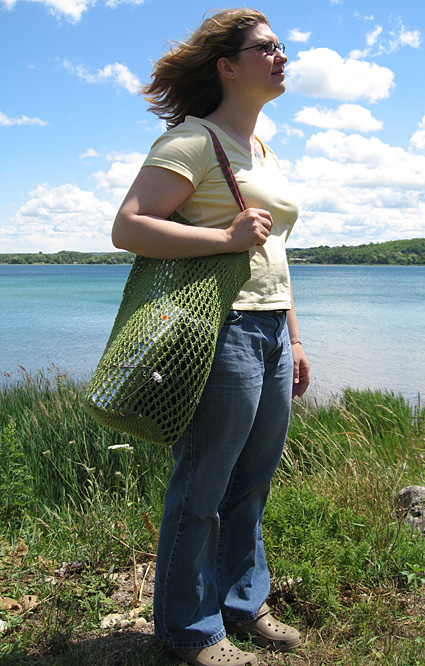
This bag was designed so
I'd never have this problem again. It's made
of 100% hemp, so it won't mildew. The production
of the yarn itself didn't add more chemicals
into our environment, since industrial hemp
requires no pesticides or fertilizers to flourish.
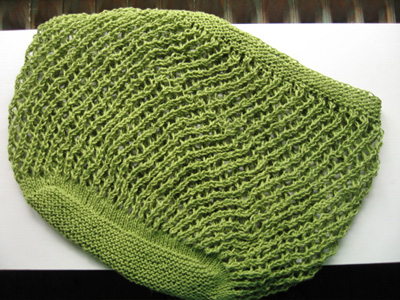
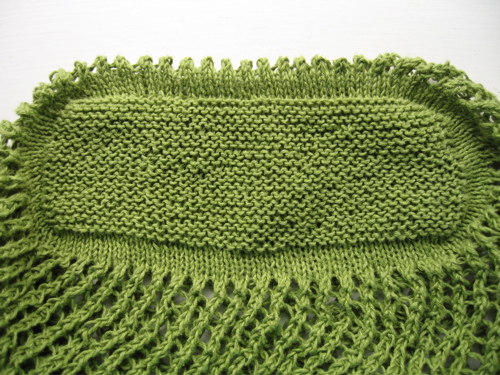
It's worked in a solid garter
stitch at the bottom, where all the stuff I
buy will sit, with a little smooth lip around
the base in case little things want to try
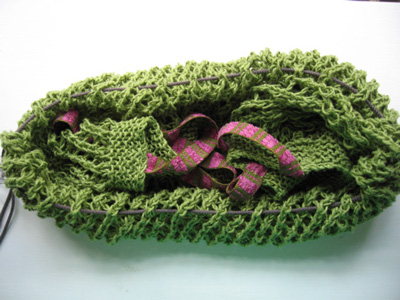
to escape. The mesh stitch lets it expand almost
infinitely, but keeps the bag as light as it
can possibly be. And it folds up into itself
and can be tucked your purse or
backpack, so you're never without it.
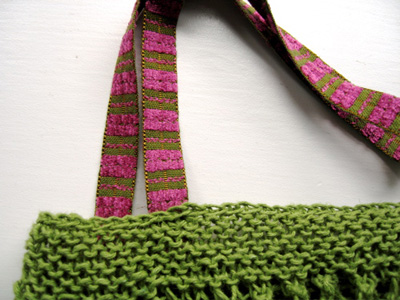
For the handles, I decided to use affordable
and sturdy twill tape that would hold its shape
and not be a barrier to getting the bag done
in my lifetime. [I don't have a stash of vintage
ribbon to dig through.] But when I got to the
shop, I found a perfect match with the fuschia/green
chenille ribbon shown here, and I couldn't resist.
Ordering information is below if you want what
I got. |
 Hempforknitting
allhemp 6 [100% hemp; 165yd/150m per 100g skein];
color: 019 Sprout; 2 skeins Hempforknitting
allhemp 6 [100% hemp; 165yd/150m per 100g skein];
color: 019 Sprout; 2 skeins
24-inch US #5/3.75mm circular needle
24-inch US #10.5/6.5mm circular needle
1.3yds/1.2m Mokuba ribbon, art#4302, 18mm
wide, color 5 [for handles]
1.65yds/1.5m Mokuba cord, art#8100, color 54
[for drawstring closure]
Note: Mokuba offers mail order service. Read finishing instructions
before purchasing ribbon.
Phone 416.504.5358; Fax: 416.504.7318
1 stitch marker
large-eye darning needle
sewing needle
|
|
Base
With smaller needles, cast on 44 sts.
Work in garter stitch until piece is 3.5" tall,
ending after a WS row.
Now turn the corner, and start picking up
stitches along the short side of the bottom
[14 sts], turn the corner again and pick
up 44 sts from the remaining long side of
the bag, turn the final corner and pick up
the last short side's sts [14 sts]. 116 sts
total.
Bag body
 Place marker to denote beginning of round
and k next 5 rounds.
Place marker to denote beginning of round
and k next 5 rounds.
Chg to US 10.5 needles and k 1 round.
Begin working in pattern as follows:
Round 1: [yo, k2tog] repeat to end of row.
Round 2: knit all sts.
Repeat rounds 1 and 2 until bag measures
approximately 10" from base when laid
flat, unstretched, ending with round 2.
Change back to US 5 needles and begin working
in garter stitch in the round. Work 10 rounds.
Use a very stretchy bind off like Lucy Neatby's
Modified Conventional bind off [see Lucy's
Knitting Essentials DVD volume 1 for
a detailed how-to], or bind off on needles
a few sizes larger. |
Weave in ends securely
using a sharp-pointed needle, backstitching
several times so that the stitches will not
come undone.
Note: for the ribbon handles, I used enough so
that I could put the bag over my shoulder. The
bag, when full, will hang quite low, so if you
will only be carrying it in your hand, make the
straps much shorter.
Cut the ribbon into two pieces.
Fold under 3/4" of
one edge of ribbon and pin it to the inside of
the bag, about an inch in from the edge, with
the raw edge of the ribbon facing the inside
of the bag. Do the same with the opposite end
of the same piece of ribbon on the other side
of the bag.
Note: I ran the ribbon from the front to the
back on each side so the bag would hang tidier
when in use.
Split a piece of hemp yarn into sets of plies
to provide perfectly colormatched sewing thread.
Take two plies of yarn, thread the sharp sewing
needle and sew each side of the first handle
securely to the bag. Do the same with the second
handle.
Drawstring:
Take a large darning needle and thread one
end of the drawstring through it. Attach
the toggle to the other end of the drawstring
and tie a loose knot.
About a hand's width up from the bottom of
the bag, begin threading the darning needle
through holes in the mesh, keeping the drawstring
horizontal. Work the drawstring back around
to your starting point. Remove the darning
needle and thread the last part of the drawstring
through the toggle.
When you're satisfied
with the position of the drawstring, untie
the loose single knot and tie a strong double
knot, making sure to leave enough drawstring
so that the bag can be fully filled without
being constricted. Trim ends.
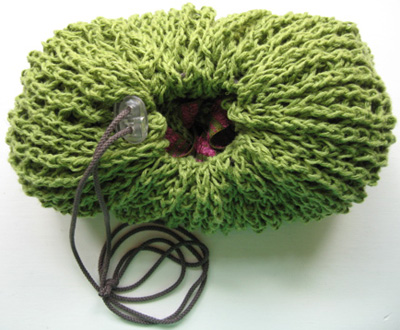
To stow the bag, tuck
the handles and the top of the bag below the
drawstring. Pull the drawstring tight. |