
  by
MK Carroll by
MK Carroll 
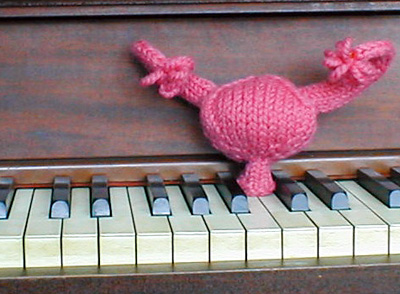
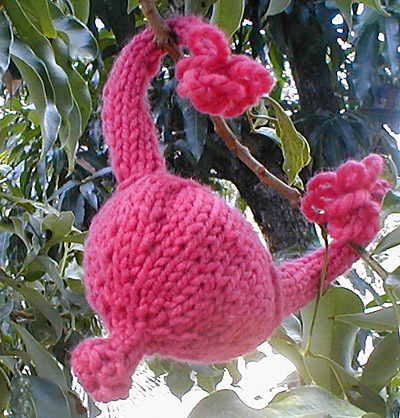
Human anatomy is pretty amazing,
but not always pretty. My interest in anatomy coupled
with the Blythe
dolls phenomenon somehow combined in my imagination
to produce a cute, cuddly uterus doll.
It's not completely anatomically
accurate. I've taken a few liberties with the general
shape and scale, as well as leaving out the ligaments
connected to the ovaries. And, of course, the human
uterus is not normally bubblegum pink.
|
|  photos: MK
Carroll
photos: MK
Carroll
|
|
| One |
| |
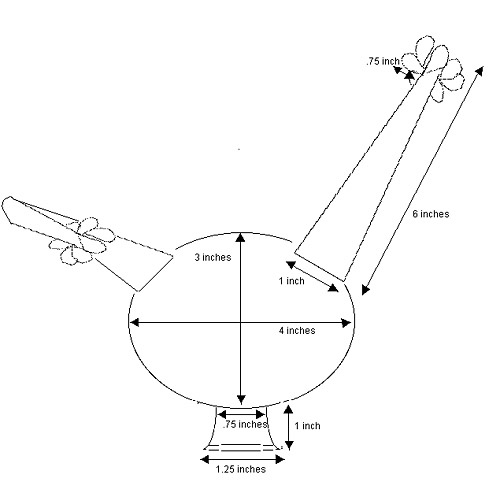
| Height: 4 inches
Body Circumference: 10 inches
Tubes: 6 inches long, 2.5 inches circumference at
base |
| |
| |
|
[MC] Cascade 128 Chunky [100% Peruvian highland wool;
128yd/117m per 100g skein];
color: pink 2561; 1 skein (will make three uterus
dolls)
Note: Brown Sheep Lamb's Pride Bulky in M38 Lotus
Pink is a good alternate
1 set US #8/5mm double-point needles
stitch marker
tapestry needle
crochet hook
pipe cleaners (2 for each doll, preferably pink)
scrap yarn or stuffing (approximately 2 cups worth)
beads |
|
|
| 16 sts/24 rows =
4 inches in stockinette stitch worked in the round |
| |
| [Knitty's
list of standard abbreviations can be found
here]
How to
work I-cord
CO required number of sts onto a dpn. K all
sts.
Next Row: Instead of turning the work
around to work back on the WS, slide all sts
to the other end of the needle, switch the needle
back to your left hand, bring the yarn around
the back of the work, and start knitting the
sts again. After the first 2 sts, give the yarn
a sharp tug.
Repeat this row to form I-cord.
After a few rows, the work will begin to form
a tube.
|
 Body Body
Leaving a tail,
CO 6 sts, and distribute evenly on 3 dpns. Place
marker and join to begin working in the round, being
careful not to twist. 2 on each of 3 dpns.
Rnds 1-4: K all sts.
Rnd 5: P all sts.
Rnds 6-9: K all sts.
Rnd 10: [K1, m1, k1] arond. 9 sts.
Rnd 11: K all sts.
Rnd 12: [K1, m1] around. 18 sts.
Rnd 13: K all sts.
Rnd 14: [K2, m1] around. 27 sts.
Rnds 15-18: K all sts.
Rnd 19: [K1, m1, k7, m1, k1] around. 33 sts.
Rnd 20: [K2, m1, k7, m1, k2] around. 39 sts.
Rnd 21: [K1, m1, k11, m1, k1] around. 45
sts.
Rnd 22: K all sts.
Form Cervix
From top of work, slide crochet hook into 6-st tube,
catch end of tube (beg of work), and pull up inside
tube until purled row forms base of tube. Push down
gently on inner tube to make cervix look plump ("pouty",
if you will). Sew in place using yarn tail from
CO.
Rnd 24: [K1, k2tog, k9, k2tog, k1] around.
39 sts.
Rnd 25: [K1, k2tog, k7, k2tog, k1] around.
33 sts.
Rnd 26: [K1, k2tog, k5, k2tog, k1] around.
27 sts.
Rnd 27: [K1, k2tog, k3, k2tog, k1] around.
21 sts.
Rnd 28: [K1, k2tog, k1, k2tog, k1] around.
15 sts.
Rnd 29: [k2tog, k1, k2tog] around. 9 sts.
Rnd 30: K all sts. Remove st marker. Cut
yarn, leaving 12 inch tail, thread tail through
rem sts. DO NOT pull tail tight to fasten off at
this point.

Fallopian
Tubes (Make 2)
CO 6 sts onto a dpn.
Row 1: K all sts.
Rows 2-4: Work 6-st I-cord. All subsequent
rows will be worked in I-cord.
Row 5: K1, k2tog, k3. 5 sts.
Rows 6-10: Work 5-st I-cord.
Row 11: K1, k2tog, k2. 4 sts.
Rows 12-15: Work 4-st I-cord.
Row 16: K1, k2tog, k1. 3 sts.
Rows 17-24: Work 3-st I-cord.
Cut yarn, leaving a 20-inch
tail. Thread yarn on tapestry needle and draw through
rem sts, pull tight. Use yarn tails to sew loops
(see photo). Use yarn to tie a small knot around
one st, draw rem yarn tail down through tube and
cut end.
|
| Stuff body
until it feels firm but cuddly. Pull yarn end at top
of body to close, fasten off and weave in end.
Bend tip of each pipe
cleaner over (about .25 inches). Slide each pipe cleaner,
bent end first, into a fallopian tube, working from
the CO end up to loop fringed end. Leaving 2.5 ® 3
inches projecting from the cast on end, cut excess
pipe cleaner. Position tubes on body, pushing ends
of pipe cleaners into body. Using pins or coilless
safety pins, secure tubes to body, gently spreading
out bases of tubes. Sew into place and remove pins.
Weave in all ends.
Gently bend fallopian tubes forward into a curve,
or however you wish to pose them.
|
|
 MK
has been taking anatomy and physiology classes this year. Visit her
blog for more information on this pattern. MK
has been taking anatomy and physiology classes this year. Visit her
blog for more information on this pattern.
|
| Pattern & images
© 2004 MK Carroll. Contact MK |
|


