  Welcome
to last-minute gift season, the most wonderful
time of the year. Welcome
to last-minute gift season, the most wonderful
time of the year.
There comes a time in every
knitter's life when it occurs to you to make
gifts for people instead of buying them trinkets
at the mall. Oh yes, you will feel like a genius,
a modern day Leonardo DaVinci; talented, versatile
and original. You may even be the sort of person
who makes a list of the people in your life
and the gifts you want to knit for them. Utilitarian
objects for the men in subdued colors, crazy
accessories for the young ladies, lacy shawls
for those women with more sense. You'll never
have to battle holiday crowds at the mall again.
As time passes, you will
find yourself with a nagging sensation in the
far corners of your mind. No matter how much
time you have invested in gift knitting, you
still have a long ways to go. Maybe you have
not yet cast on for the figgly monster-sized
project lined up next. You will hear a tiny
voice saying, "You don't have enough time
to finish all of this." Or perhaps, "If
you don't tell anyone about the pains in your
hand/fingers/wrist/arms/elbows, there is nothing
serious to be concerned about." Your desire
to produce handmade presents is overwhelming.
You will be tempted to forgo sleep to get all
of your projects completed in time.
Fear not intrepid artisans.
I have a project for you that takes five minutes,
and everyone who sees it will say to you, "How
cool! You made it?" After all, isn't that
the reaction we really want when knitting for
others?
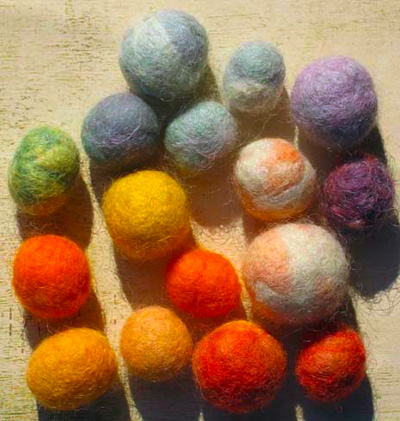
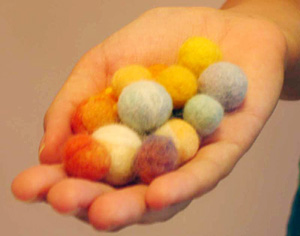
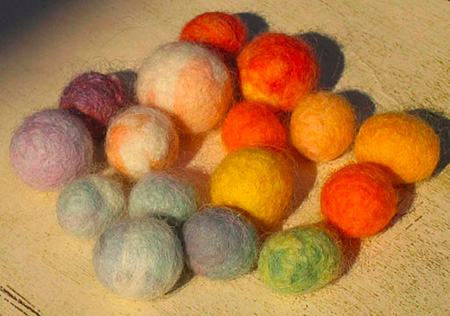
I present to you felted beads.
You can make them perfectly matching or vary
the sizes and colors. They can look like wooly
marbles or rough pebbles. You can use them to
adorn hats and scarves, or in place of buttons
or fringe. You can make them into jewelry. Go
wild.
Here is a list of what
you will need:
-Carded wool or wool roving
(1 oz = approx 30 beads)
-A big cup of warm to hot water (hot, but
not hot enough to burn you)
-A few drops of dish or hand soap to water
and squirt onto your hands (your beads will
be scented if your dish soap is scented, so
you may want to use unscented soap) (also,
almost any soap will work -- try what you
have)
-Towel to catch drips and protect your table
To make round beads:
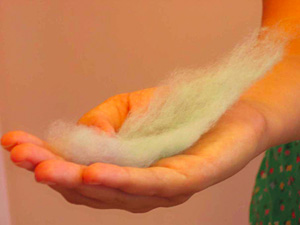
| 1.
Start by taking a small amount
of wool into your hands. Tease the roving
a bit to make it fluffy. The amount depends
on the size bead you wish to make. The
roving will shrink about half in size
when felting, so keep that in mind when
starting.
TIP: Always
pull roving apart, never use scissors. |
 |
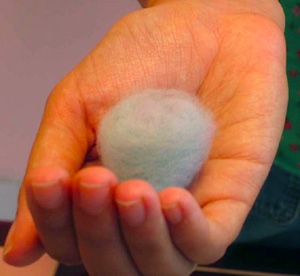
| 2.
Roll the dry wool loosely
into a ball. Pretend you are winding up
a ball of yarn, twisting as necessary
to keep the shape round. For a layered
marble effect, wrap a thin amount of other
colors in and over ball.
TIP: Wind
the wool into a ball evenly for the smoothest
results. |
 |
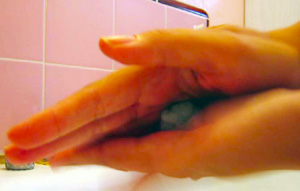
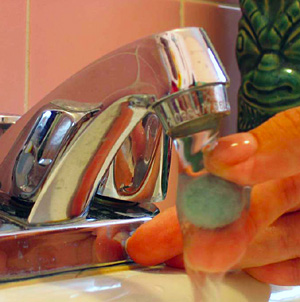
3.
Dip the ball into the water, and
squeeze excess out. Roll the ball in your
soapy hands as you would if you were making
a clay ball. You will need to roll for
about two to five minutes, depending on
the size of your bead. Check occasionally,
to ensure your bead is smooth. Resist
the urge to squeeze the ball as you roll.
Only squeeze once or twice to remove excess
water. You will want to roll with pressure,
but trust me, don't.
TIP: Roll
lightly. If you roll too hard, your ball
will get wrinkles and lumps. Do not take
this tip casually. You will have better
results if you roll as lightly as you
would if you were petting a newborn chick.
Once the bead starts to feel firmer, you
can gradually add pressure as you roll.
|
 |
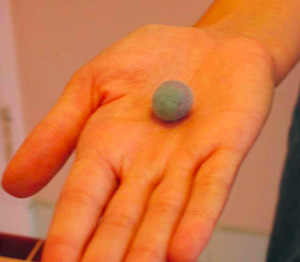
| 4.
Once the bead has felted, you can
roll as hard as you want. Set aside and
make more! When you are finished making
beads, place them in a colander in your
sink and shock them by pouring boiling
water over them. Then, rinse them thoroughly
in cold water and set aside to dry. You
are done!
TIP: When
you are rinsing the bead, if it takes
on water like a sponge and gets sloppy,
the bead is not done felting. Go back
to step 3 and roll some more. |
 |
| The beads
can take a day or two to dry entirely. Be
patient, you have to wait until the center
is dry to use them. |
 |
| You've read
the instructions and have some questions
rattling in your mind? Perhaps this will
help. |
 |
What is carded wool and
where do I buy it?
Carded wool is combed or brushed processed raw
or washed fibers used in the production of yarn.
Roving is carded wool that has fibers aligned
in a straight path. For bead purposes, you can
use batts, carded wool or roving interchangeably.
You can buy undyed roving and dye your own using
instructions found in the dyed in the wool article
on knitty. Or you can buy pre-dyed wool too.
I have noticed that different breeds of wools
felt differently, so be patient. DO NOT BUY
SUPERWASH WOOL, it will not felt. You can start
with a search for "roving" or "carded
wool" on the internet to get countless
results. eBay is a good source as well, and
I sell felt bead kits in my
etsy shop.
How do I know when the
bead is done?
This one is a bit tricky, but the answer is
when it's firm. You will get better at knowing
this the more beads you make. When you rinse
the bead in the final step, it will not swell
up and get mushy if it is done.
My bead has a crack and/or
lump. Can it be saved?
Yes! This is a common problem. Just take a tiny
amount of fiber and fill the crack or wrap around
the problem areas and keep rolling. You may
have been rolling with too much pressure. If
the bead is a total wreck, don't waste your
time trying to save it. It probably won't ever
look great. You can always use it as the core
of your next bead. Feel free to giggle at the
crack in your bead that reminds you of a baby's
bottom.
I've made a bunch of
beads -- how do I string them?
A sharp sewing needle will pierce through the
bead. Use them like you would any other bead.
If you are making very large beads, insert a
toothpick through center when still wet.
 How
can I further embellish the beads? How
can I further embellish the beads?
There are more ways to do this than I know about.
You can embroider on them, stitch seed beads
over them, or needle felt designs and textures
on them. Try adding in bits of silk or eyelash
yarns for texture. Also, experiment with different
shaped beads like ovals and cones, etc. The
sky's the limit!
If these beads aren't your
thing, put together a kit with roving and print
out these instructions for a pal as a gift,
maybe it is just the thing for them. |


