...ramblings of a color
glutton
  How
many two- to four-ounce hanks of handpainted
fiber do you have in your stash? Since I’m
a color glutton of the first order, I’ll
be first to admit I have plenty. Since I’ve
hoarded so much fiber (OK, I dyed a lot of
it too) many of these beauties have some kind
of affinity for one another. How
many two- to four-ounce hanks of handpainted
fiber do you have in your stash? Since I’m
a color glutton of the first order, I’ll
be first to admit I have plenty. Since I’ve
hoarded so much fiber (OK, I dyed a lot of
it too) many of these beauties have some kind
of affinity for one another.
Here’s
how I stockpiled enough coordinating yarns
for a cool moebius
wrap from
fiber I already had in my stash.
In the Beginning
I generally start sorting
fiber for a project with general vision of
my finished project in mind, but am always
open to making changes along the way. Often
these changes grow organically out of the yarn
design process. Originally I envisioned a small
shrug but as I kept knitting my color samples
into a longer and longer gauge swatch, I decided
to transform the swatch into a wrap instead.
I had a limited amount of fiber so I figured
both a wrap or a shrug would take a similar
amount of yardage, but with the wrap I wouldn’t
freak about running out of yarn or having to
rip out my growing and beautiful swatch to
reknit something else.
To get a ballpark idea of how far my fiber would
go, I figured as follows:
Even before I designed Justify,
I figured whatever I designed would take in the
neighborhood of 600 yds of chunky yarn to knit
on US 10 needles at a gauge of 14 sts and 24
rows per 4 inches. My usual lofty 100% wool chunky
handspun averages about 80 yds per oz. (divide
number of yards in sample skein by its number
of ounces for yds per oz). That means I’d
need at least 8 oz of fiber to get my yardage.
But it never hurts to have a little extra.
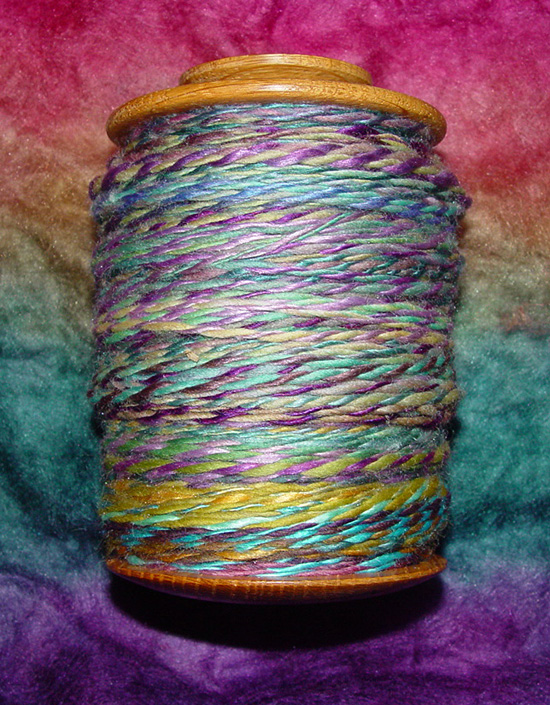
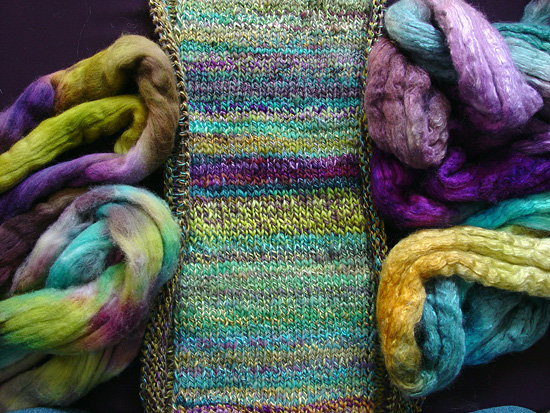
This
bobbin holds 170 yds of finished yarn.
Clockwise
from large roving at top:
Sweet Grass Wool 100%
targhee top in “Woodlands”,
LV ltd (Lynne Vogel Limited)
50% merino/50% bombyx
silk in “Undercurrent”, LV ltd
50%
merino/50% bombyx silk in “Tuscany”,
LV ltd
100% BFL wool in “Luna Moth”,
Woolgatherings
100% tussah silk one of a
kind I”ll call “Sunshine”.
Surrounding
all, LV ltd 100% merino wool in “Velarde”.
Sure, I could take two
four-ounce wool handpainted rovings and ply
them to each other, but that’s
too easy for me. Why? Because it’s so hard
to make up my mind. Riffling through my stash,
I keep discovering more and more handpainted
wool and wool/silk blended rovings in spring
and autumn hue combinations of green, gold, violet
and teal. Each roving has at least three out
of four of the above colors in similar values;
they are all basically medium pastel. I avoided
choosing colors that were significantly lighter
or darker, as they tend to rob the pastel colors
of their brilliance.
Tip:
Figuring Yardage Needs
If you are making up your own project, you
can determine yardage as follows:
1.Determine your row gauge.
2.Determine the width of your row in inches.
3.Multiply that width by 4 (we’ll call
this A).
4.Determine how many rows in your desired
length (length in inches times row per inch:
we’ll call this B).
5.Multiply A and B. Divide by 36 (number
of inches in a yard) and there’s your
approximate yardage.
If you have a lot of shaped pieces,
just figure the yardage for each piece
as simply as possible. You can always
use the extra yardage for something.
Know that the larger your needles, the
less overall yardage you’ll need
regardless of yarn grist. |
Altogether I found at least
6oz of silk or silk/wool blends and about 10
overall ounces of 100% wool. Definitely enough
to start playing.
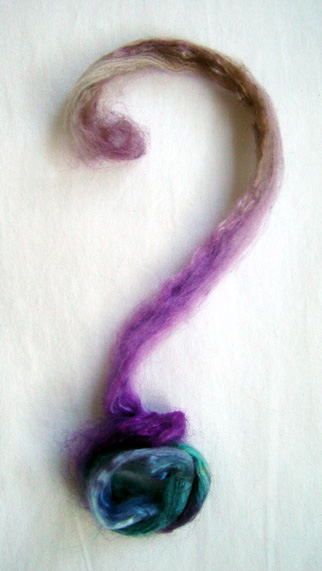
Combining Colors
Now that I have a pile
of fiber in front of me, but I don’t
want to waste too much time or fiber in sampling
them all, I’ll
take a thin strip of each and wind them together
into a fluffy faux yarn just to see what the
colors will look like combined. The finished
yarn will be darker than the unspun fiber, but
I’m just looking for color balance at this
point. I know also that if I like what I see,
I’ll probably like the yarn too. So far
so good.
I divide the silk blends (mostly
50%/Merino/50% Bombyx or 100% Tussah silk) into
one pile and the 100% wool rovings (Merino or
Blue Faced Leicester) in another. By spinning
a length of each color from its respective
pile into the same single I can extend a number
of small amounts of fiber into an entire bobbin
of coordinated singles yarn. I”ll do the
same with the silk blends, then ply the two singles
together into a drop-dead gorgeous 2-ply yarn.
Fiber Prep and Spinning the Colors
Before spinning, I make long narrow strips of
each of the rovings and arrange them in piles.
Working with the wool first, I alternate spinning
long strips of “Woodland” and “Velarde” with
short strips of “Luna Moth”. I
like to join one colorway to the next on a
like color, such as violet to violet or green
to green. All my wools have similar shades
of yellow green so joining the different colorways
on these green bands gives my overall yarn
smoother transitions. Say I want to match green
to green but my next strip of roving has violet
on the end, I just move down the strip to a
green band and break the roving, and make my
join with that piece. Later on I can join the
violet end on when I come to violet and so
on.
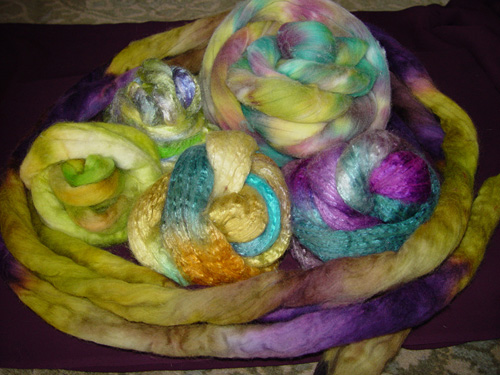
from top: “Luna Moth” and “Sunshine”, “Velarde” and “Tuscany”, “Woodlands” and “Undercurrent”.
Not only do these pairs of colors look good together,
they look like they will look combined interchangeably
with colors from the other pairs.
Yarn
Structure, or how I thought about the actual
spinning
I spun the wool ply
first, making it about 18 wpi using a short draw
technique. I spun what for me is “fast
and sloppy” (my version
of trying to be a beginner again) because I wanted
a quasi thick and thin yarn with a fair amount
of loft and
plenty of character. In other words,
I didn’t work too hard to make a smooth
and even yarn.
I spun the silk blend ply thinner (24 wpi) and
smoother than the wool ply mostly because it
was the natural thing to do. There was less silk
in my stash and I wanted to make it go farther.
Because silk is shiny, it is more noticeable
so I don’t need as heavy a ply for it to
show to full advantage. Plus, a thin shiny ply
plays up the loft of the thicker wool ply. Finally,
silk tends to spin up thinner because it doesn’t
have the lofty quality of wool, so I didn’t
have to work too hard to make the silk ply thinner.
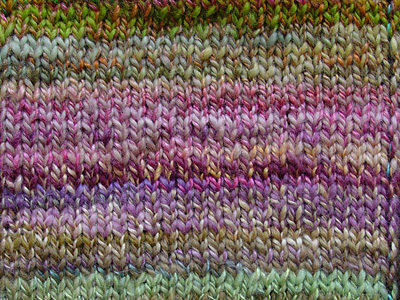
Finished Yarn
Here’s
a sample swatch knit from my finished yarn.
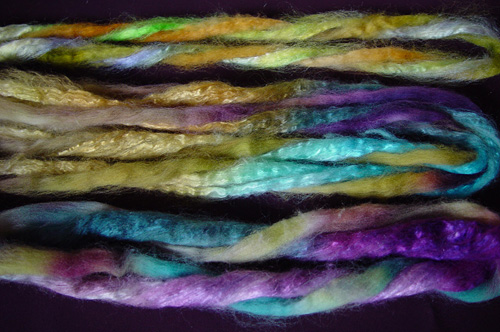
fibers clockwise from lower
left: “Woodlands”, “Velarde”, “Undercurrent”, “Tuscany”.
Three combinations of colorways in yarns from
the top down: “Woodlands” and “Undercurrent”, “Velarde” and “Undercurrent”, “Woodlands” and “Tuscany”.
Yarn knit along sides of stockinette panel combine “Velarde” and “Tuscany”.
As I spun different color
samples, I knit them into a sample swatch which
grew and grew into the stockinette panel of
my Justify wrap.
I couldn’t help sampling
a few other odd combinations,
so I included them
in the sample swatch to add a touch of excitement.
Three Waters Farm 100% BFL wool in “Lotus” plied
with Capistrano Fiber Arts 50% merino/50% bombyx
silk in a one-of-a-kind experiment.
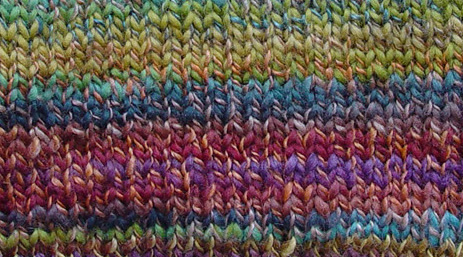
LV ltd 100% merino in Santa
Fe plied with LV ltd 50% merino/50% bombyx in “Red Merle
Aussie”.
|