Collar and Tie, a free knitting pattern from Knitty.com. Free knitting pattern for a properly constructed tie that one would be proud to wearxqx.
INTRODUCTION
Collar and Tie

![]()
My beloved one hates to see me knitting; but he loves ties (he is a collar and tie sort of man) and pink. So last Christmas I decided to overcome his repulsion to kitting and knitwear by making him a pink tie.
I began searching for a nice pattern but the problem was that knitted ties are usually hideous: they are pointless, in garter, rib or seed stitch and they are flimsy. I think all the intended recipients only wear them once out of respect for the knitter. I did not want to waste my efforts on something that would sit in the closet unused.
After much thinking I decided that a two layered tie would do for the flimsiness; now I just had to find a solution for the point. The solution actually found me when I was browsing an old women magazine that belongs to my mom: there was a tie smartly knit on the bias to create the point. The tie was knit double in length and then folded and sewn. The idea was great, but I thought circular knitting would do a much refined job, and I wouldn’t have to sew a 5ft-long object on two sides!
 model: L. Del Puppo
 photos: L. Degan
SIZE
One
FINISHED MEASUREMENTS
Width at widest point: 3.75 inches/9.5cm
Length point to point: 60 inches/150cm
MATERIALS
Yarn
![]() Laines du Nord Baby Soft [50% Soy, 50% Cotton; 159 yards/145m per 50g ball] 2 skeins; Color 202
Laines du Nord Baby Soft [50% Soy, 50% Cotton; 159 yards/145m per 50g ball] 2 skeins; Color 202
Recommended needle size
[always use a needle size that gives you the gauge listed below - every knitter's gauge is unique]
![]() US #1/2.25mm needles for small circumference in the round: DPNs, 1 long circular or 2 short circulars as you prefer
US #1/2.25mm needles for small circumference in the round: DPNs, 1 long circular or 2 short circulars as you prefer
Notions
![]() stitch markers
stitch markers
![]() yarn needle
yarn needle
![]() blocking mats, wires and pins
blocking mats, wires and pins
GAUGE
30 sts/40 rounds = 4 inches/10cm in stockinette stitch
PATTERN NOTES
[Knitty's list of standard abbreviations and techniques can be found here.]
Instructions for Judy's Magic Cast On can be found here.
Instructions for grafting can be found here.
M1: Use the backwards loop (e-wrap) method.
The Tie is worked in the round and on the bias; the tube folds neatly at the decreases/increases lines as if it was a double layered flat fabric. It starts at the widest part, and decreases slowly to the narrow end. The CO edge and the direction of knitting are shown in the figure below. The slanting construction allows for a perfectly pointy end.
DIRECTIONS

Using Judy’s Magic Cast on method, CO 40 sts- 20 on each side. Join for working in the round. Knit 1 round.
Point - increase section
In this section the largest point is created, by increasing on one side of the tie, both in the upper and lower layers. The increases create a slanting edge; if you have a different gauge work this section until the straight edge is long as the cast on edge.
Round 1: K1, m1, k to 1 st before end of round, m1, k1. 2 sts increased.
Round 2: Knit.
Repeat Rounds 1-2 14 more times, until you have 70 sts. Place a marker or distribute your stitches so that you can identify the center of the round.
Tapered section – on the bias
This section is worked on the bias; every tenth round the increases are skipped to create the gradual taper.
Round 1: K1, M1, knit to 3 sts before center of round, SSK, k1; k1, k2tog, k to 1 st before end of round, M1, k1.
Round 2 and all following even rounds: Knit.
Rounds 3-8: Repeat Rounds 1-2 3 more times.
Round 9: K to 3 sts before center of round, SSK, k1; k1, k2tog, k to end of round. 2 sts decreased.
Round 10: Knit.
Repeat Rounds 1-10 22 more times. 24 sts rem, 12 on each side.
Straight section – on the bias
Work Rounds 1-2 for 21 inches/54 cm.
Small tip
Work Rounds 9-10 4 times in total, and work Round 9 once more. 14 sts rem; 7 on each side.
Graft the two sides together.

FINISHING
Wet block, using blocking wires and pins to shape. Weave in ends.
ABOUT THE DESIGNER
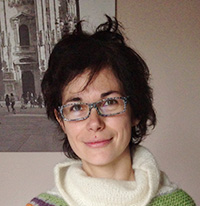
 Lorella lives and knits on Lake Maggiore, Italy. She spends her (somehow scarce) free time knitting or thinking about what to knit next.
Find more of her work here.
Pattern & images © 2017 Lollicat. Contact Lollicat


