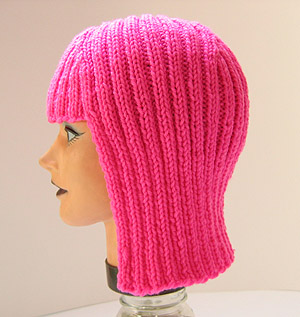
Wig
Using straight needles or one
set of circulars, cast on 96 sts.
Work in 2 x 2 rib until
the piece is as long as the distance between the bottom
of your chin, and your eyebrow (about 6.5"),
ending with a WS row.
NOTE: The extra stitches along the edge of the
work will balance the width of the first and last
ribs. Later on, when the bangs are added, these stitches
will become parts of purl ribs.
If more length in the main
body of the wig is desired, work more rows at this
point.
Next row [RS]: work
as before, but slip the first and last stitch.
Bangs
With RS
facing and using backward loop cast on, loosely
CO 32 sts. The backward loop cast on allows for
plenty of stretch.
Div sts onto DPNs or circulars
and join to work in the round with
the RS of the wig facing out, being careful
not to twist stitches. The
first stitch will be a p; follow rib pattern after
that.
Work in 2x2 rib for 10 rows.
NOTE: The extra stitches that were at the beginning
and end of the work up to this point become parts
of purl ribs where the bangs join - see diagram
A below for example.
If more length in the bangs
is desired, work more rows at this point.
Work
Decreases
Using diagram B below as a guide, rearrange stitches
on needles and add stitch markers.
(Diagram B shows placement for both double-pointed
and circular needles.) When placing markers, begin
counting from center front of bangs, which falls
in the center of a purl rib.
NOTE: Decreases
will be worked identically at the front and back
of the wig. Markers have been placed one stitch
away from decreases instead of directly next to
decreases, for ease of working.
Begin decrease round
by working decreases over bangs.
Decrease Round
*Work in rib as set to marker color 1, slip marker,
k1, ssk, rib as set to 3 sts before marker color
2, k2tog, k1, slip marker.
Rep from *. Work this round every round until 6
sts rem between markers.
Work to marker color 1 (right edge of bangs section).
Next Round: *Sl marker, k1, ssk, k2tog, k1,
sl marker, [p2tog, k2] to 2 sts before next marker,
p2tog. Repeat from * once.
Remove st marker, k1, sl1, transfer the first half
of the work (between center front and center back)
to one DPN or circular needle, removing st markers,
transfer the second half of the work to a second
needle, cut yarn, leaving a 2-foot length for use
in binding off.
Carefully flip work inside out, in preparation for
working a 3-needle BO from the WS.
Work 3-needle BO tightly. (A crochet hook works
well in place of a third needle.)