6. Decrease and
Close
Complete the Decrease Pattern as
calculated above, using the following for
the Decrease Round.
Decrease Round:
Needle 1: Knit 1, ssk, work to
last 3 stitches, k2tog, k1.
Needle 2: Knit 1, ssk, work to
end
Needle 3: Work to last 3 stitches,
k2tog, k1.
Creating
interchangeable mitts:
Use the same decrease pattern,
but distribute the four decrease stitches
evenly around the round. The shaping isn't
quite as elegant, but you'll end up with
"ambidextrous" mitts. Are you
making mitts for someone who's good at losing
things? Make three of these.
Two
ways to finish:
Graft these stitches together
OR cast off the remaining stitches and seam
top.
7. Thumb
Remove the scrap yarn used to mark
the thumb, and pick up the "open"
stitches on either side. Use one needle
to pick up the lower stitches, and a second
to pick up the upper stitches. Each needle
will have the number of thumb stitches on
it.
Starting with the needle
closest to the ribbing, knit the thumb stitches.
With that same needle, pick up 2 in the
"corner" between the lower and
upper needles.
Knit the stitches on the
upper needle. Using a new needle, pick up
2 stitches in the opposite "corner".
You have established a
round, of 2 times the thumb stitches plus
4. If you've got 4 thumb stitches, your
round will be 2x4+4=12; if you've got 5
thumb stitches that's 2x5+4=14.
Rearrange the stitches
so that they're relatively evenly distributed
on the needles.
Knit 1 round, twisting
picked up stitches.
Knit even until thumb measures the required
length, measured from the picked up stitches.
Decrease on next round: *k2tog, k2*, repeated
across round.
Final round: *k2tog*, repeated across round.
For woman's size only: Knit last stitch.
Cut yarn and pull through stitches. Turn
the thumb inside out, pull the yarn tail
through to the wrong side and secure. If
there are holes at the base of the thumb,
use the yarn tail there to tighten it up.
Notes
on Yarns
You're aiming for warmth, so choose appropriately.
Natural fibres only, from animals that live
in cold climates: wool, mohair, angora,
cashmere, alpaca, and so forth, and blends.
When making mittens for kids, I'll use washable
wool; acrylic mitts are simply ineffective.
A Warm Lining
My
hands get spectacularly cold in the winter;
I like to line my mittens for extra warm and
wind-proofing.
To create a lining, work
the body and thumb with two strands of yarn,
alternating strands for alternate stitches.
That is, use strand one for stitches 1,
3, 5... and so forth; use strand two for
stitches 2, 4, 6, 8... The unused yarn looping
behind each stitch forms the lining.
I typically do this with
a single color of yarn, but let your creativity
be your guide.
Do check your tension,
as working with two strands can be tighter
than with a single strand.
Ribbing
Alternatives
 Other
ribbing patterns work nicely: 2x2, 3x3,
or odd combinations like 3x1. Even combinations
of ribs (e.g. 2x2) do have more stretch.
Just make sure that you have the appropriate
number of stitches. That is, for a 2x2 rib,
your number of stitches will need to be
divisible by 4.
Other
ribbing patterns work nicely: 2x2, 3x3,
or odd combinations like 3x1. Even combinations
of ribs (e.g. 2x2) do have more stretch.
Just make sure that you have the appropriate
number of stitches. That is, for a 2x2 rib,
your number of stitches will need to be
divisible by 4.
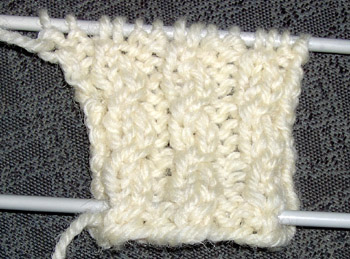
The mock cable rib looks
very sophisticated [see right], and is easy
to do. It's a 4 round repeat, on a multiple
of 4 stitches.
Round 1, RS: *P2,
skip 1 stitch and knit into 2nd stitch,
then knit into first stitch and slip both
off the needle; repeat from *, end p2
Rounds 2-4:
P2 k2 rib across
 Fancy
Cuff
Fancy
Cuff
Don't like the look of ribbing? Desperate
to use that novelty yarn that matches your
coat exactly? Create a fancy overlay for
the cuff.
Work the mitt as normal,
with a 1x1 ribbed cuff. Pick up the stitches
of the first round of the body of the mitt
with a different yarn. Ensure that you're
working so that the right side is to the
outside, and the knitting grows up over
the cuff.
Knit this tube until it's
about 2cm longer than the ribbed cuff, and
cast off loosely. Whip stitch the cast-off
edge to the inside of the ribbed cuff.
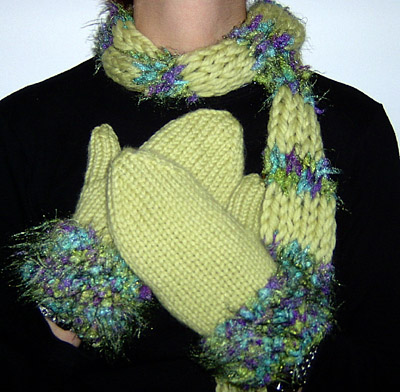
This fancy cuff can be
made out of any yarn you please -- if that
furry novelty yarn matches your coat perfectly,
use it for the cuffs and make the actual
mitts in a nice warm wool.
For the set in the picture,
the body of the mitts is in Rowan Big Wool,
and the cuff is Filatura di Crosa Hopla.
Pattern
stitches
Combinations of knit and
purl stitches on a stockinette stitch background
create textural interest. Rounds in reverse
stockinette stitch (that is, purl) provide
a striping effect against a stockinette
stitch background. Try a single round of
purl every 5 or 10 knit rounds for stripes.
Cable patterns can be
very effective, although they're best used
sparingly or in simple repeats. Check your
favourite knitting stitch book for ideas.
Be inspired by other knitted garments. As
with socks, I particularly recommend traditional
gansey patterns -- they're designed specifically
for knitting in the round.
Color work
Horizontal stripes
are easy -- make them as wide or as narrow
as you'd like. Try irregular stripe widths
for a bit of visual variety, or to use up
yarn leftovers.
Vertical stripes
are just about as simple, and provide the
wonderful side effect of lining the mittens
with an extra layer of yarn for thickness
and warmth. To create vertical stripes in
stockinette stitch, simply work with two
different colored yarns and alternate the
yarns for every other stitch.
To create vertical stripes
in ribbing, cast on using two different
yarns at the same time, alternating yarns.
Then work k1 p1 ribbing, alternating the
yarns in same order as the cast on. You'll
get the "up" ribs in one color,
and the "down" ribs in the other.
Fair Isle -- Mitts
lend themselves very well to this type of
color work; that is, using two or more colors
at the same time across the entire row.
Fair Isle typically features small, repeating
motifs or patterns across the row. Vertical
stripes are the simplest possible form of
Fair-Isle color work. All Fair Isle knitting
has an extra layer of yarn on the wrong
side (the strands), creating a warmer mitt.
 Self-patterning
Yarns
Self-patterning
Yarns
Although most of these are sock weight
(which will produce elegant but not particularly
warm mittens) some manufacturers are making
heavier self-patterning yarns. This is the
easiest kind of colour work.
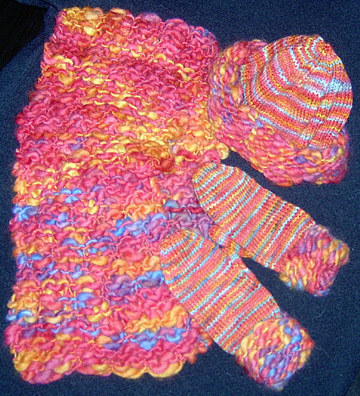
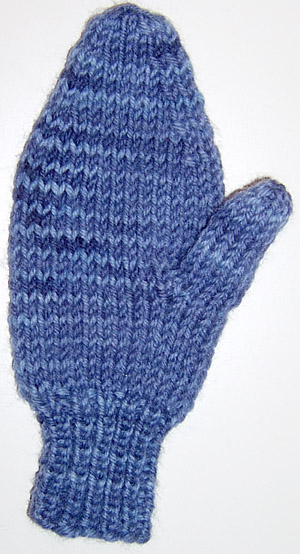
Good old variegated yarns
are the simplest form of a self-patterning
yarn, and these can add some nice visual
texture, as shown in the photo at right.
Problems?
Books
Lots exist -- here are
a few of my favourites.
Knit Mittens!, Robin Hansen,
Storey Publishing, 2002
Folk Mittens, Marcia Lewandowski,
Interweave Press, 1997
Vogue Knitting, Pantheon
Books
Vogue Knitting Accessorize:
Scarves, Hats, Ponchos, Socks & Mittens,
Trisha Malcolm, Sixth&Spring 2004
Vogue Knitting On the
Go! Mittens and Gloves, Sterling Publishing,
2000
Online
Mitten knitting inspires less fervour than
sock knitting, but there are still great
resources available online.
Knitty has a few:
Manly
Mitts
Broad street
Flappers
Woolworks has a variety
of patterns for cold-weather wear, including
some great variations on the mitten theme
Many yarn manufacturers
have free mitten patterns on their sites.
Check out your favorite and see what they've
got.